Here we will describe how to design a single post template for YT2Posts video articles. We will use Elementor Page Builder as an example, but the same can be achieved with any other Page Builder or a theme.
Below we will also show how to make this template GDPR-compliant by embedding the videos as links.
Feel free to reach out to our support at [email protected] if you need any help, we are responding within 24h and are available 24/7.
In summary, we will go over the following topics:
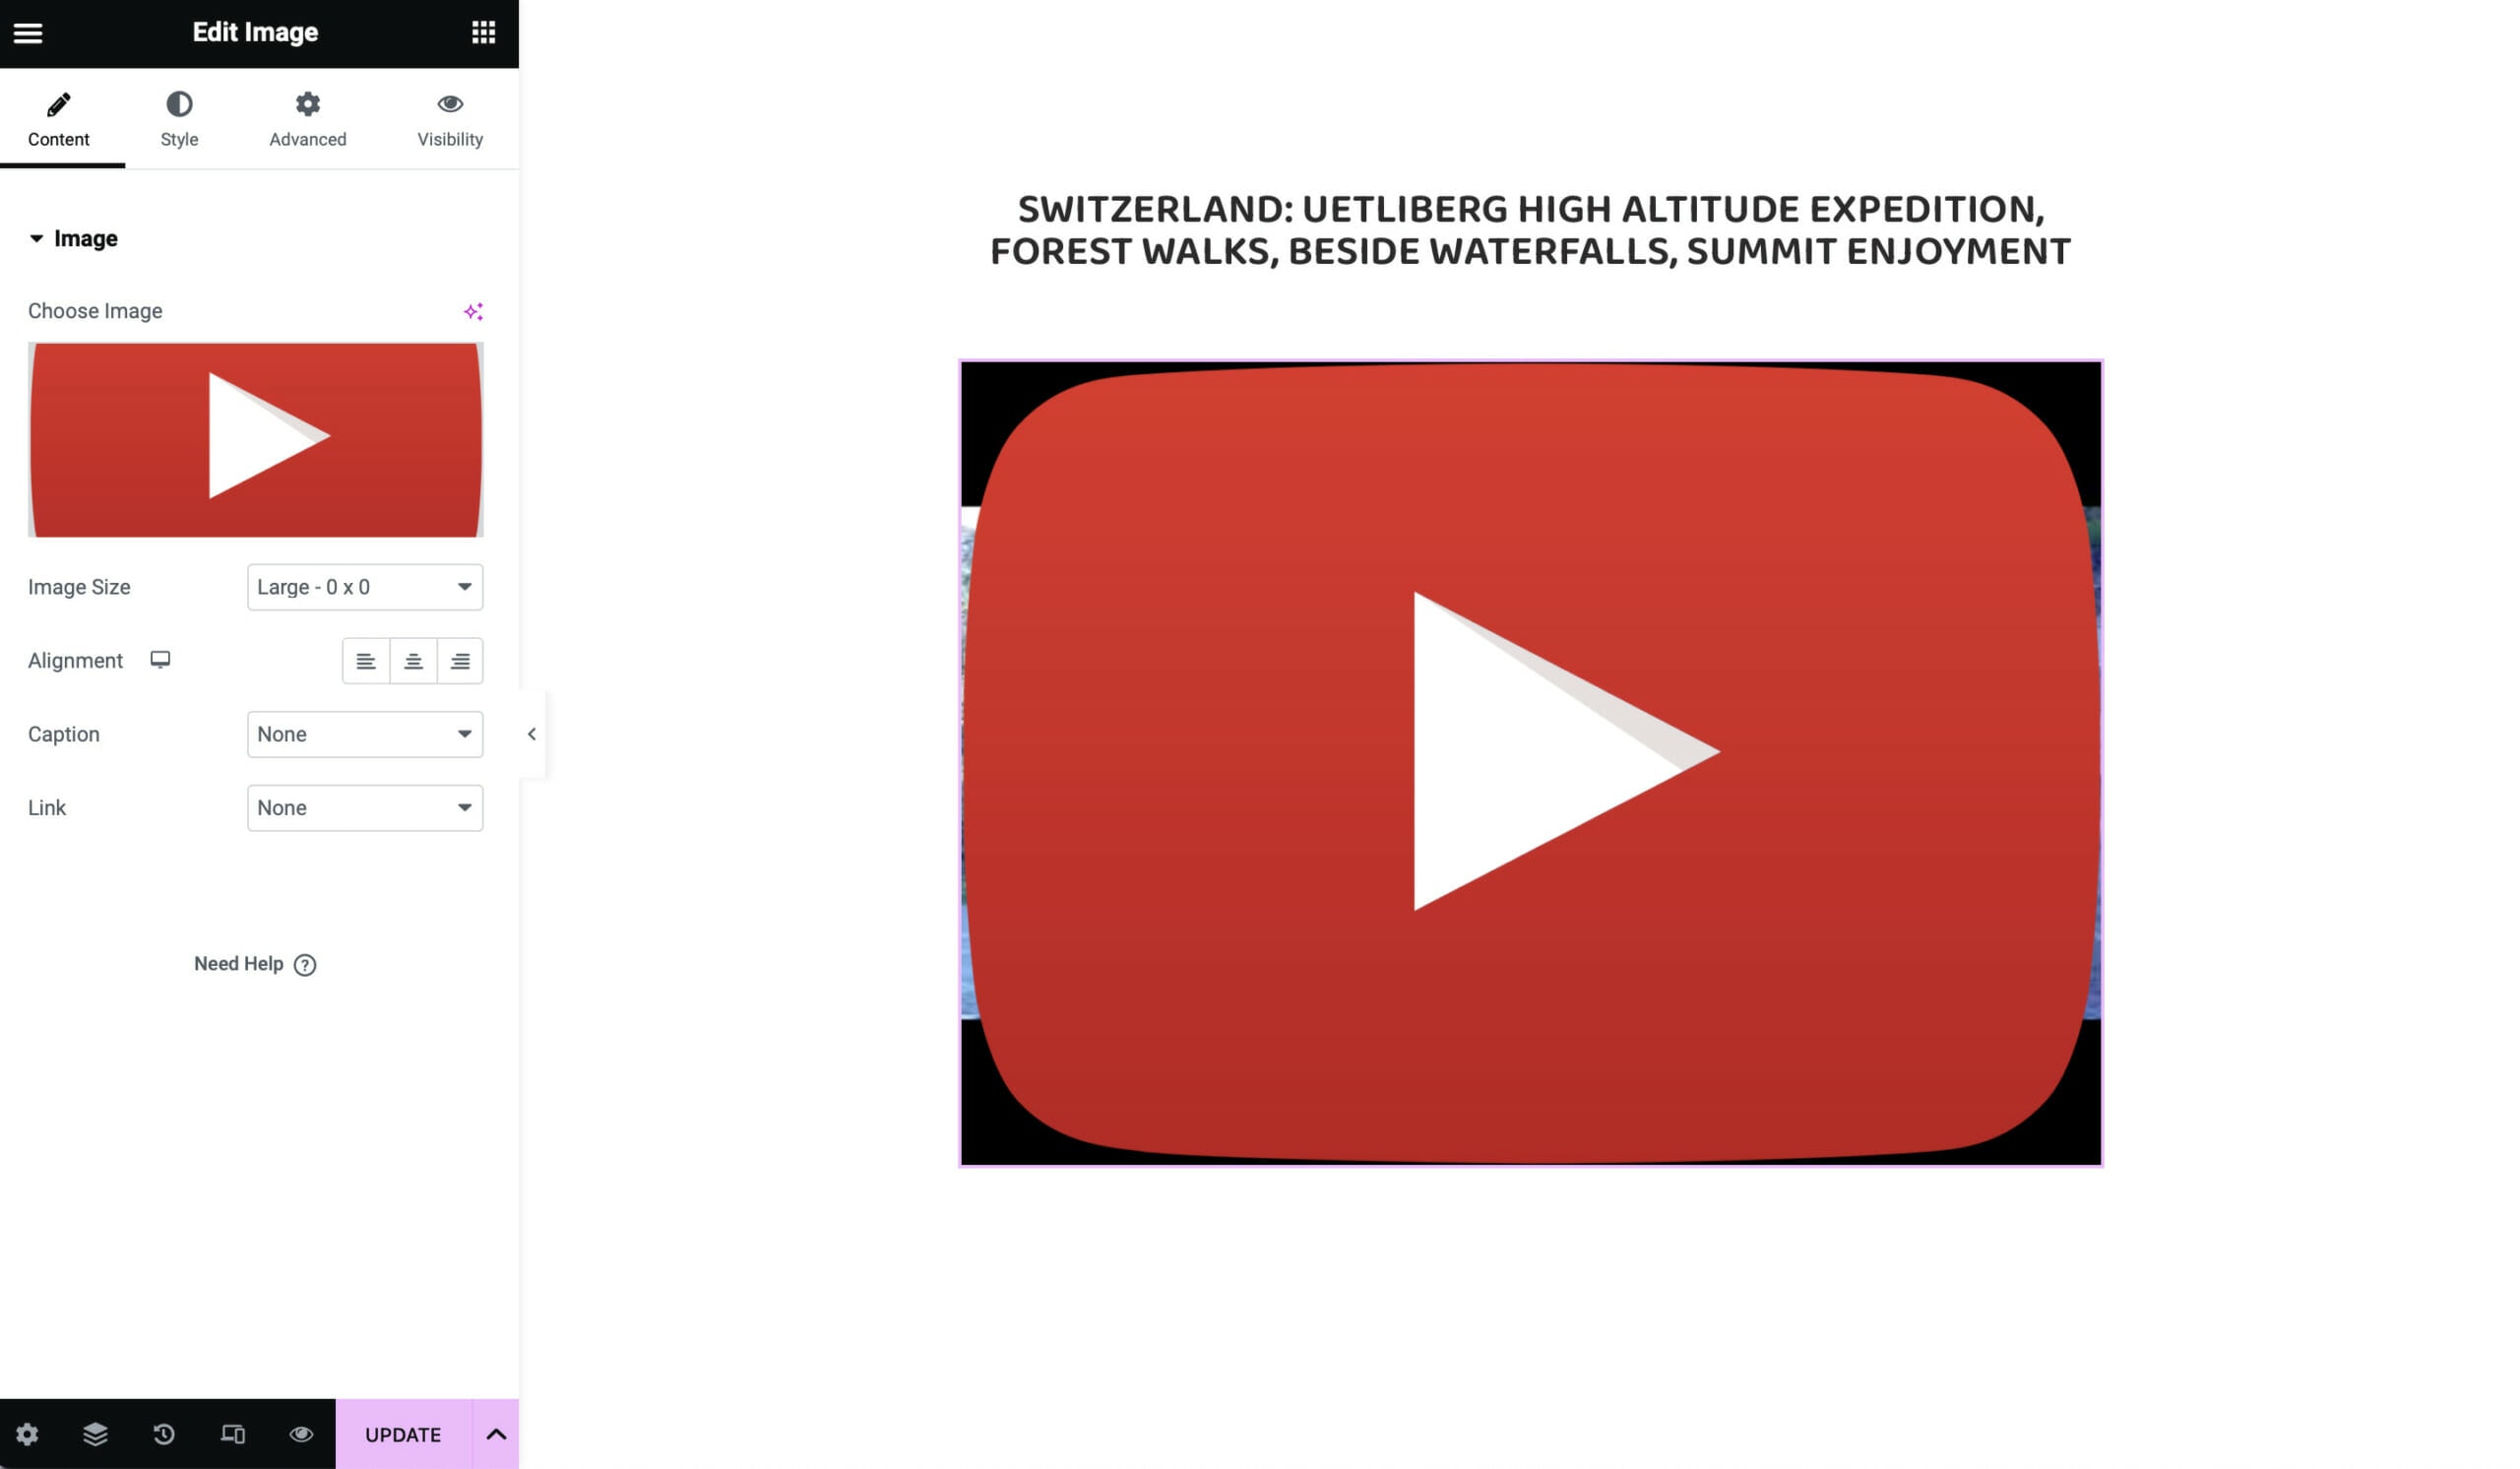
A single post template is used whenever a single video is shown. Here we will show how to create a single post template that looks as follows:

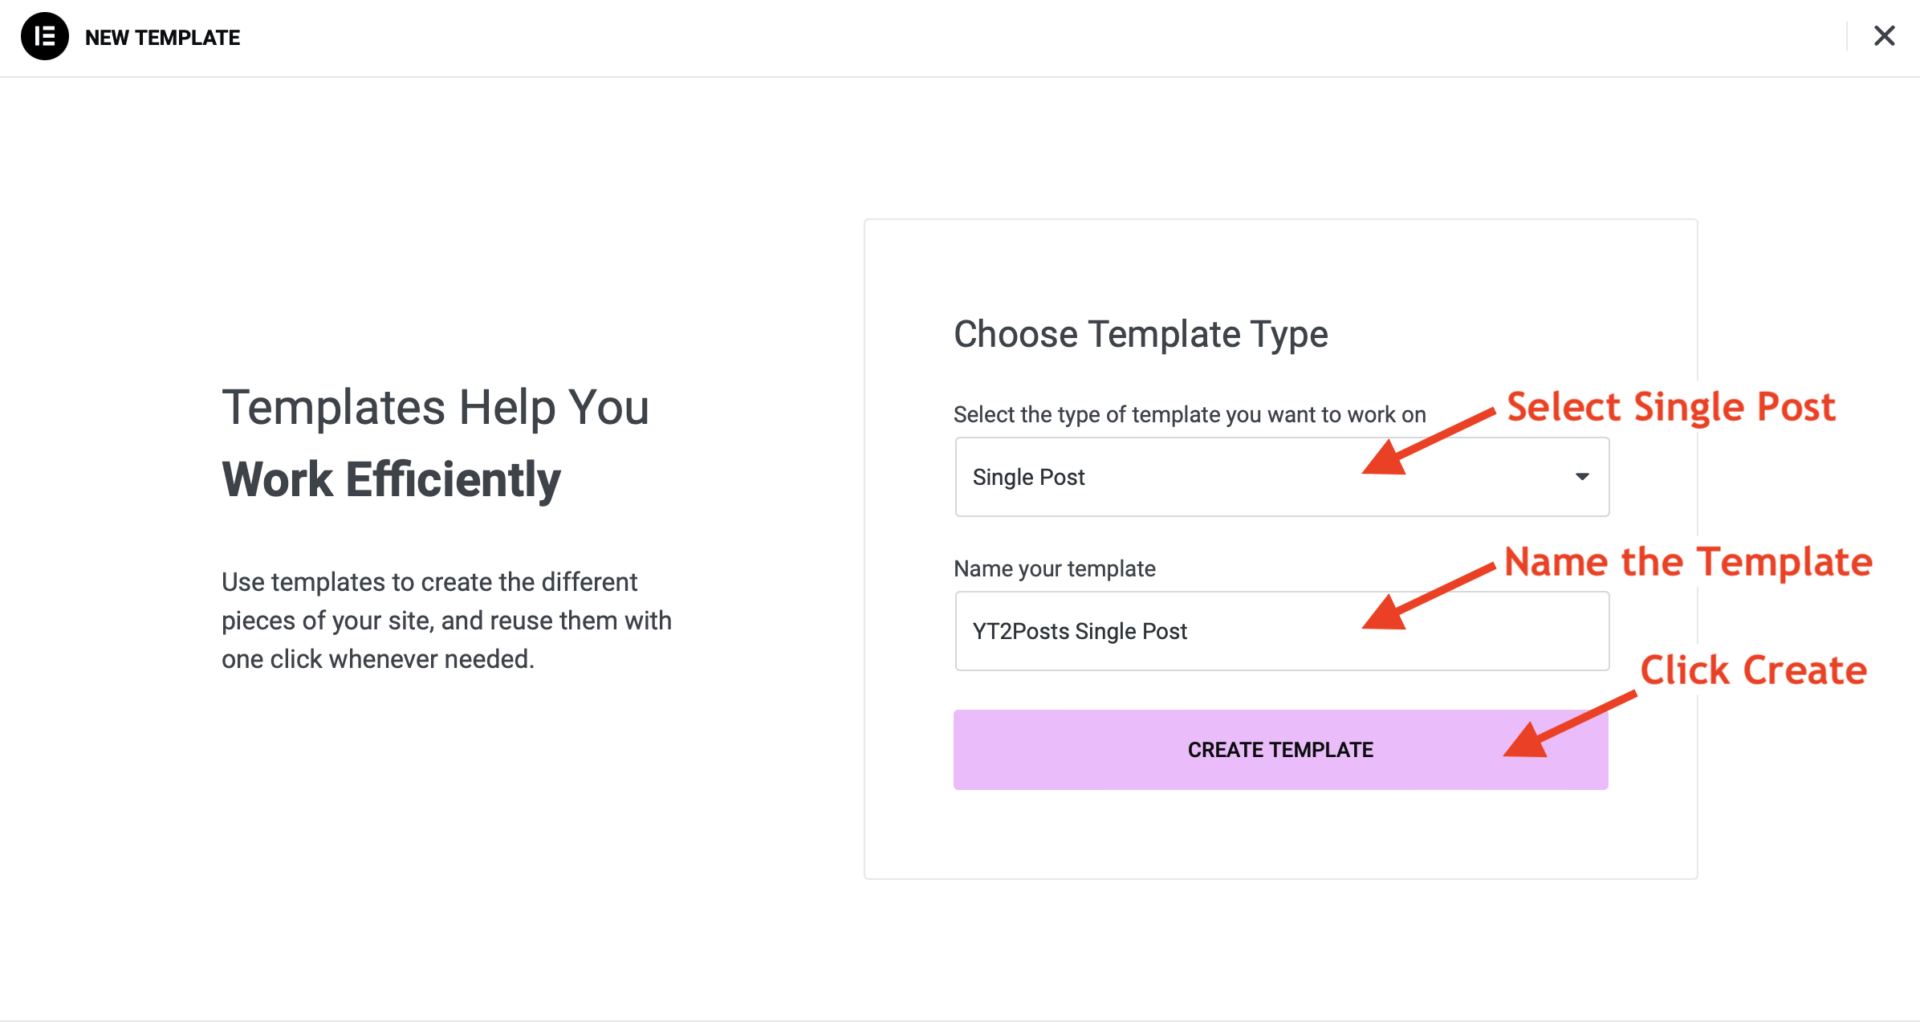
In your WordPress dashboard, go to Templates->Add New to create a new template as shown below:
Now we have to set up which video article we want to use to preview the template while designing it:
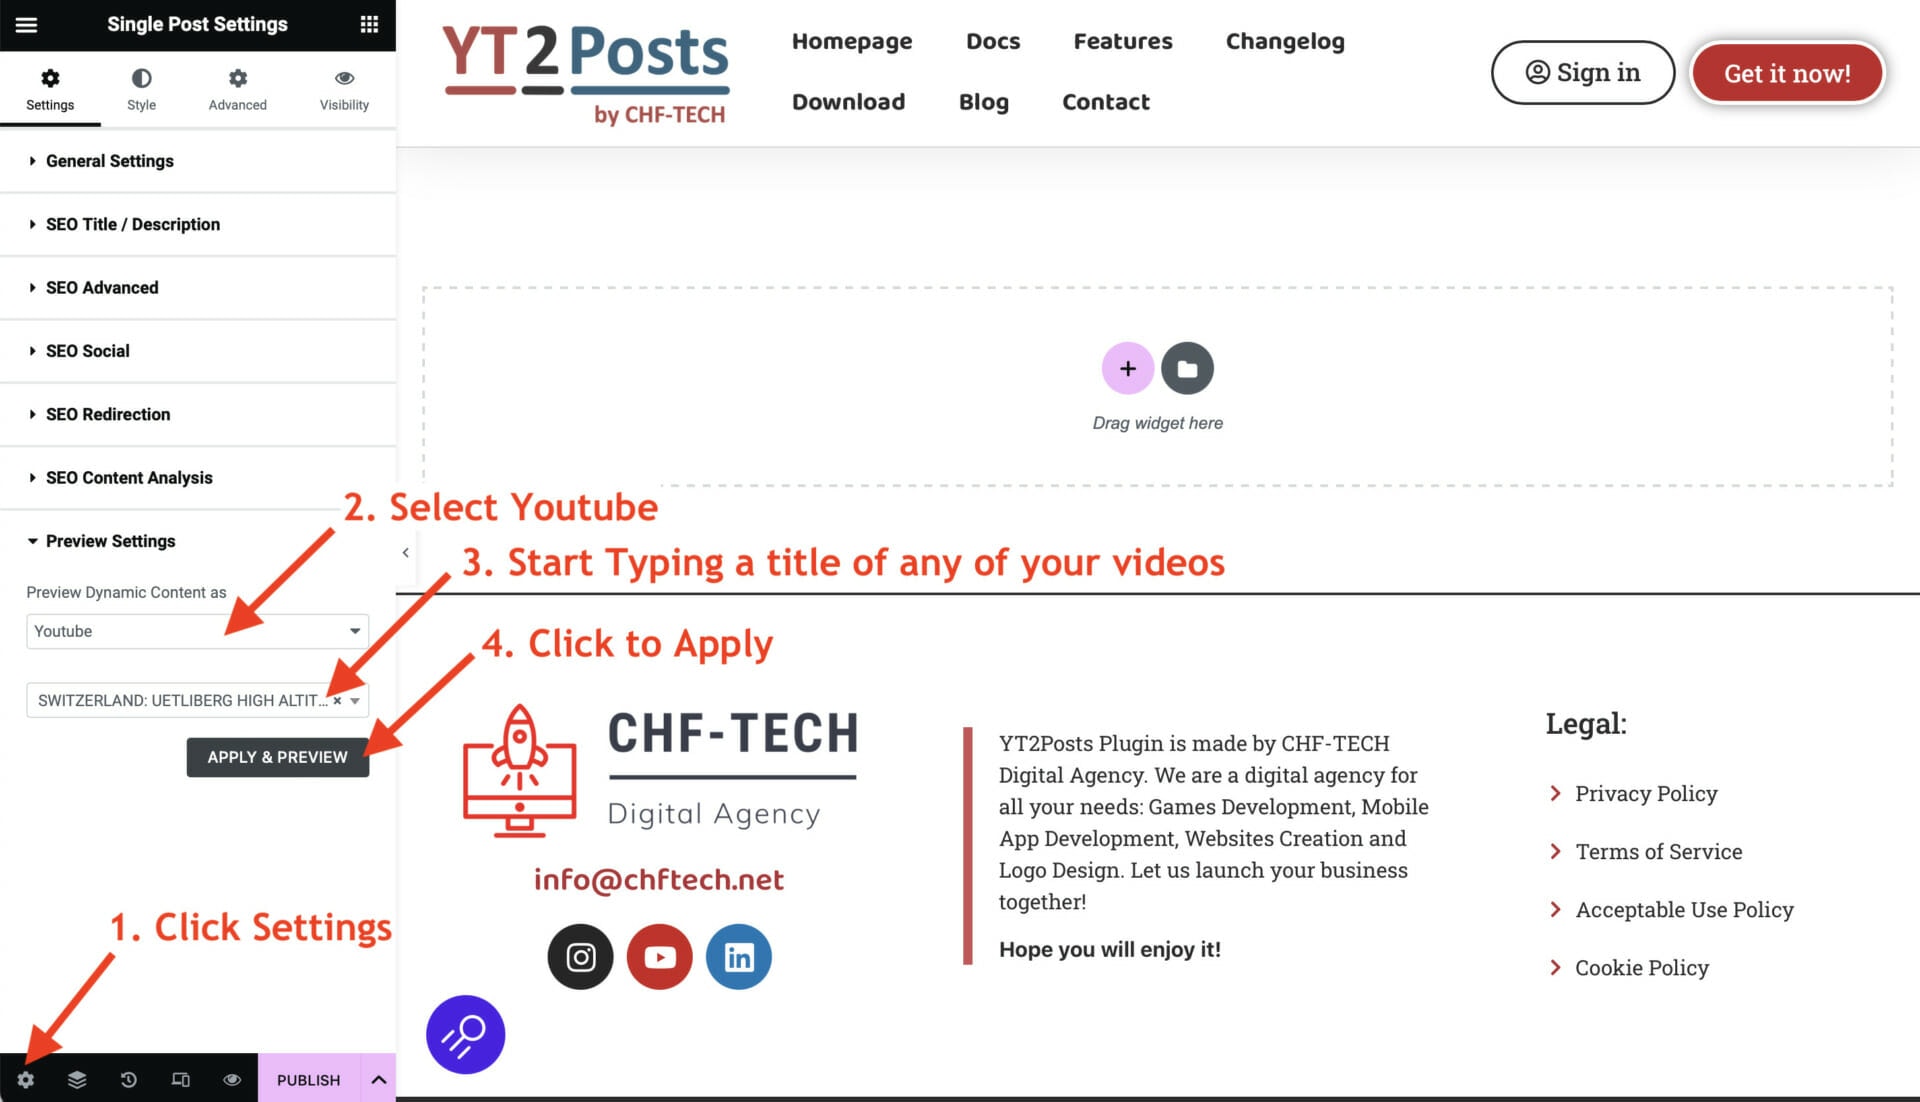
This means that Elementor will use this article so that we can preview our design in real-time. Now we can finally start designing the template.
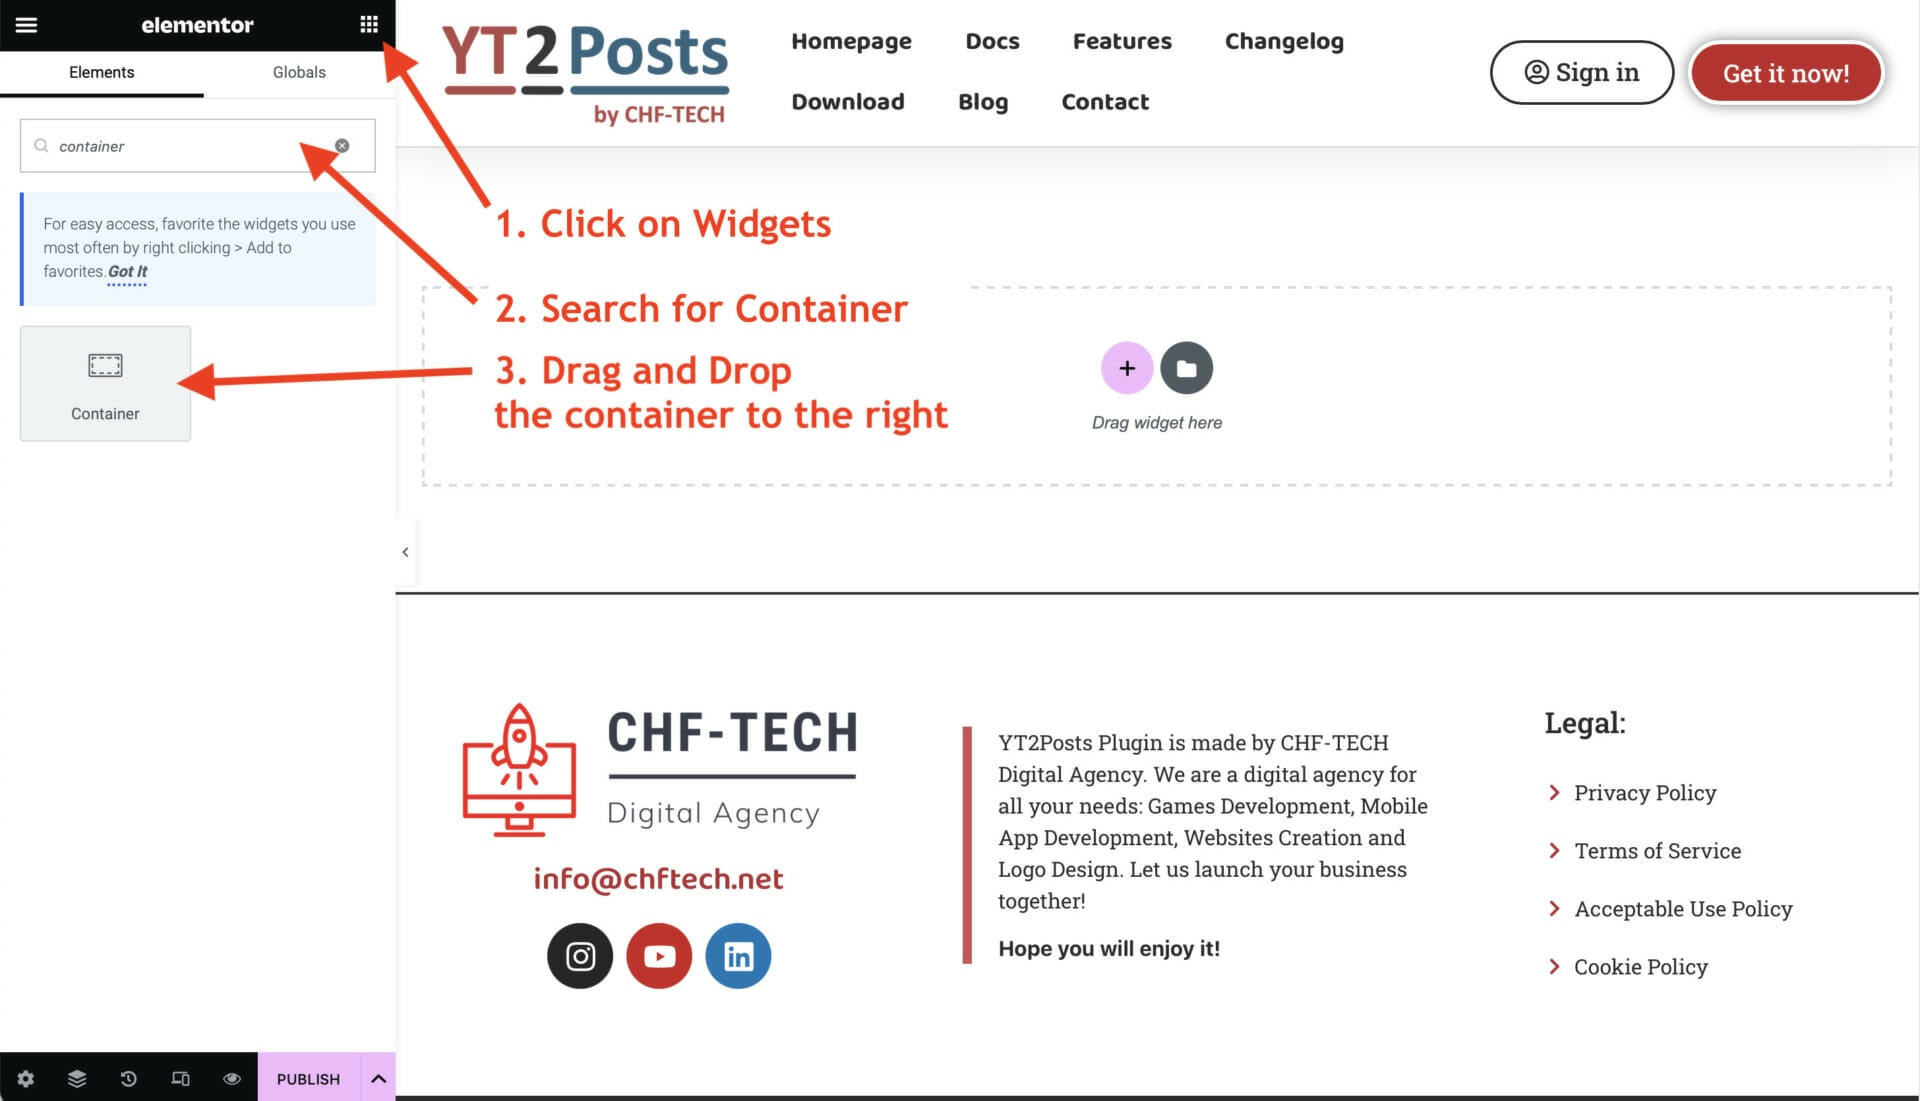
First, add the wrapping container around the whole post:
Now we can start adding the widgets within this container. Let’s start with adding a post title:

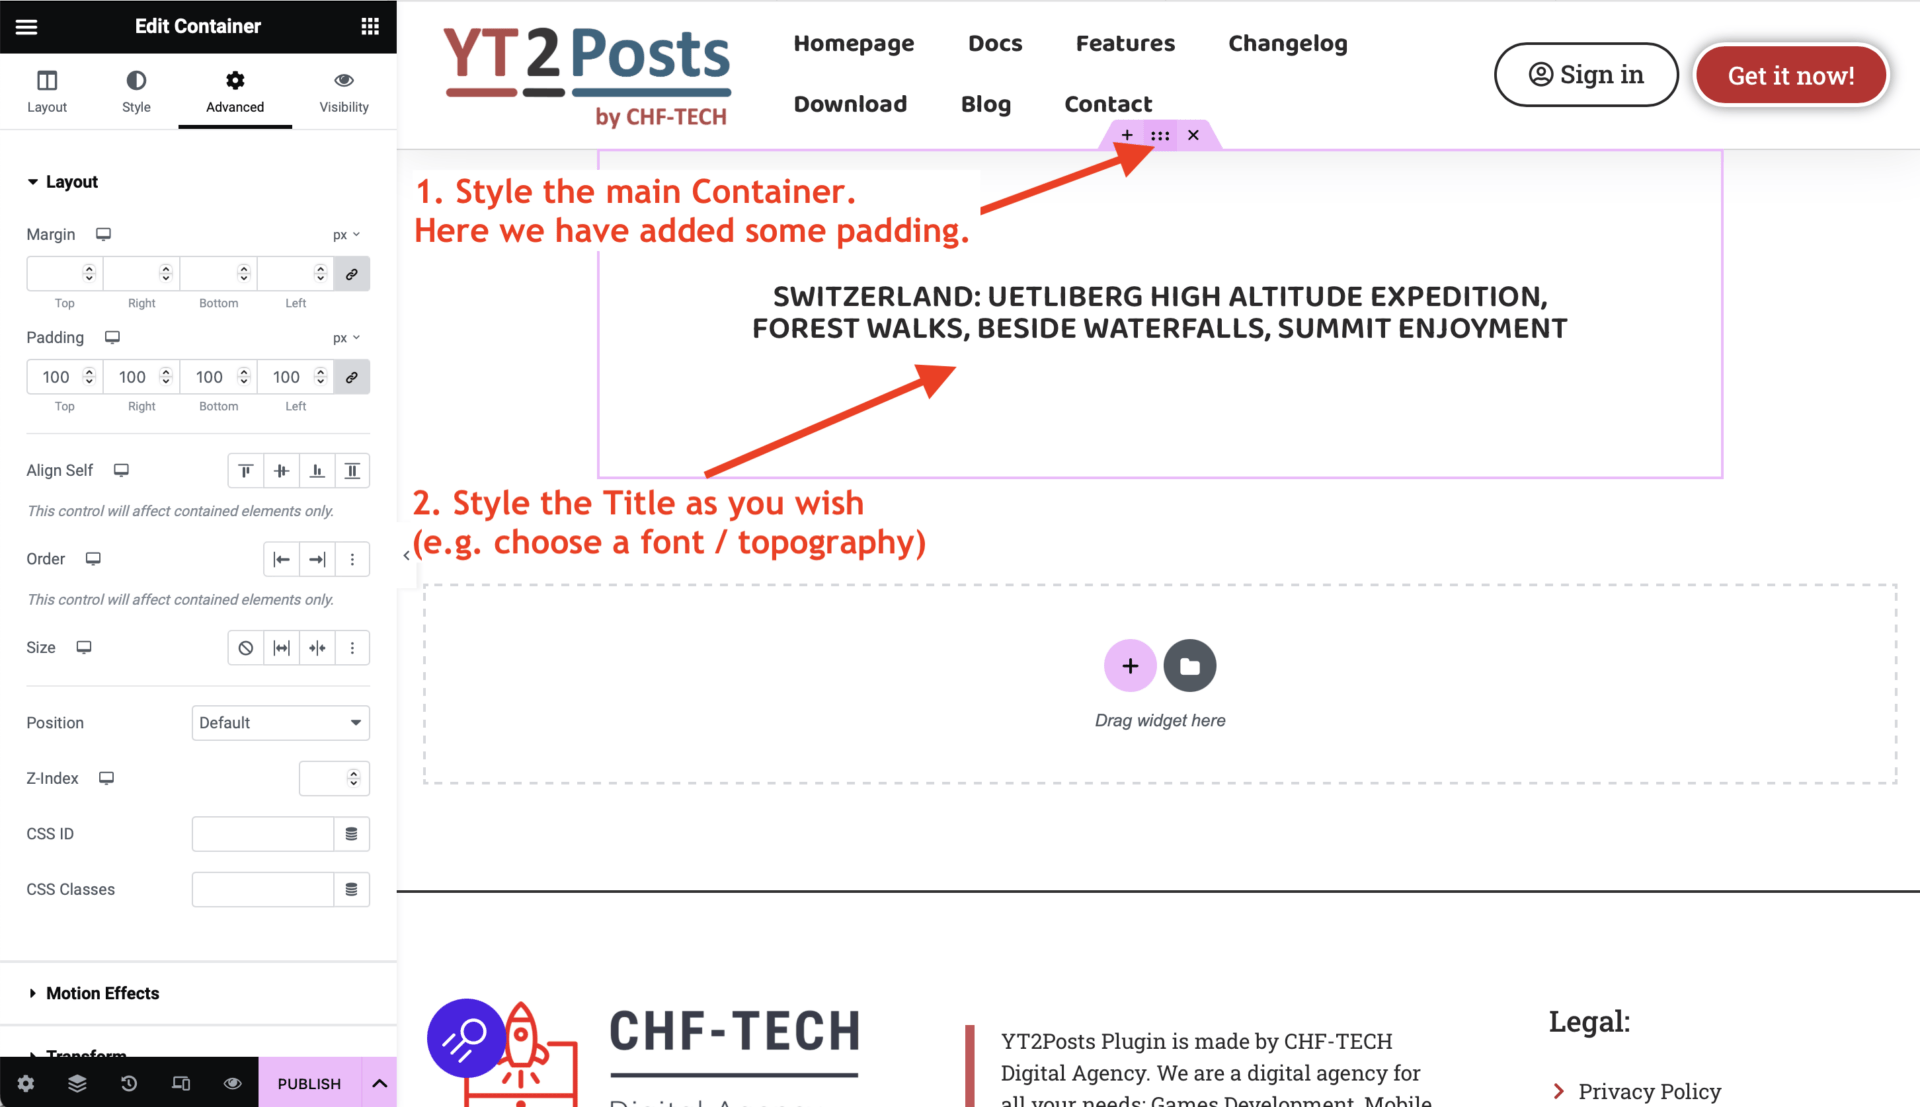
If you want, you can add some styling to the post title and the wrapping container. For example, you can choose the font of the title, the font size, color and similar. Also, we added some padding to the wrapping container, as shown below.
There are two ways to display the video:
Below we provide a step-by-step guide for both of these options.
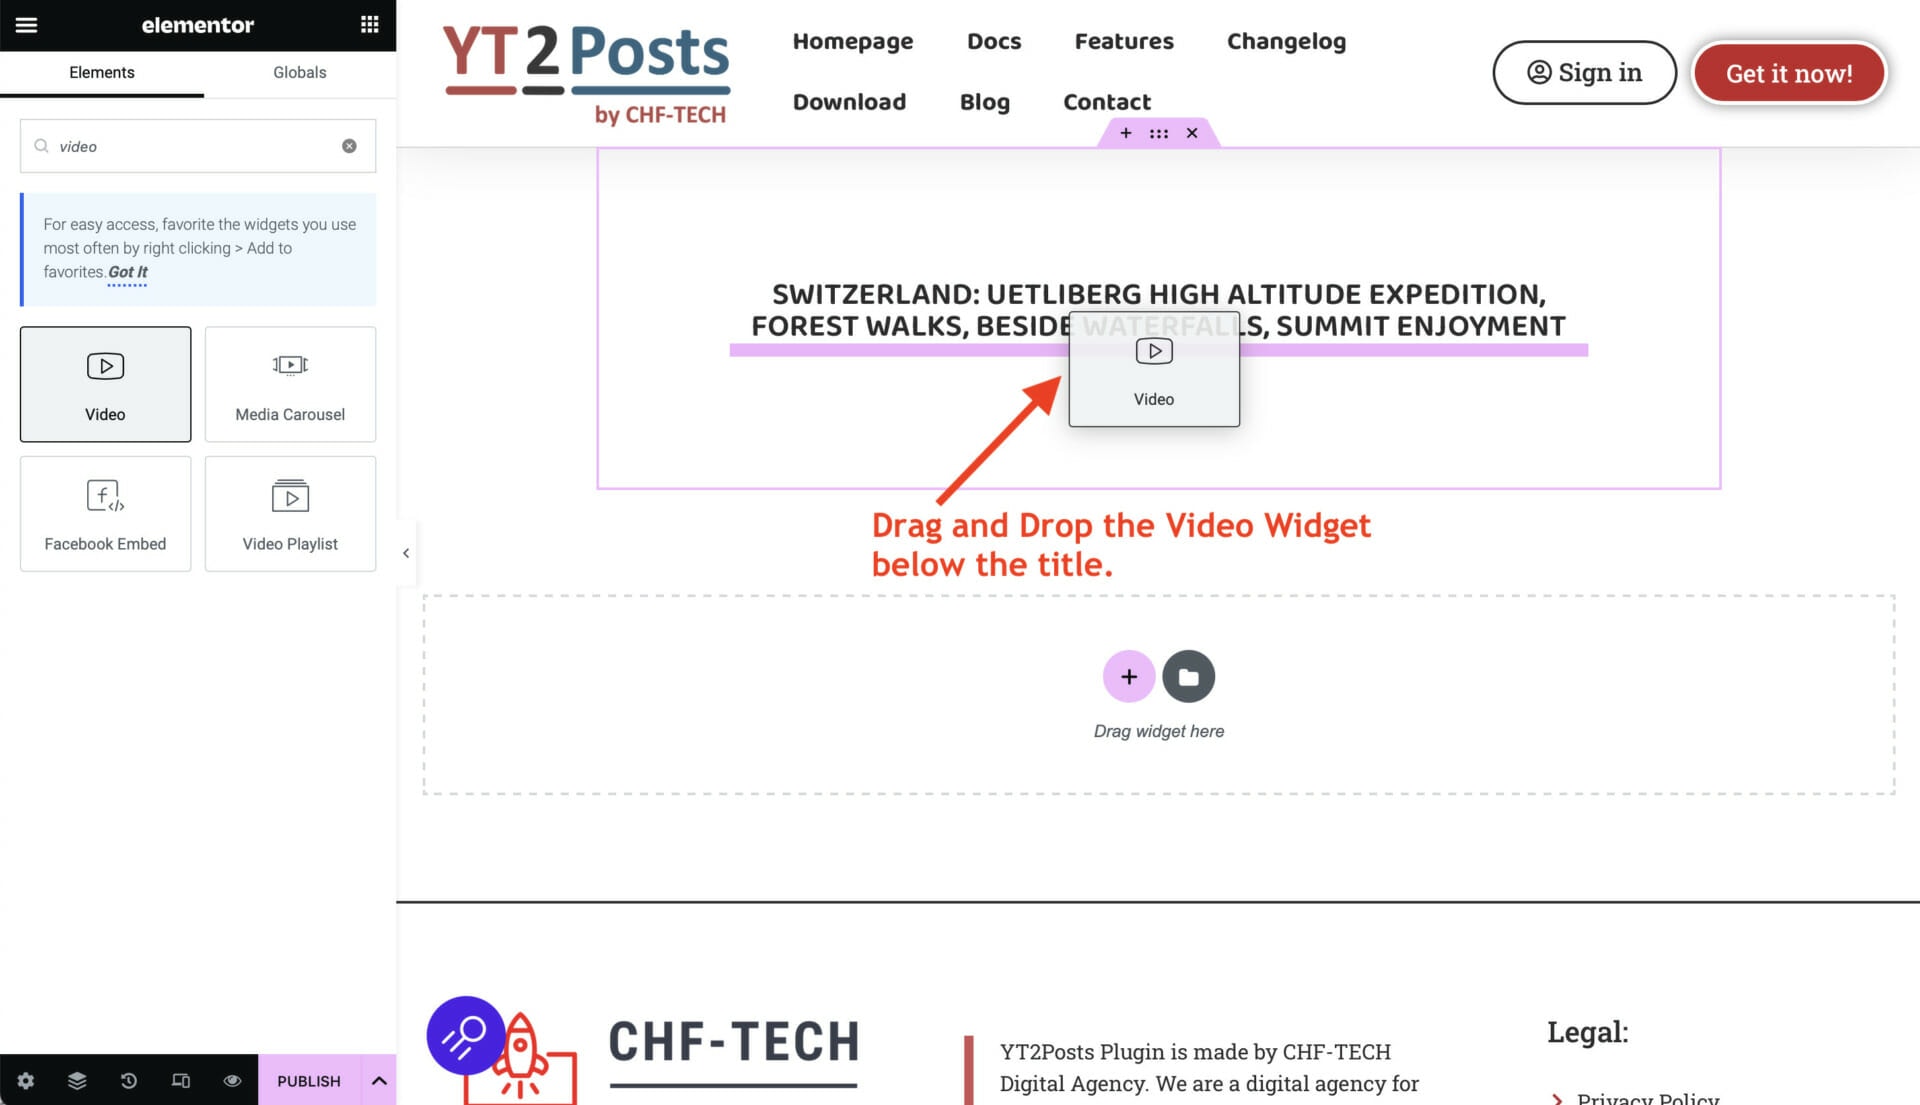
Beneath the video title, we want to insert the video. For this, we will use the Elementor’s Video Widget. Drag and Drop the Video Widget beneath the post title, within the container.
In the Video Widget, we need to dynamically insert the url of the youtube video from the post (i.e. article). This we can do by clicking on the dynamic source in the Video Widget Settings as shown below.
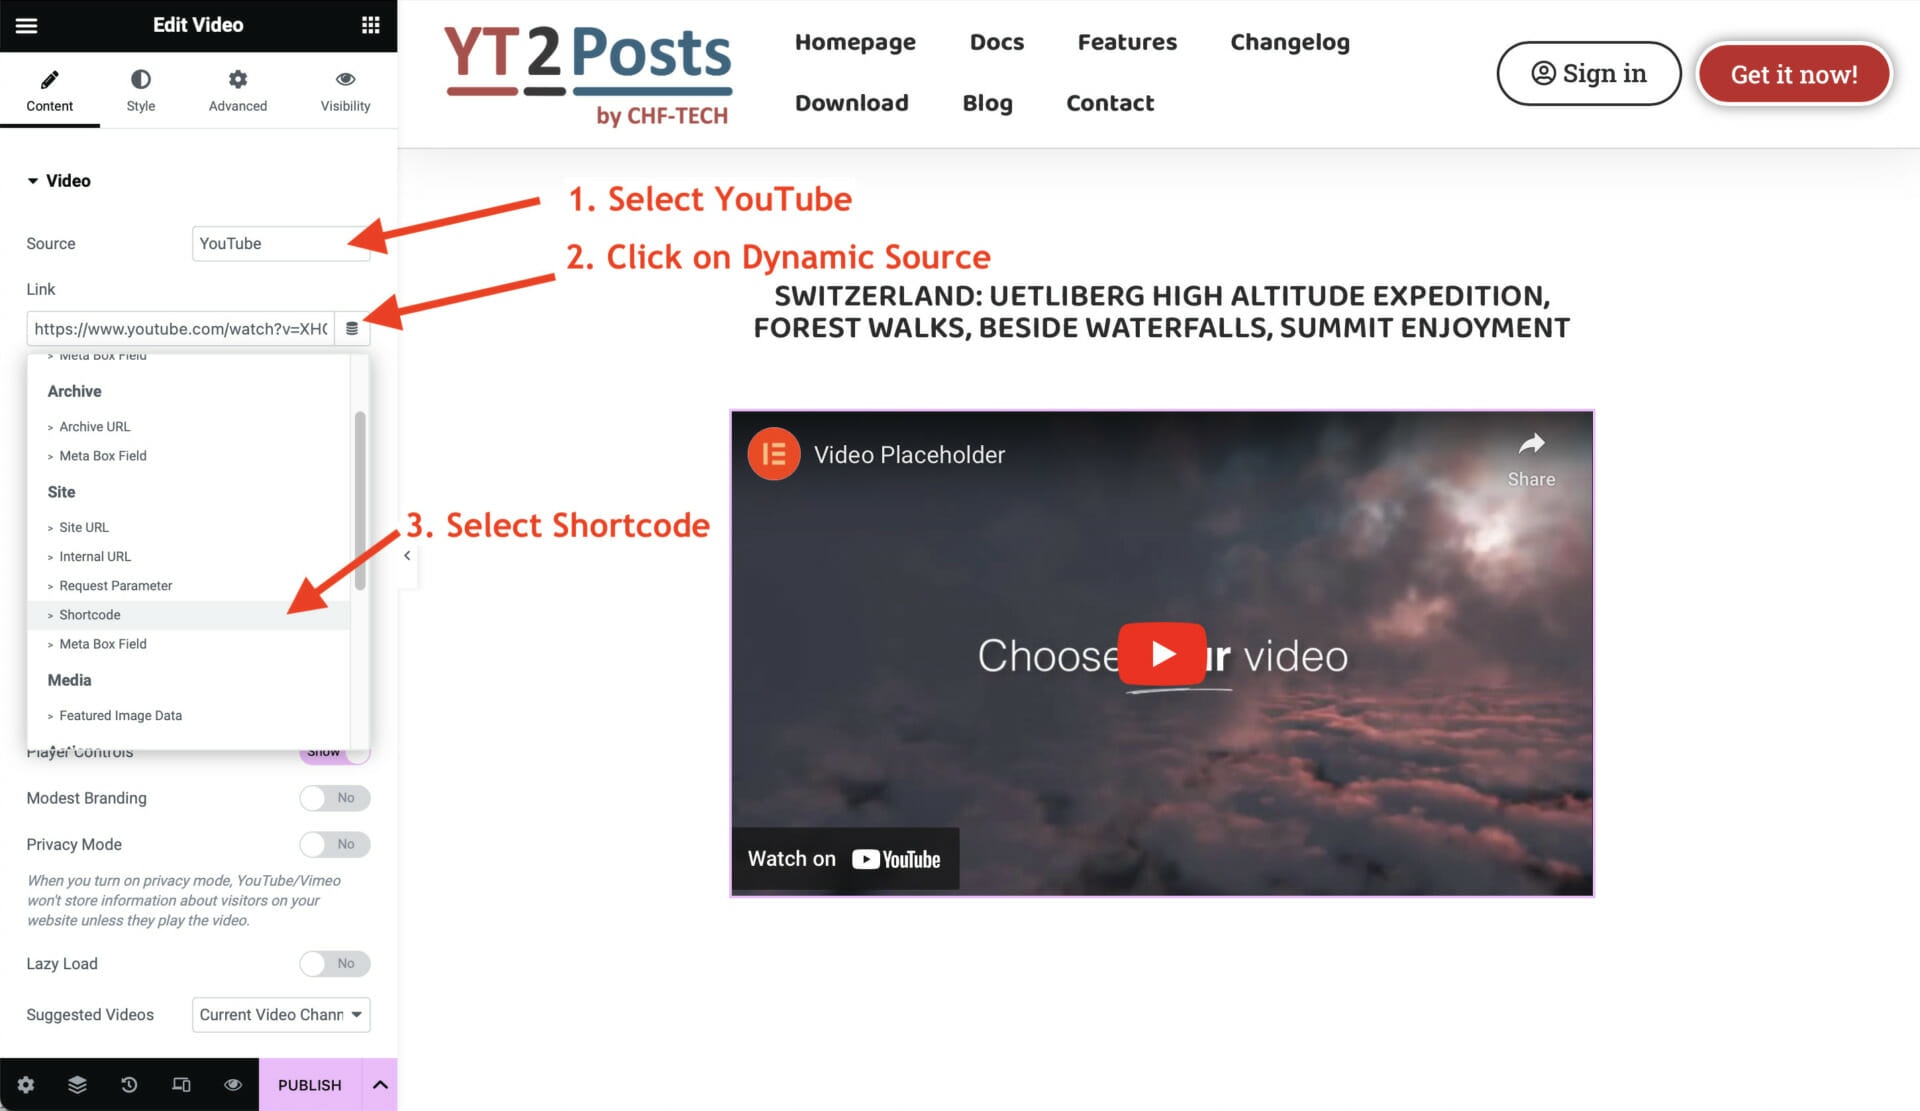
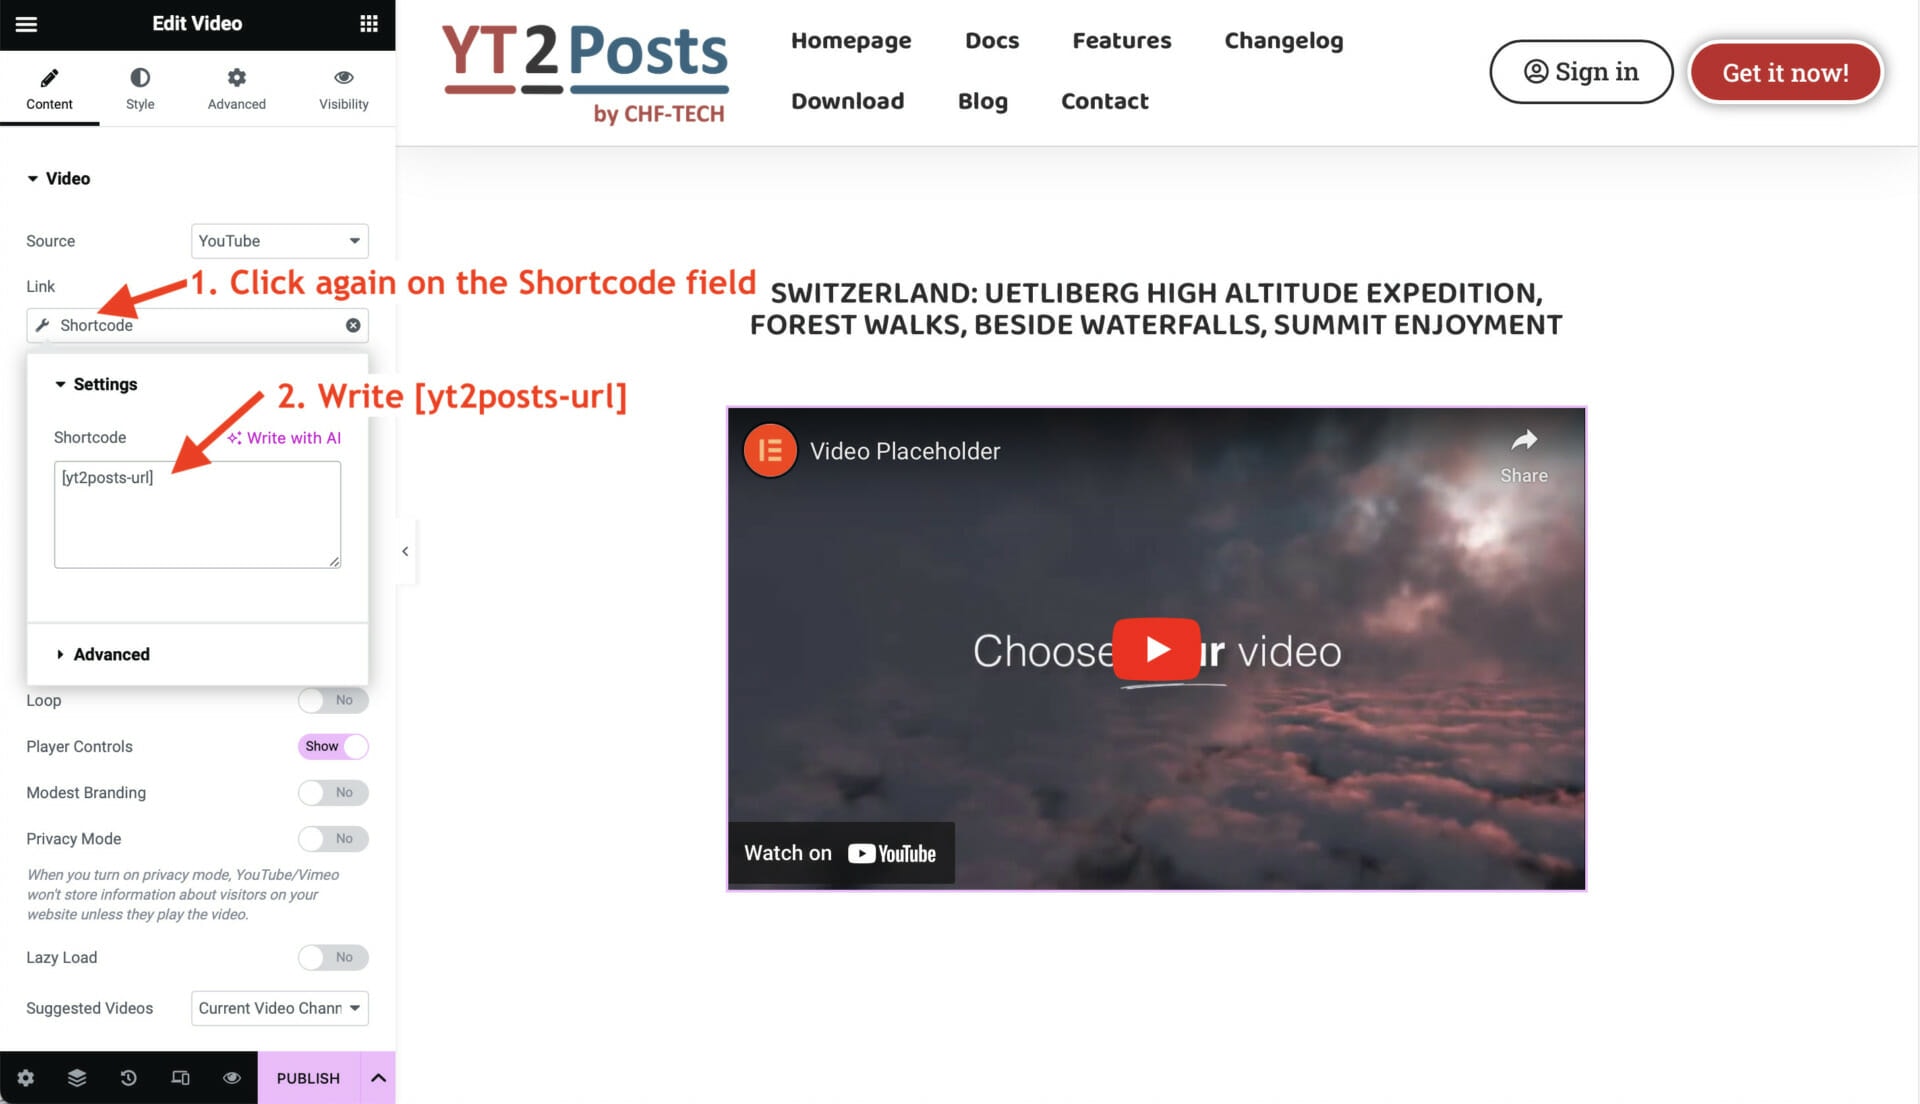
Click again on the shortcode field and write yt2posts-url with brackets in the shortcode field as shown below. This shortcode returns the URL of the video in the current post.
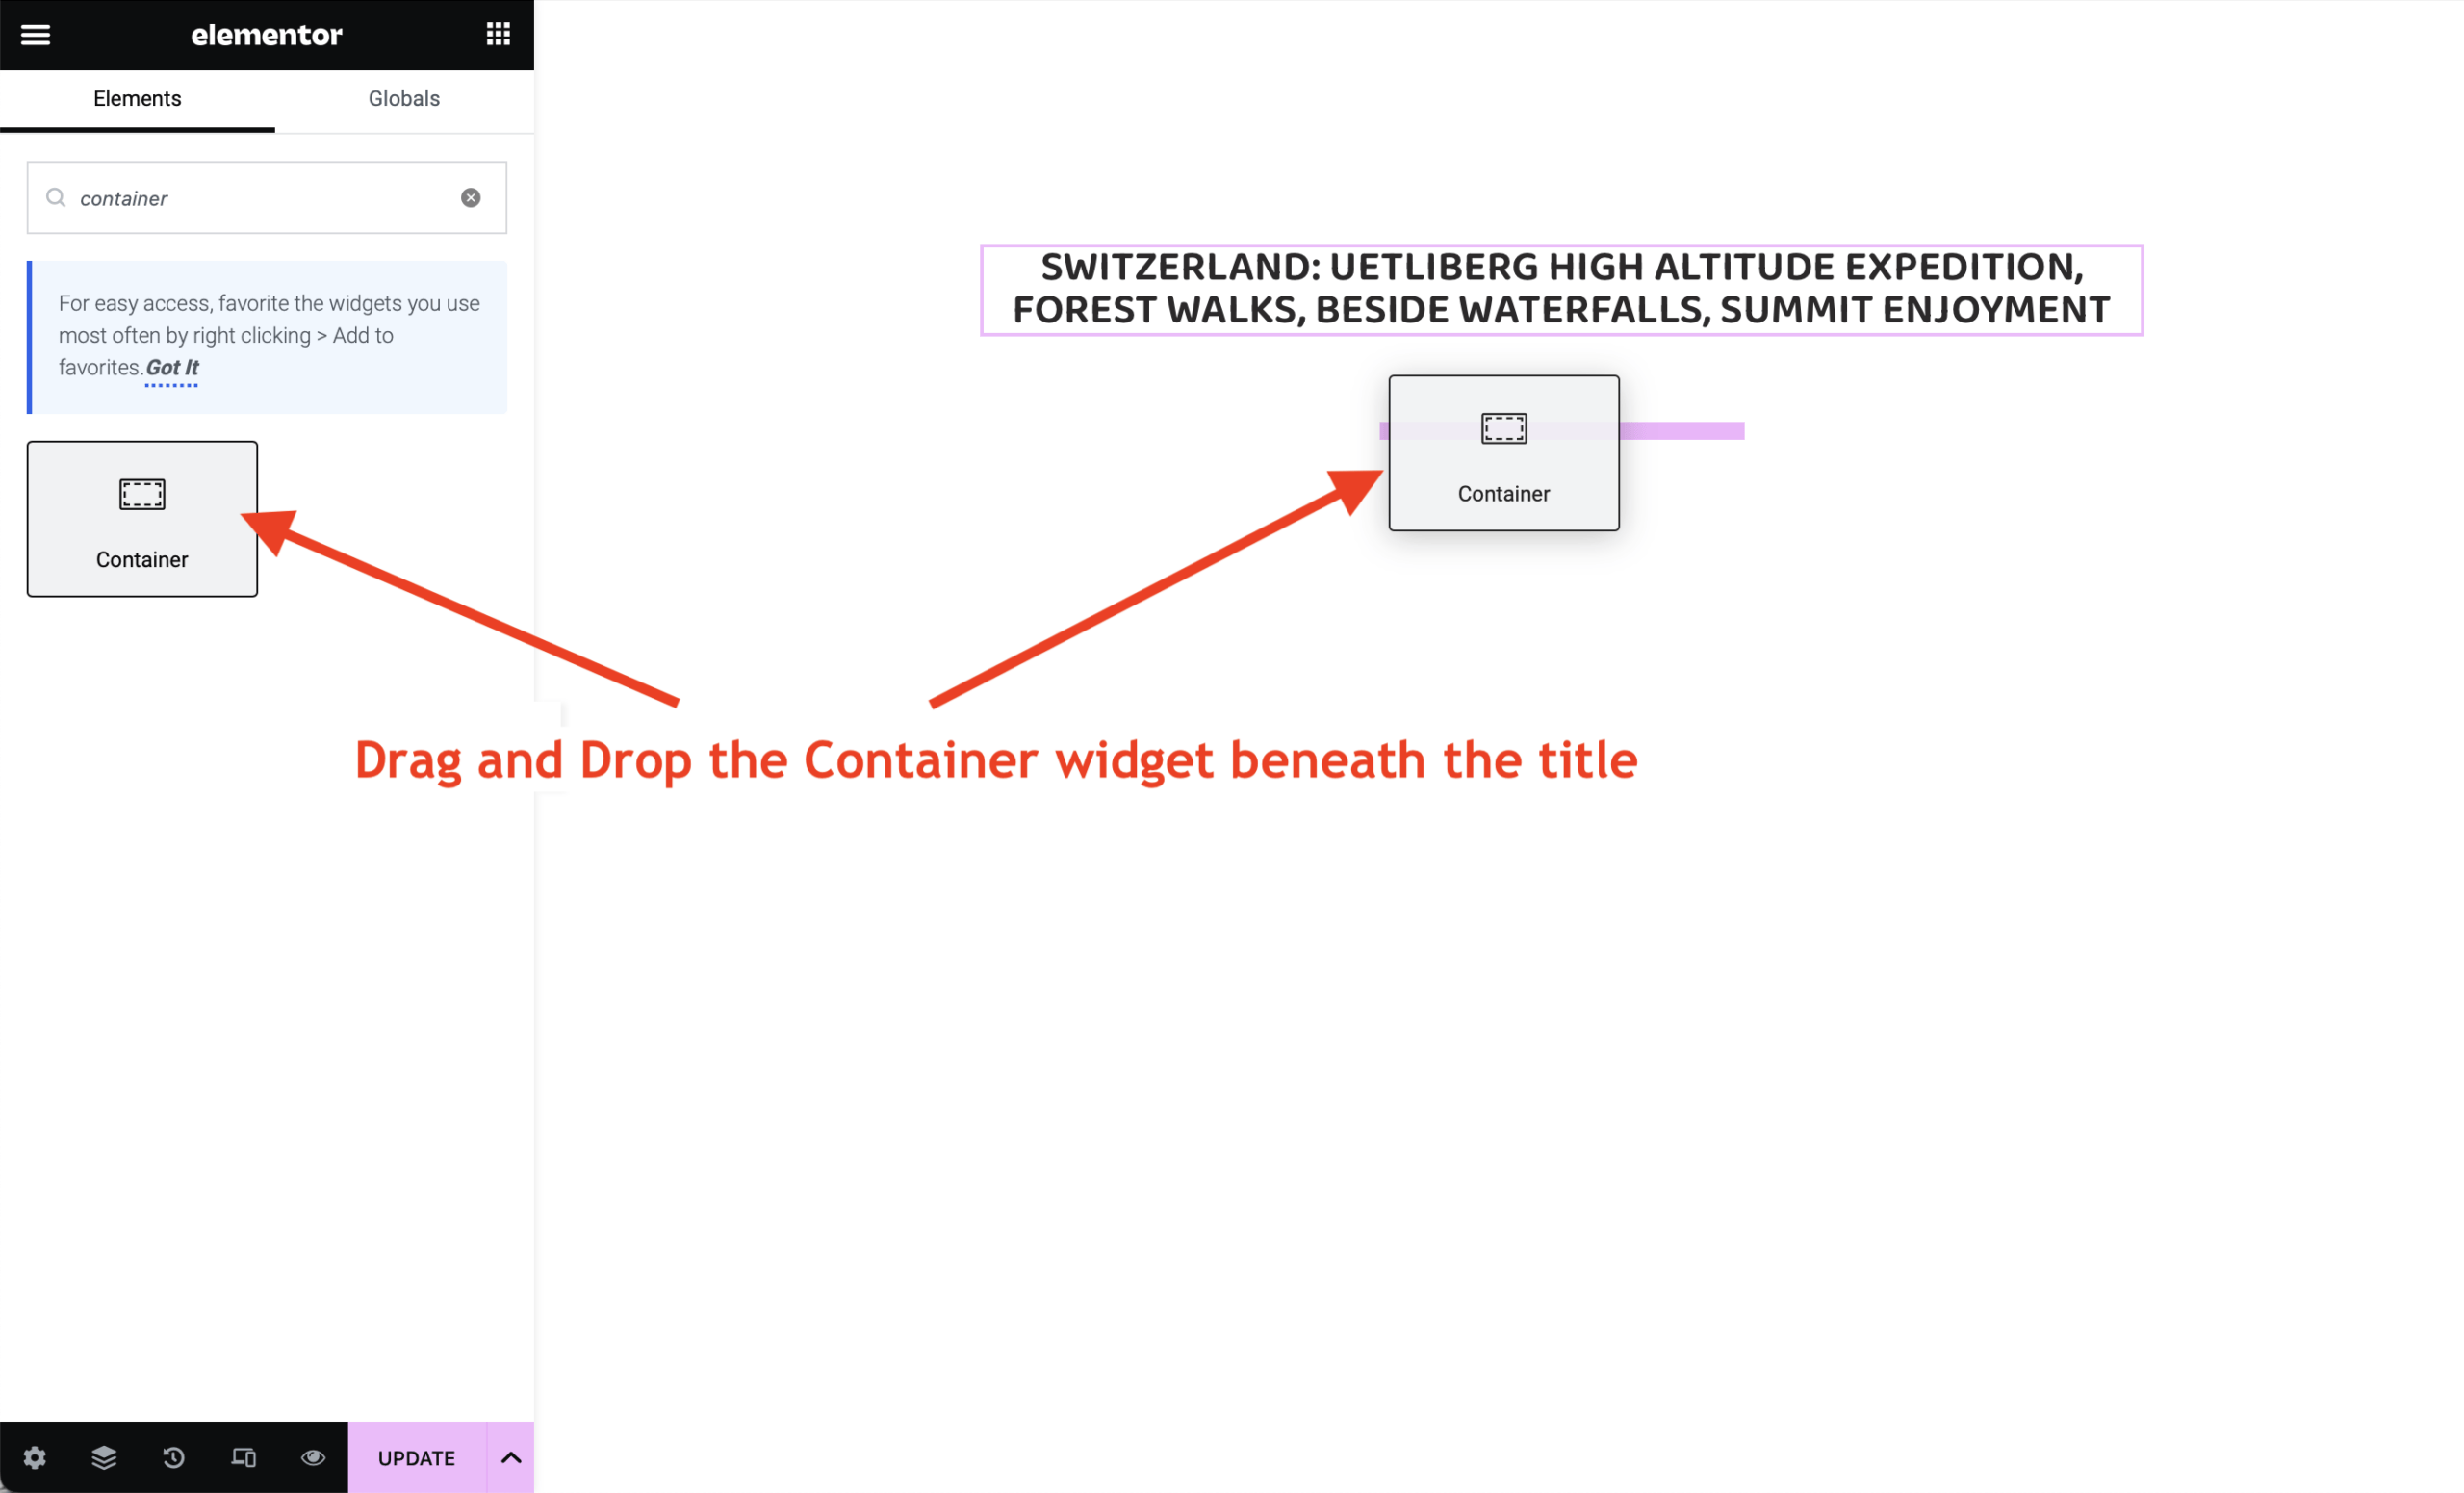
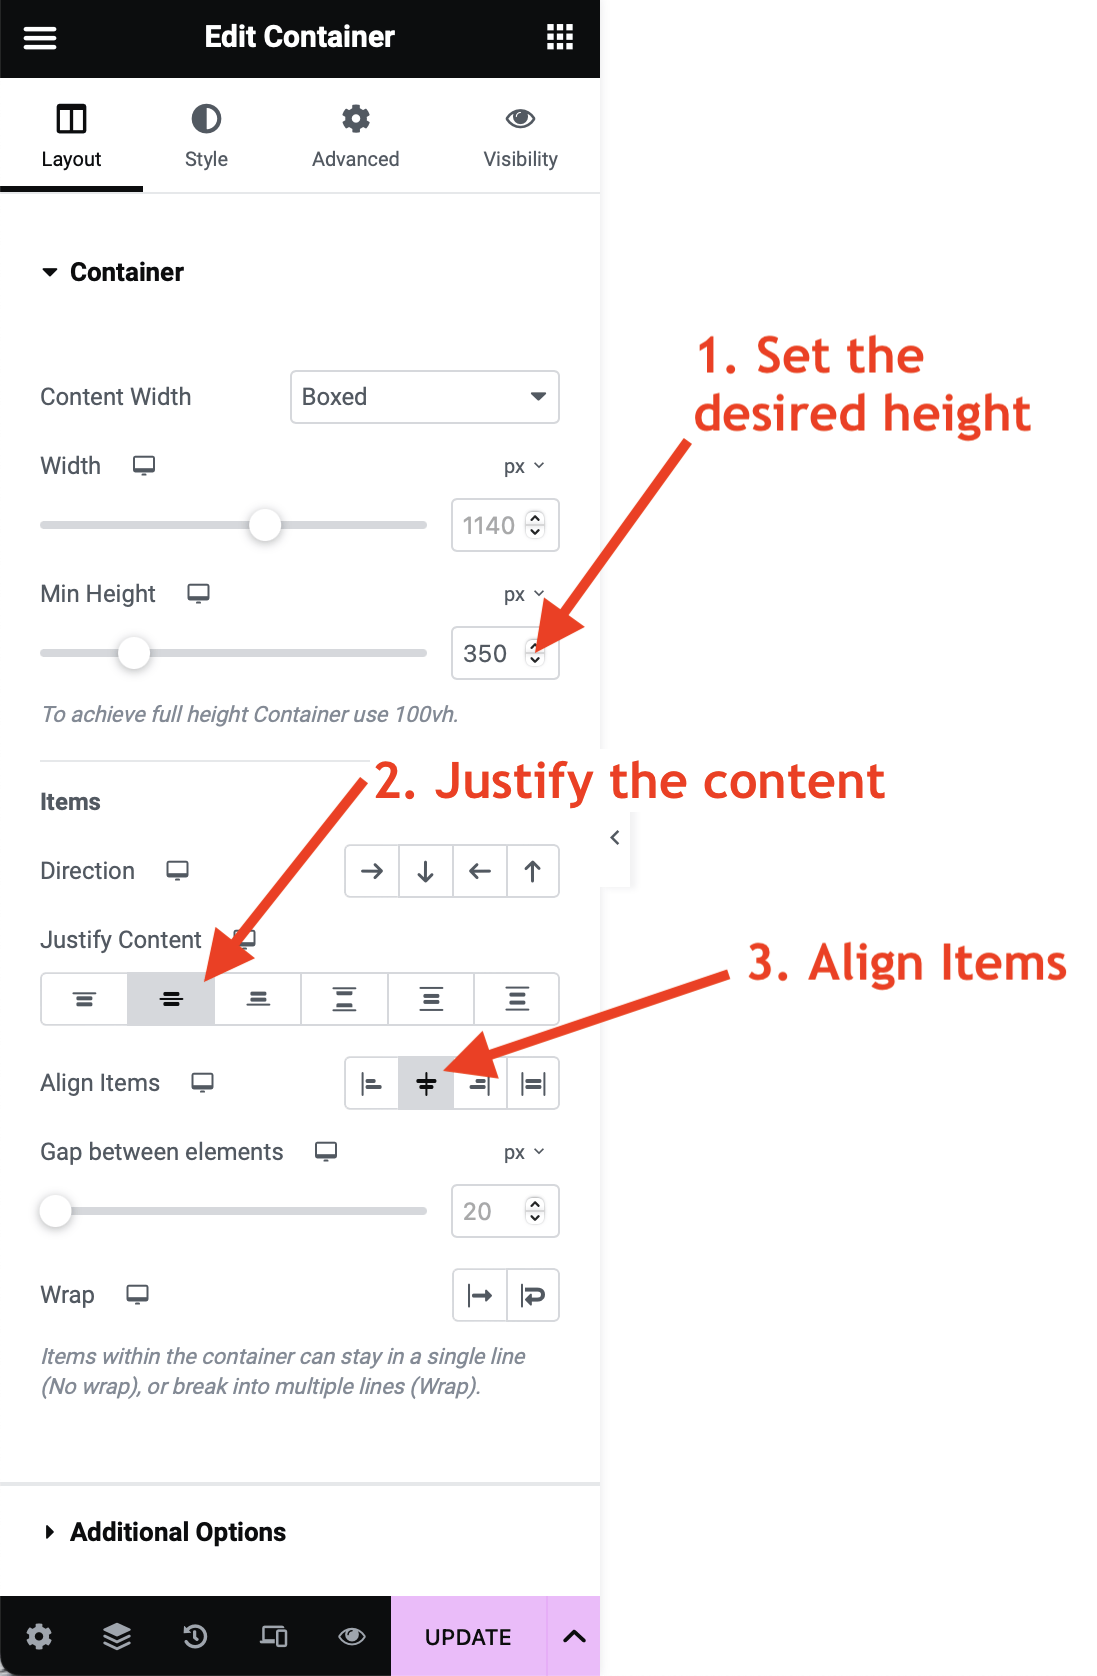
The main idea here is to use a simple Container Widget, instead of the Video Widget. We start by inserting a Container Widget beneath the title, as shown below.
This container is going to display the featured image of the video. We should now set the minimum container height and the justification and the alignment as shown below.
Now we want to add the link to this container, so that when the visitor clicks on it, he is redirected to the video on YouTube. We can do this by clicking on Additional Options in the same menu, as shown below.
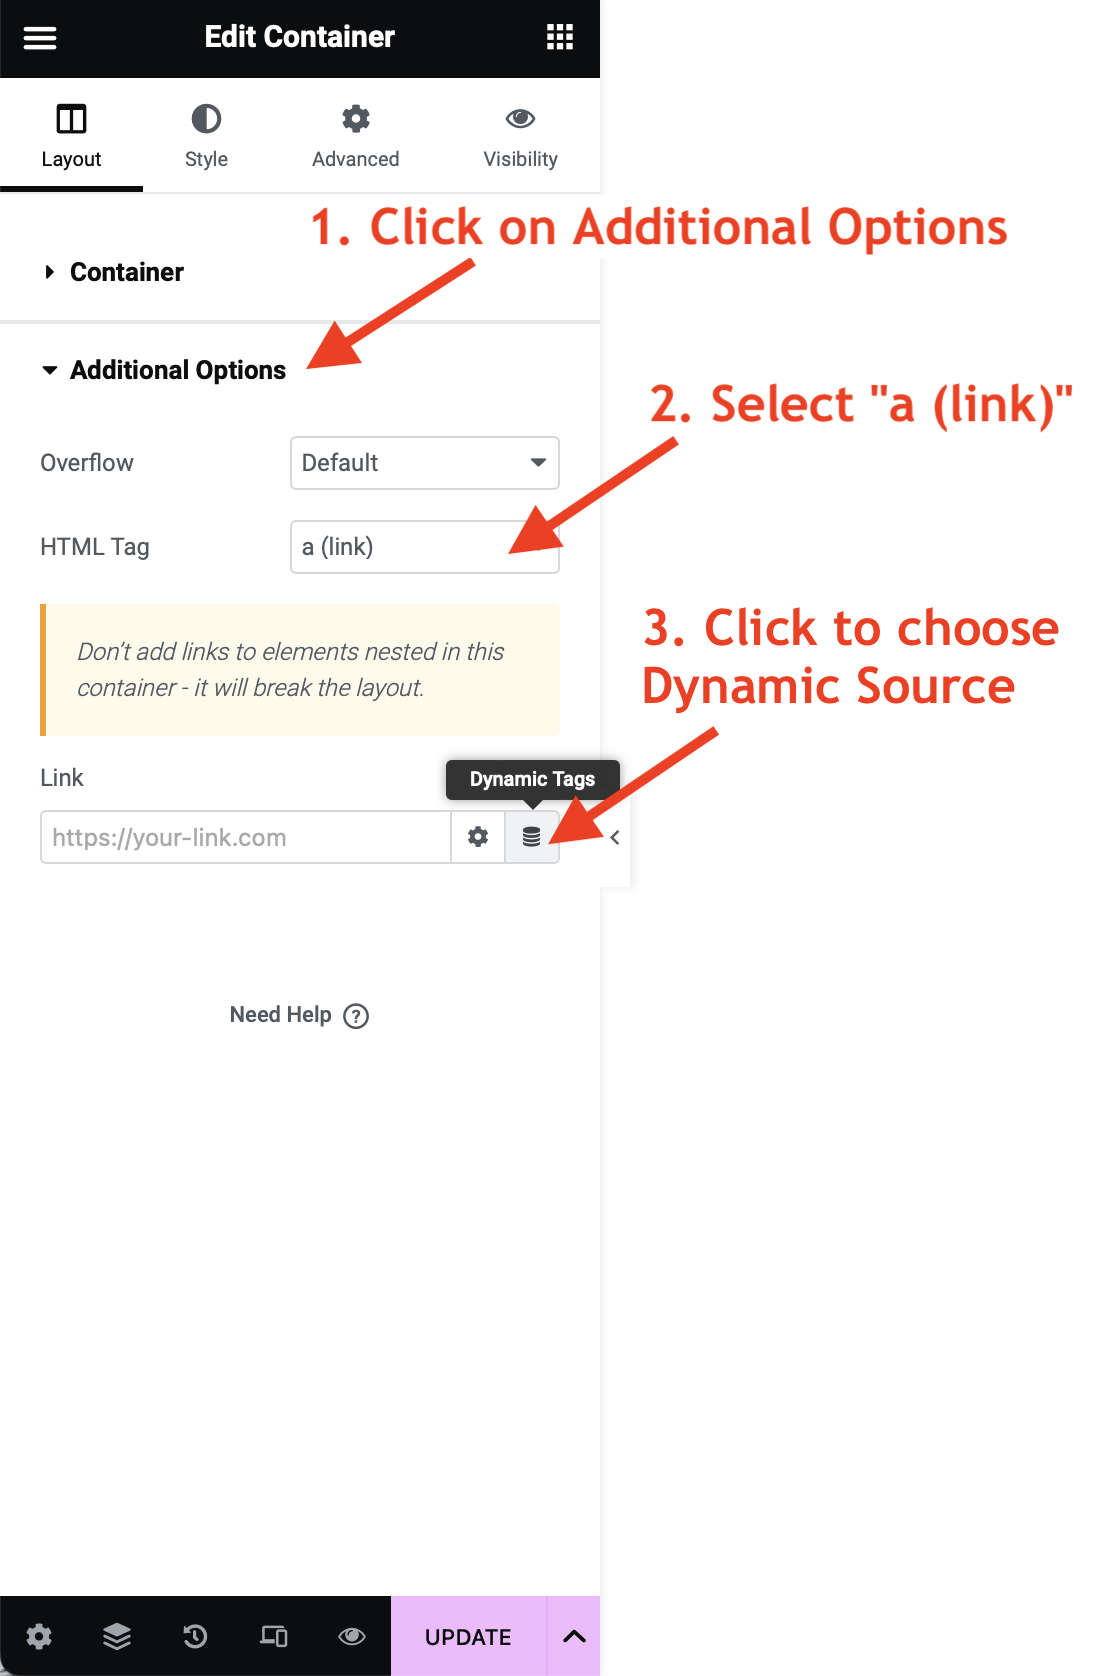
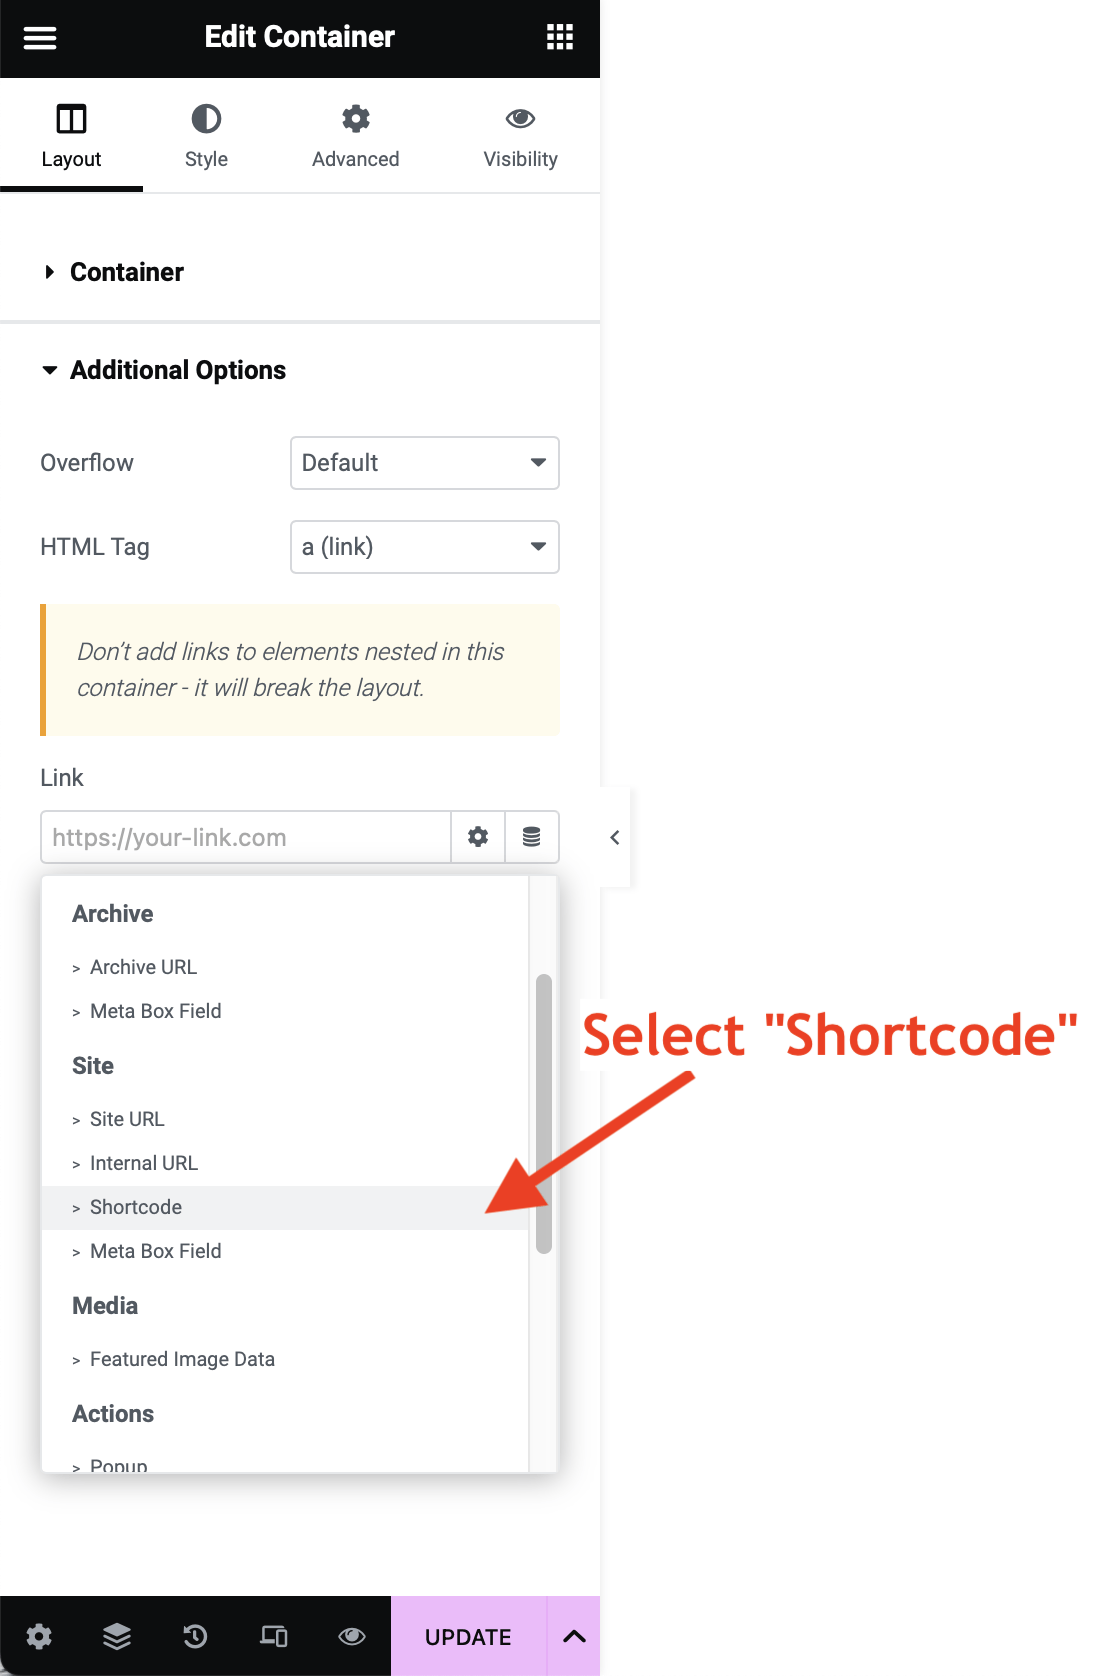
In the dropdown menu, select Shortcode.
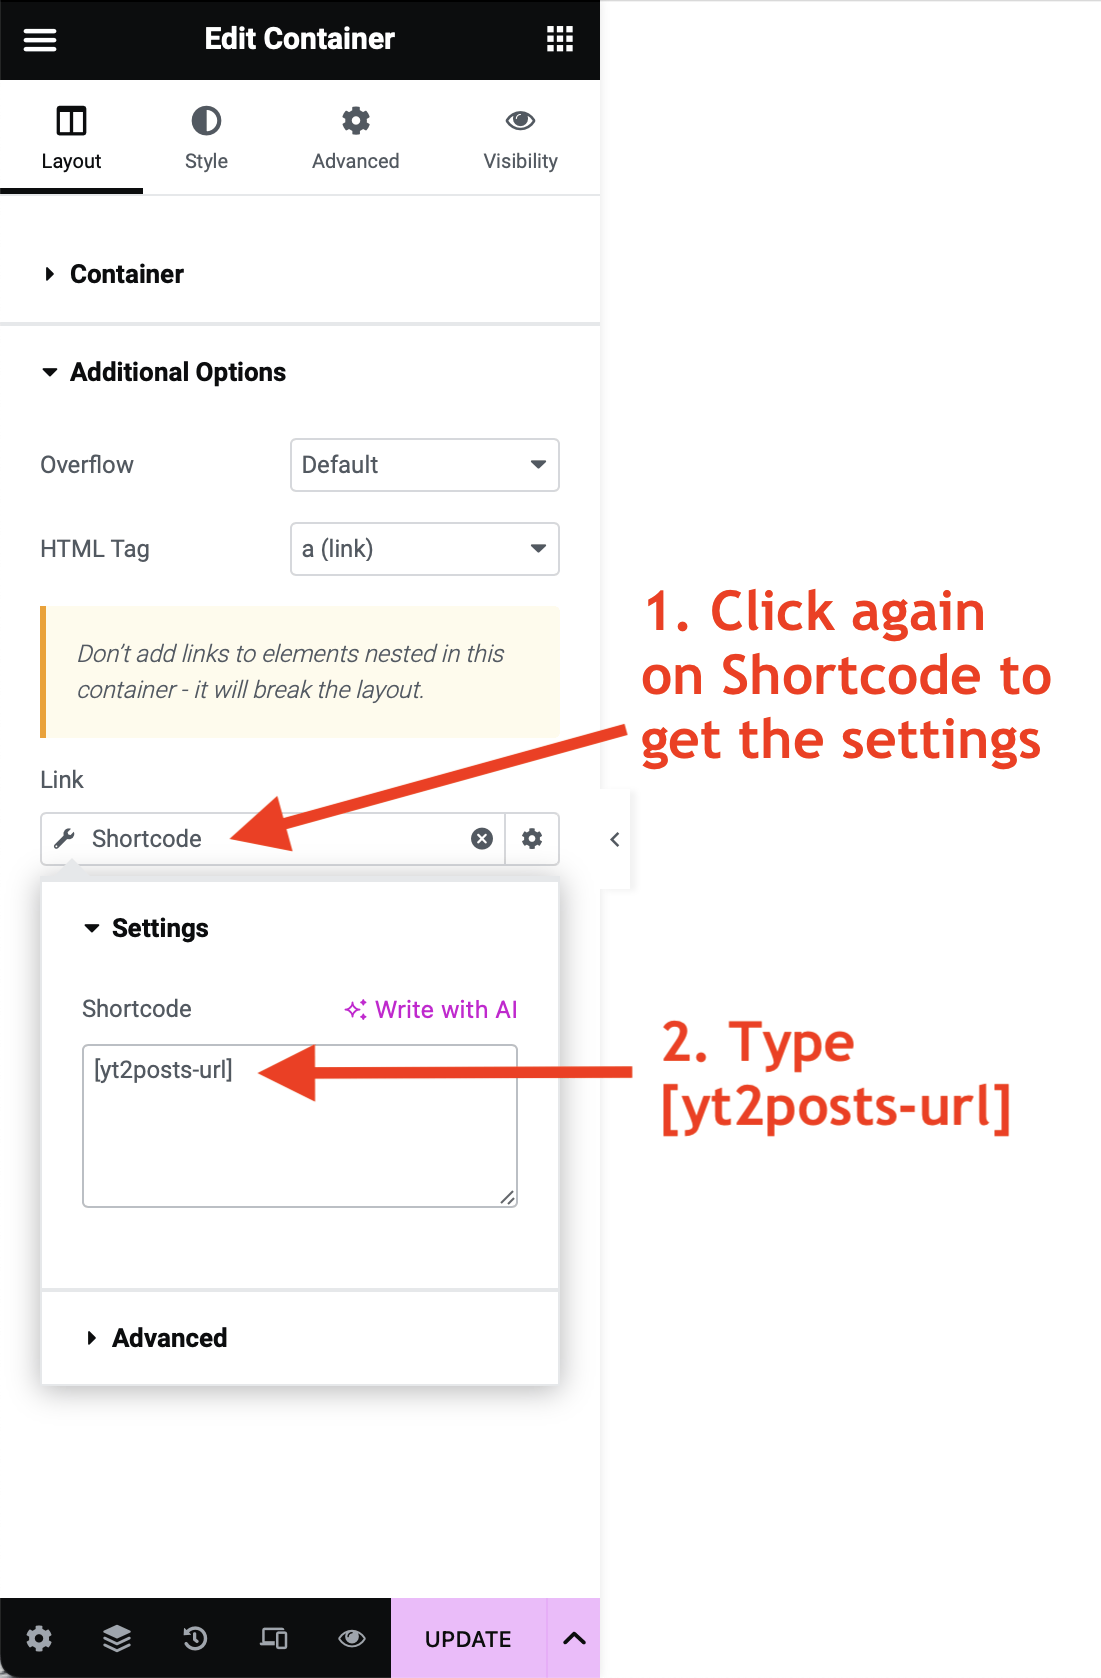
Click again on Shortcode to get the settings and type in yt2posts-url (with brackets) as shown below.
With this we achieved that, when visitors click on this container, they will be redirected to the youtube link of the video. Now we want to add the featured image as the background of this container. For this, click on the Style tab and choose the Image as the background Type as follows.
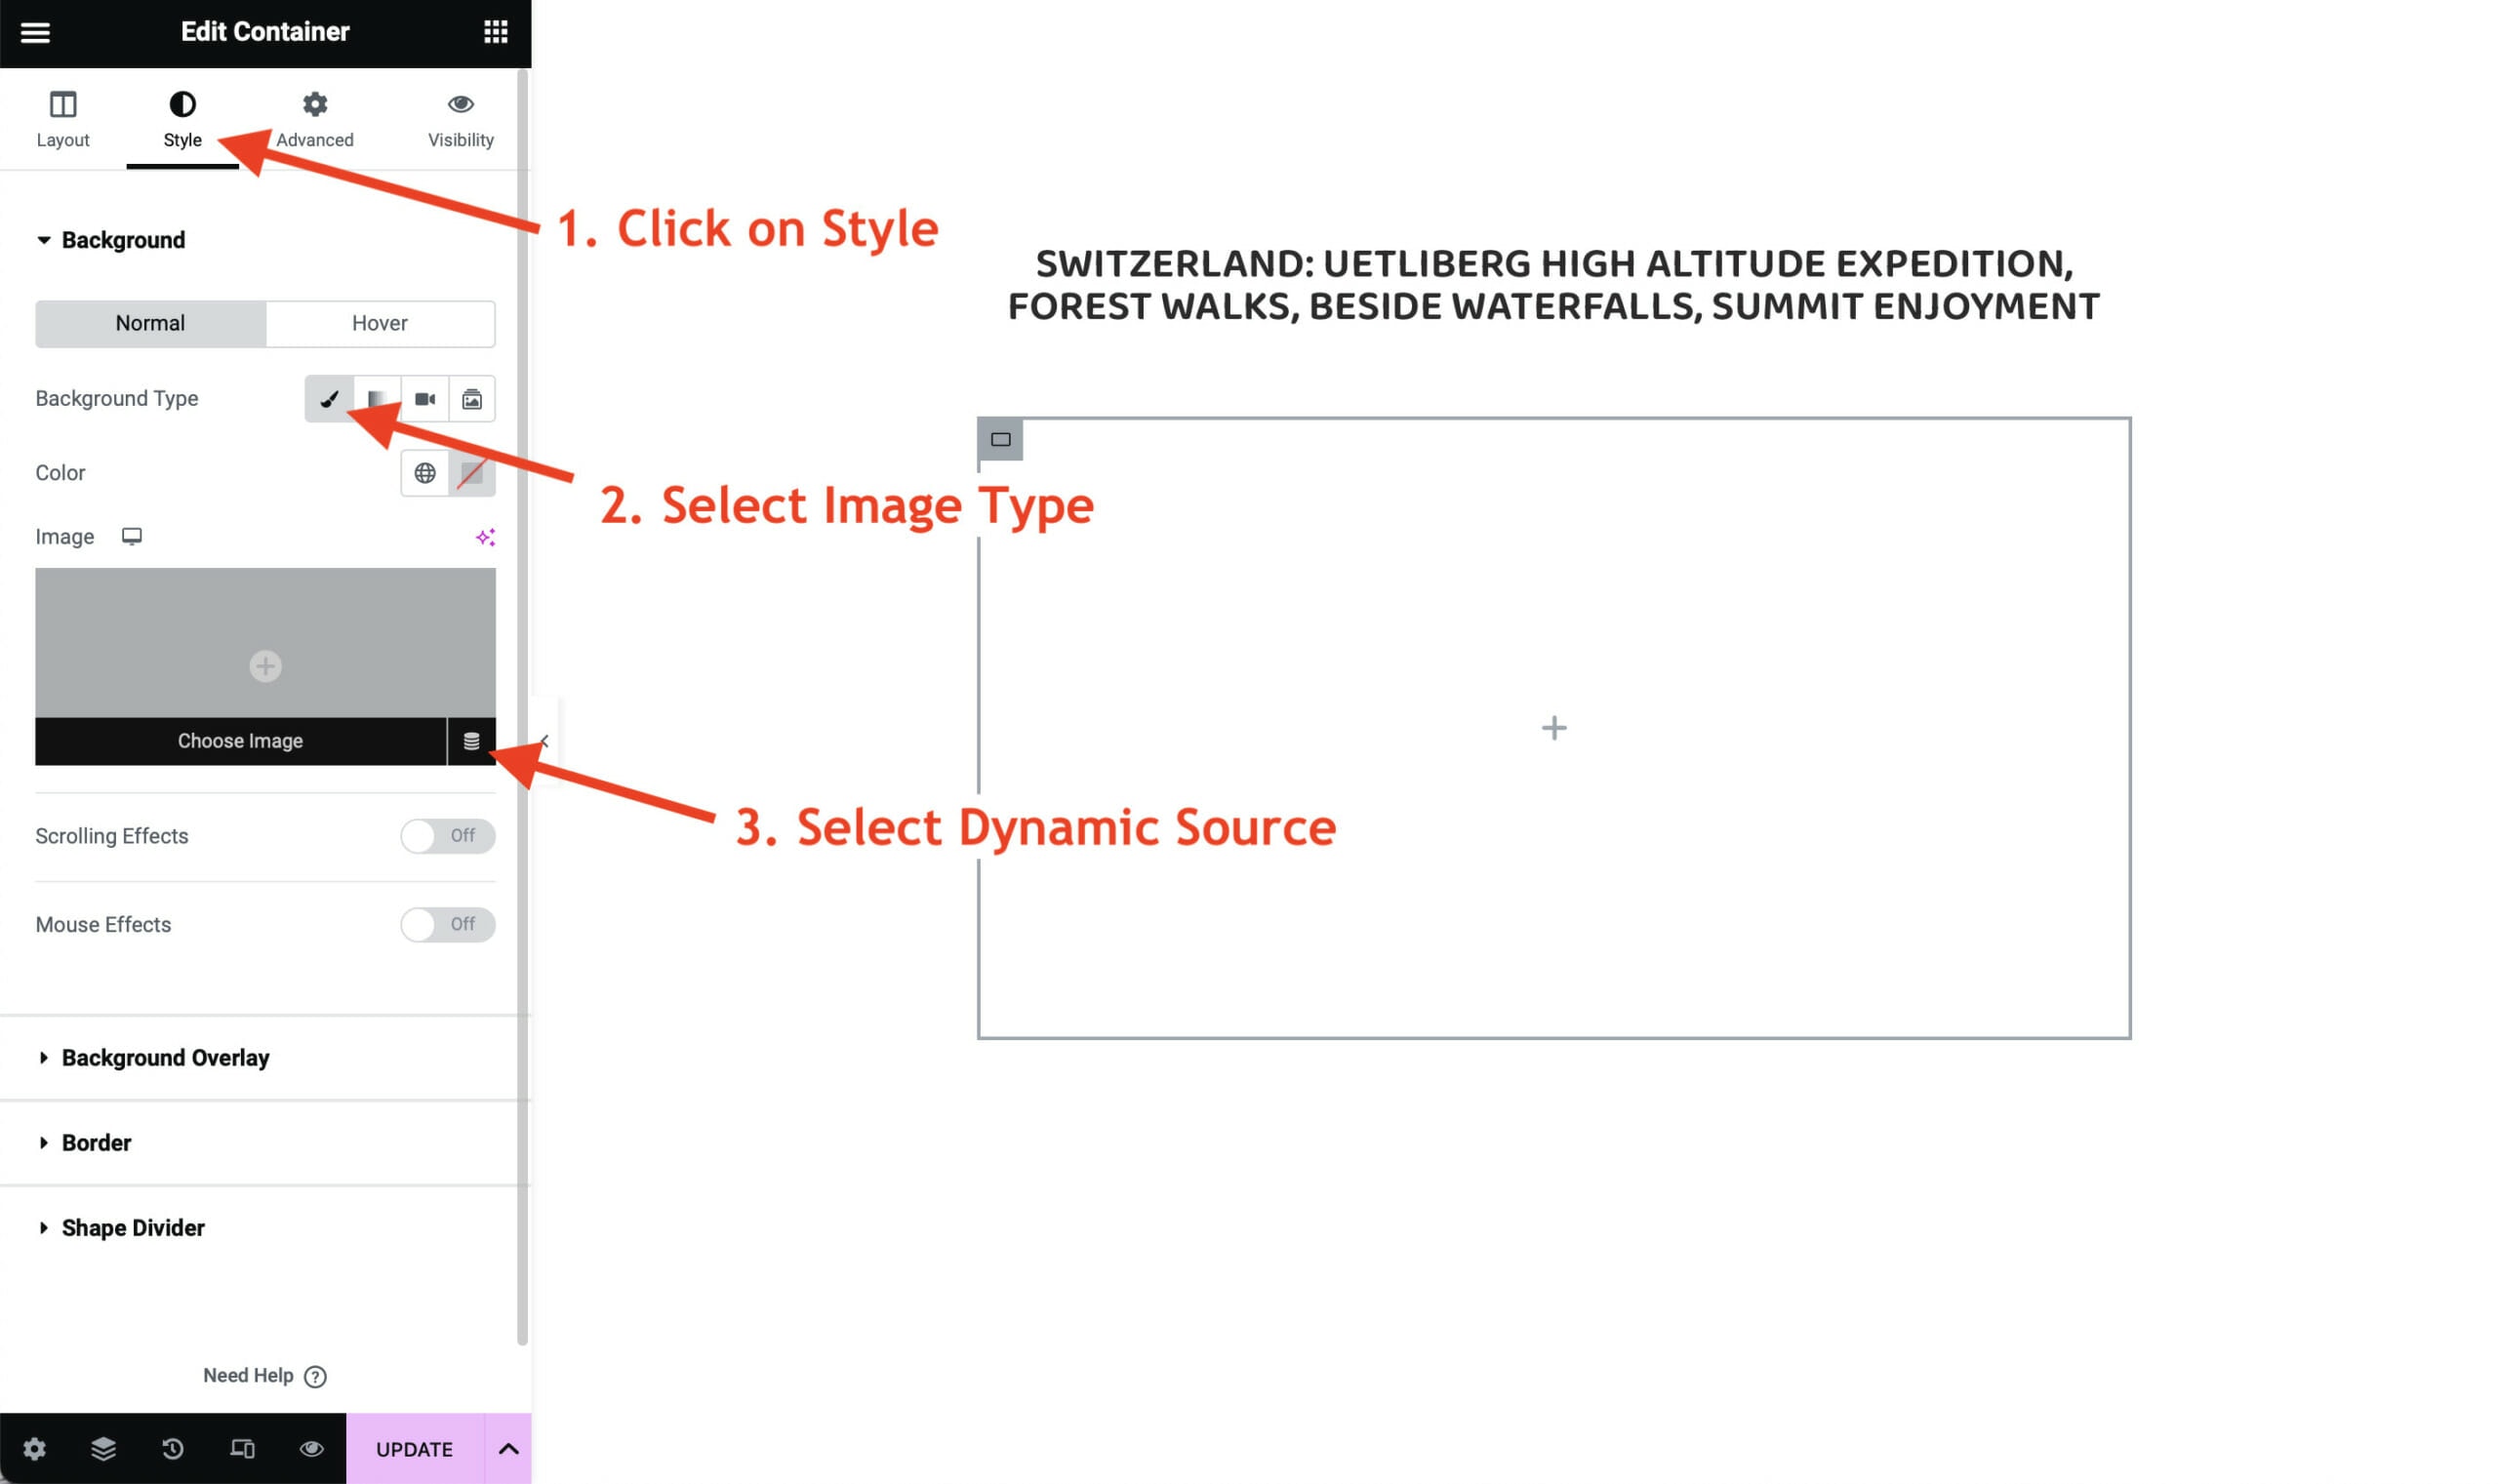
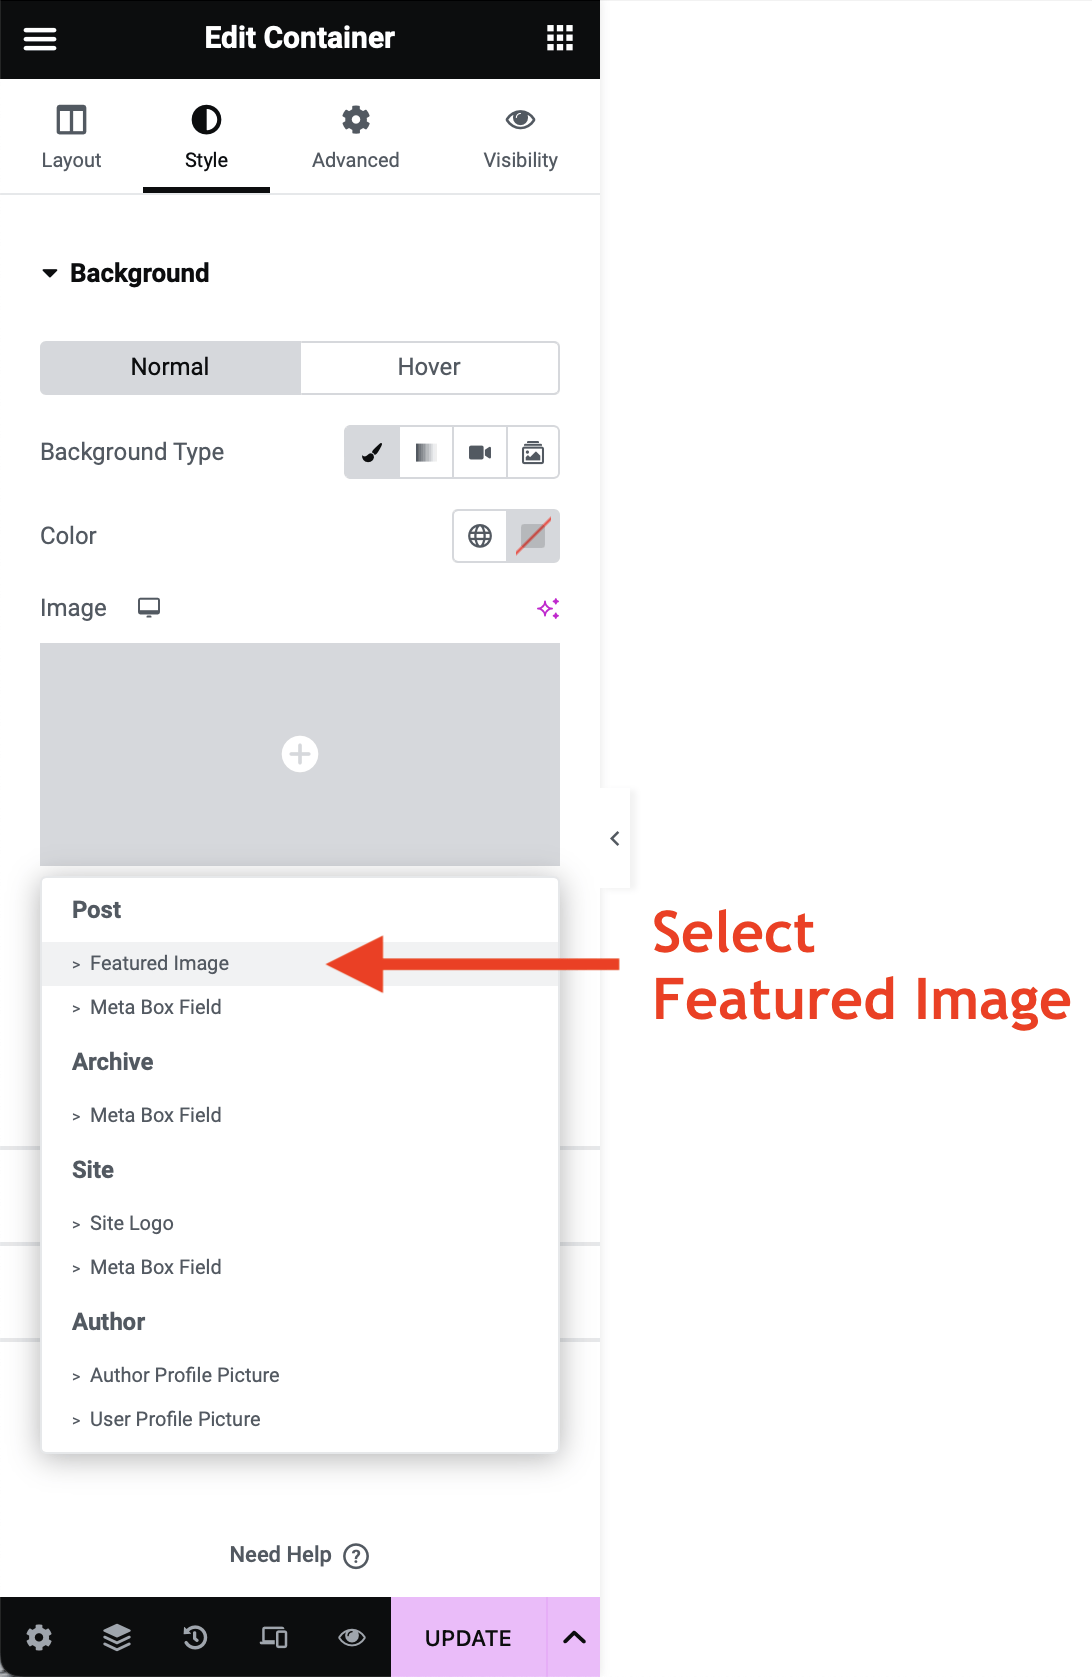
In the dropdown menu, select Featured Image, as shown below.
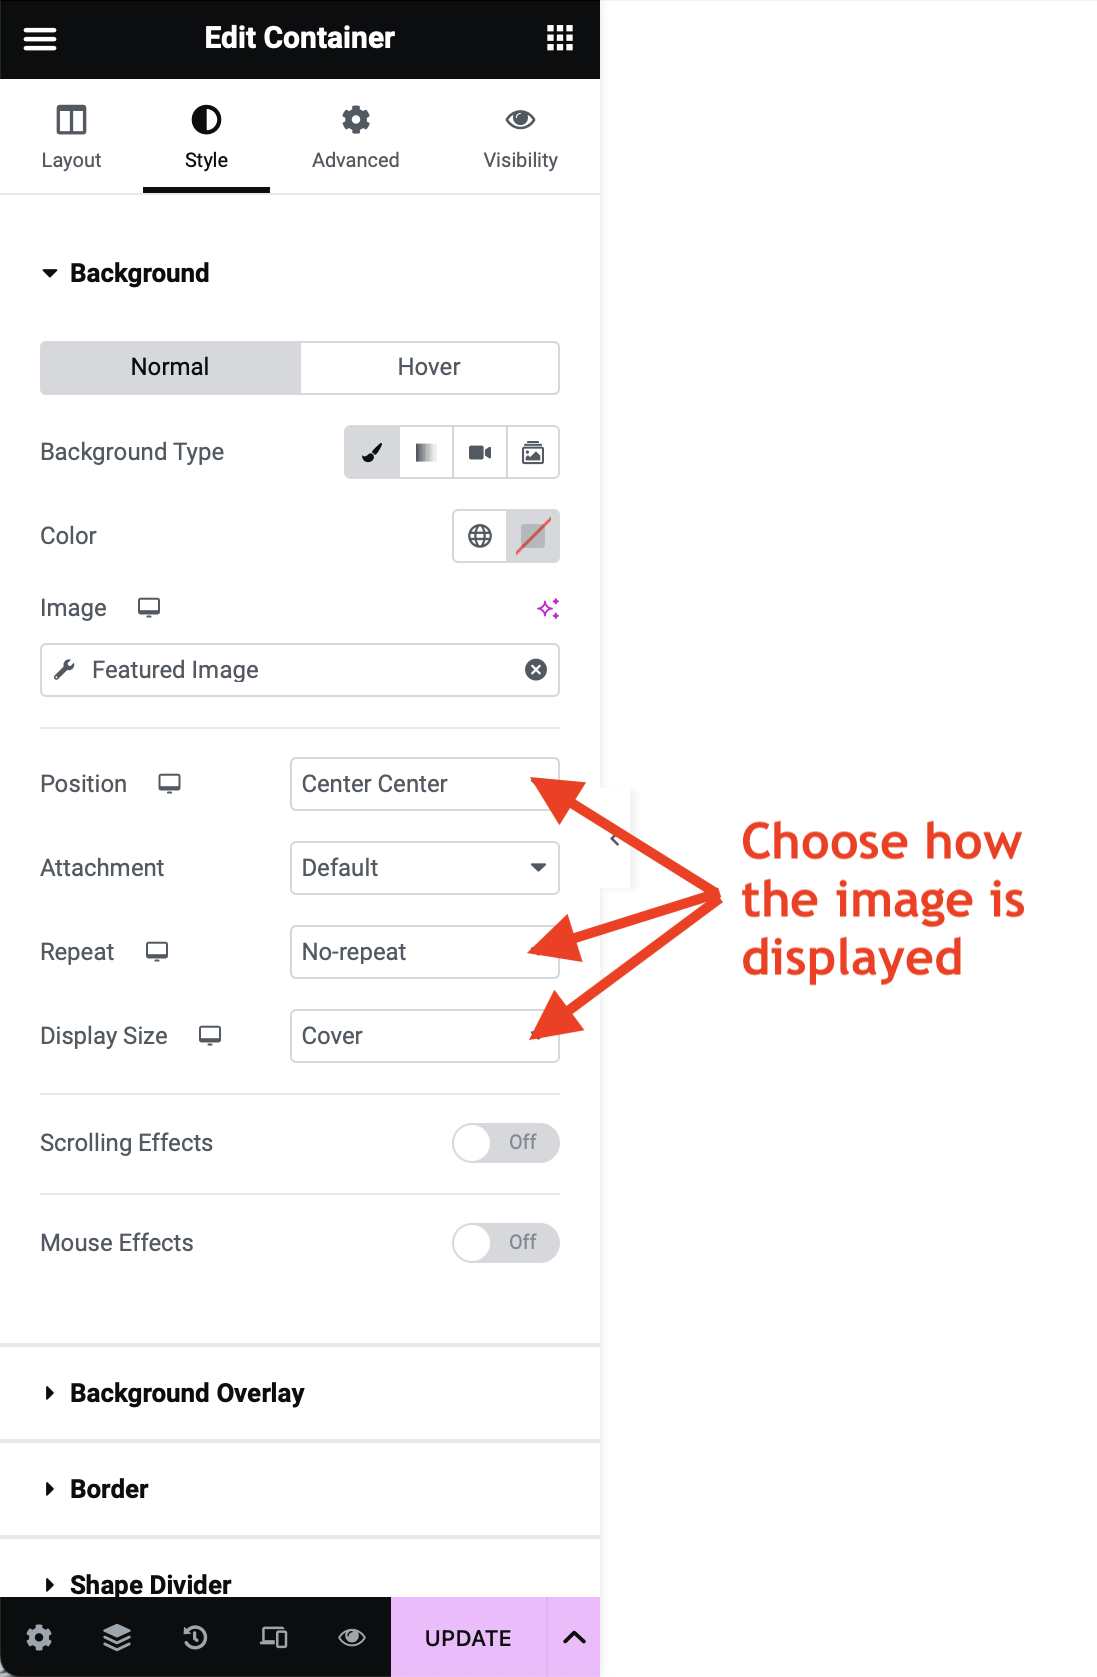
Then, choose how the image is displayed, as shown below.
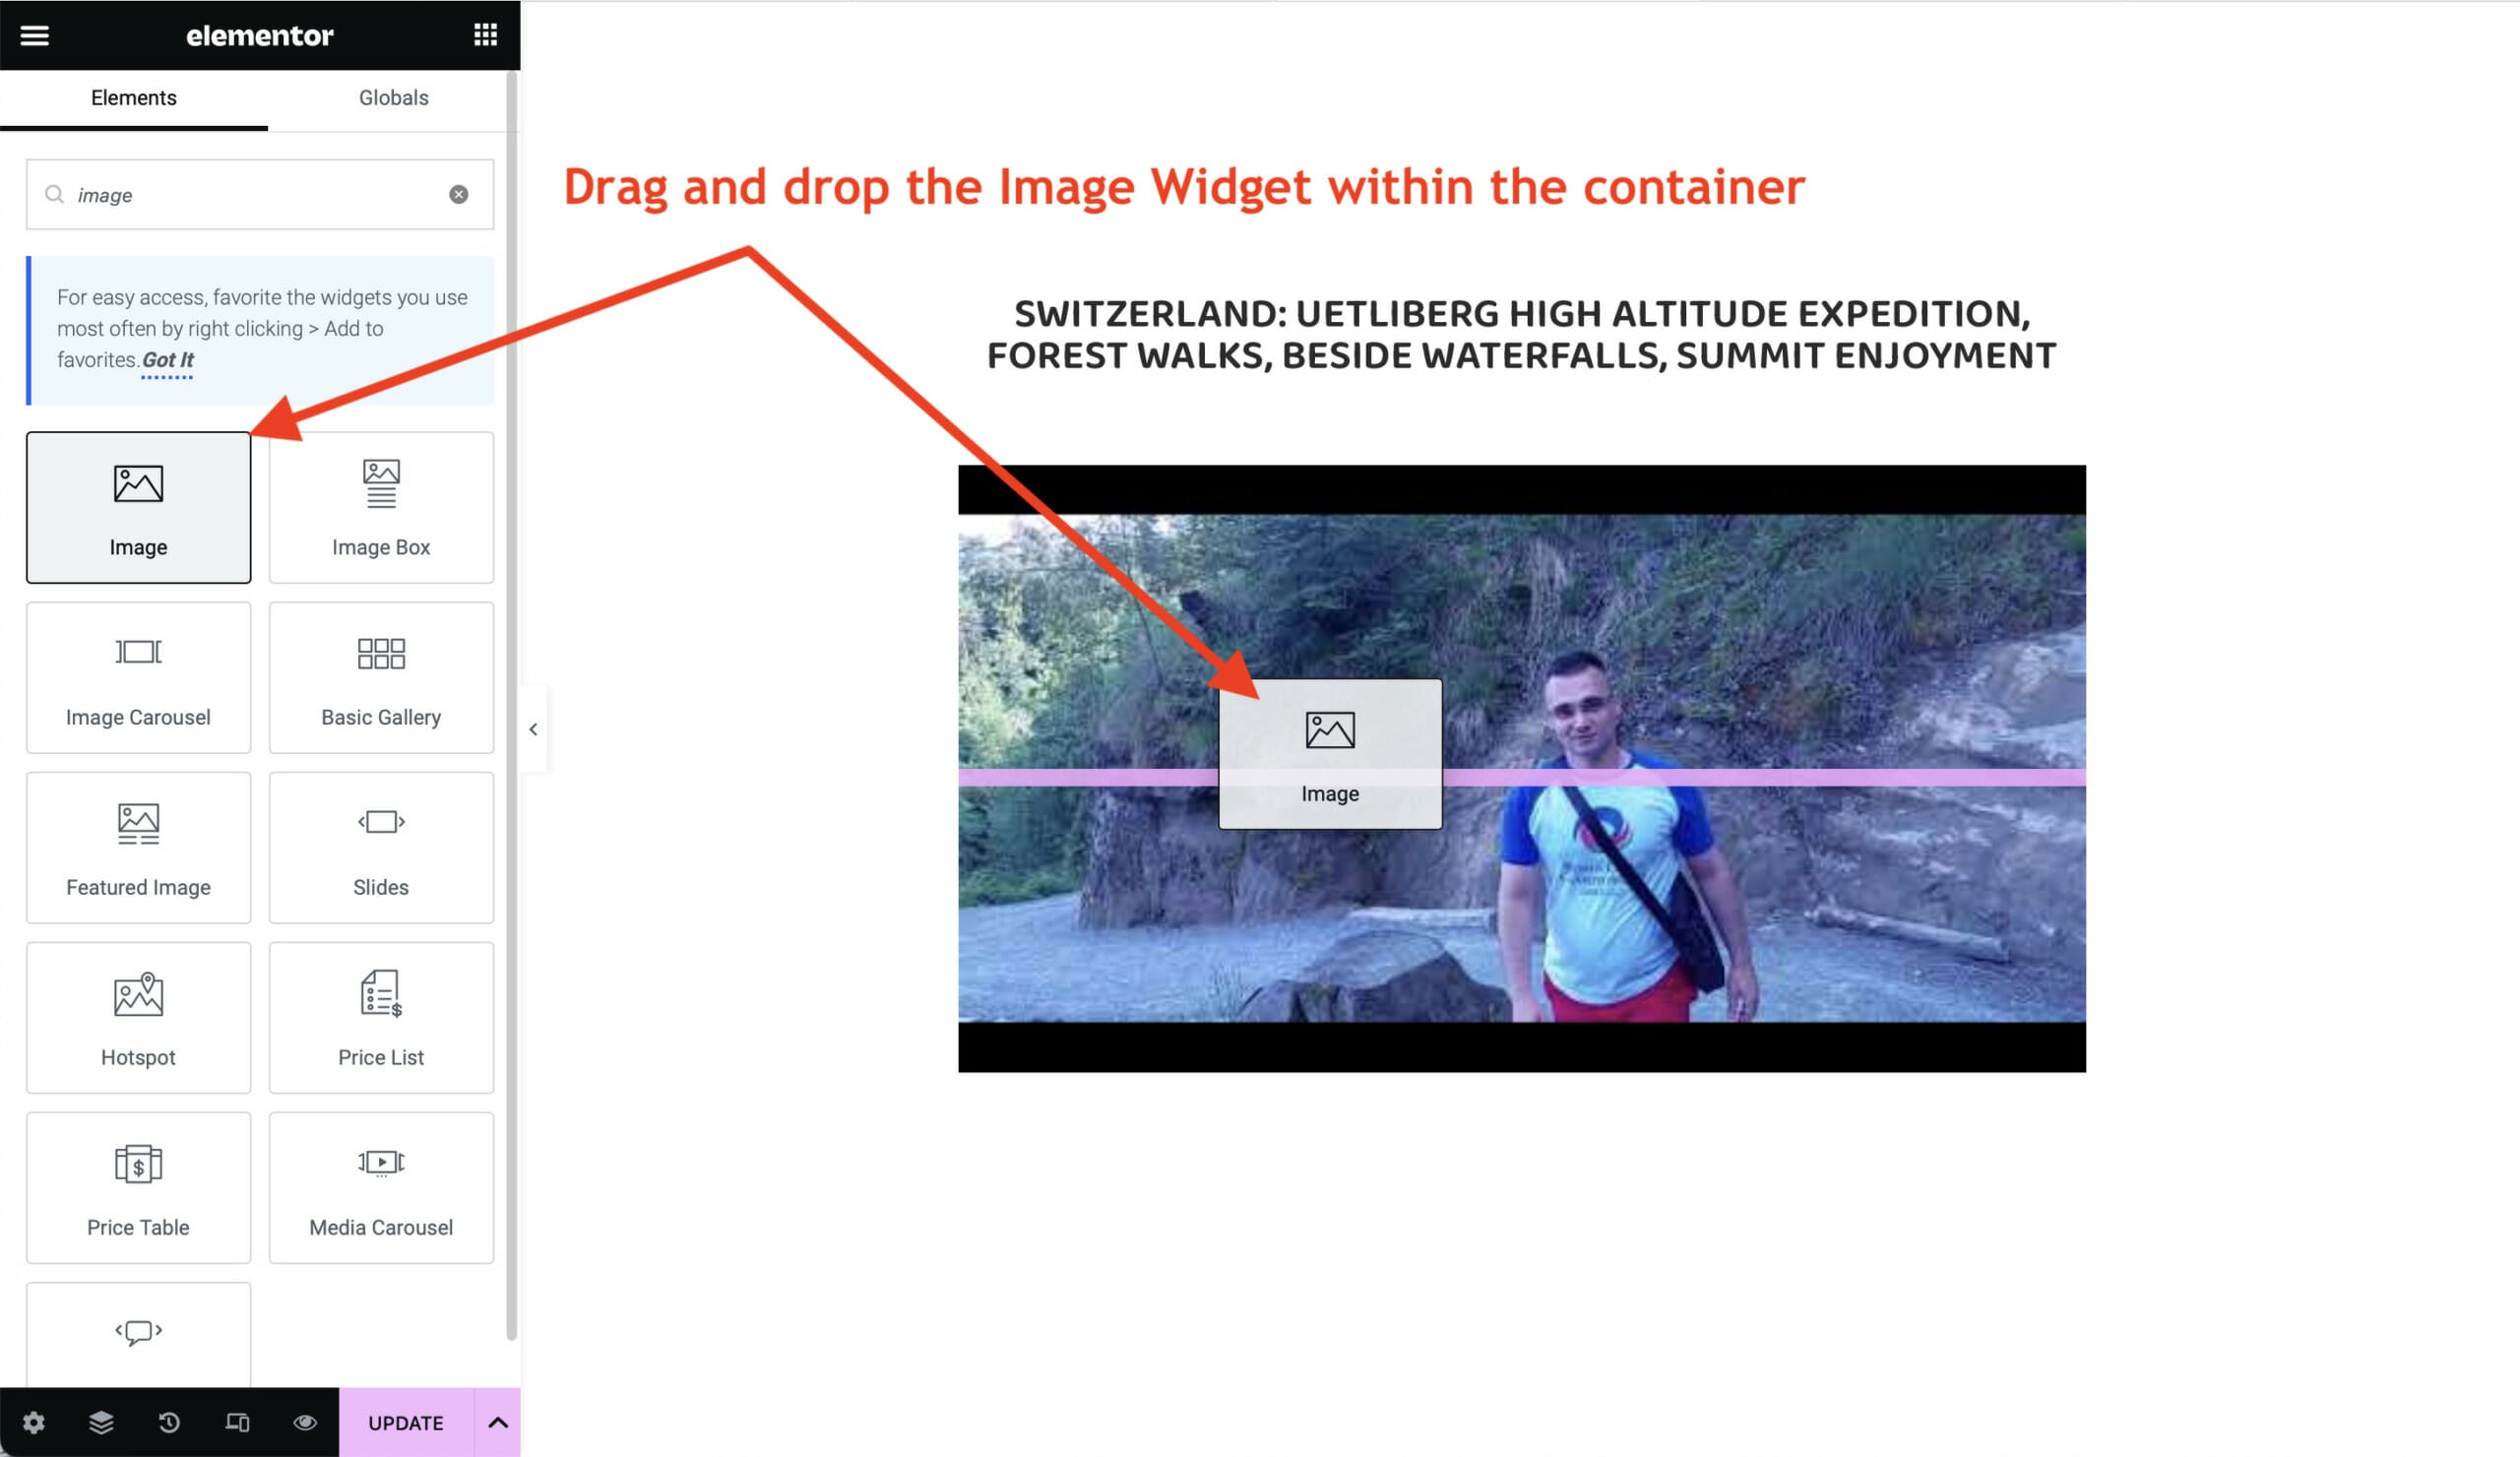
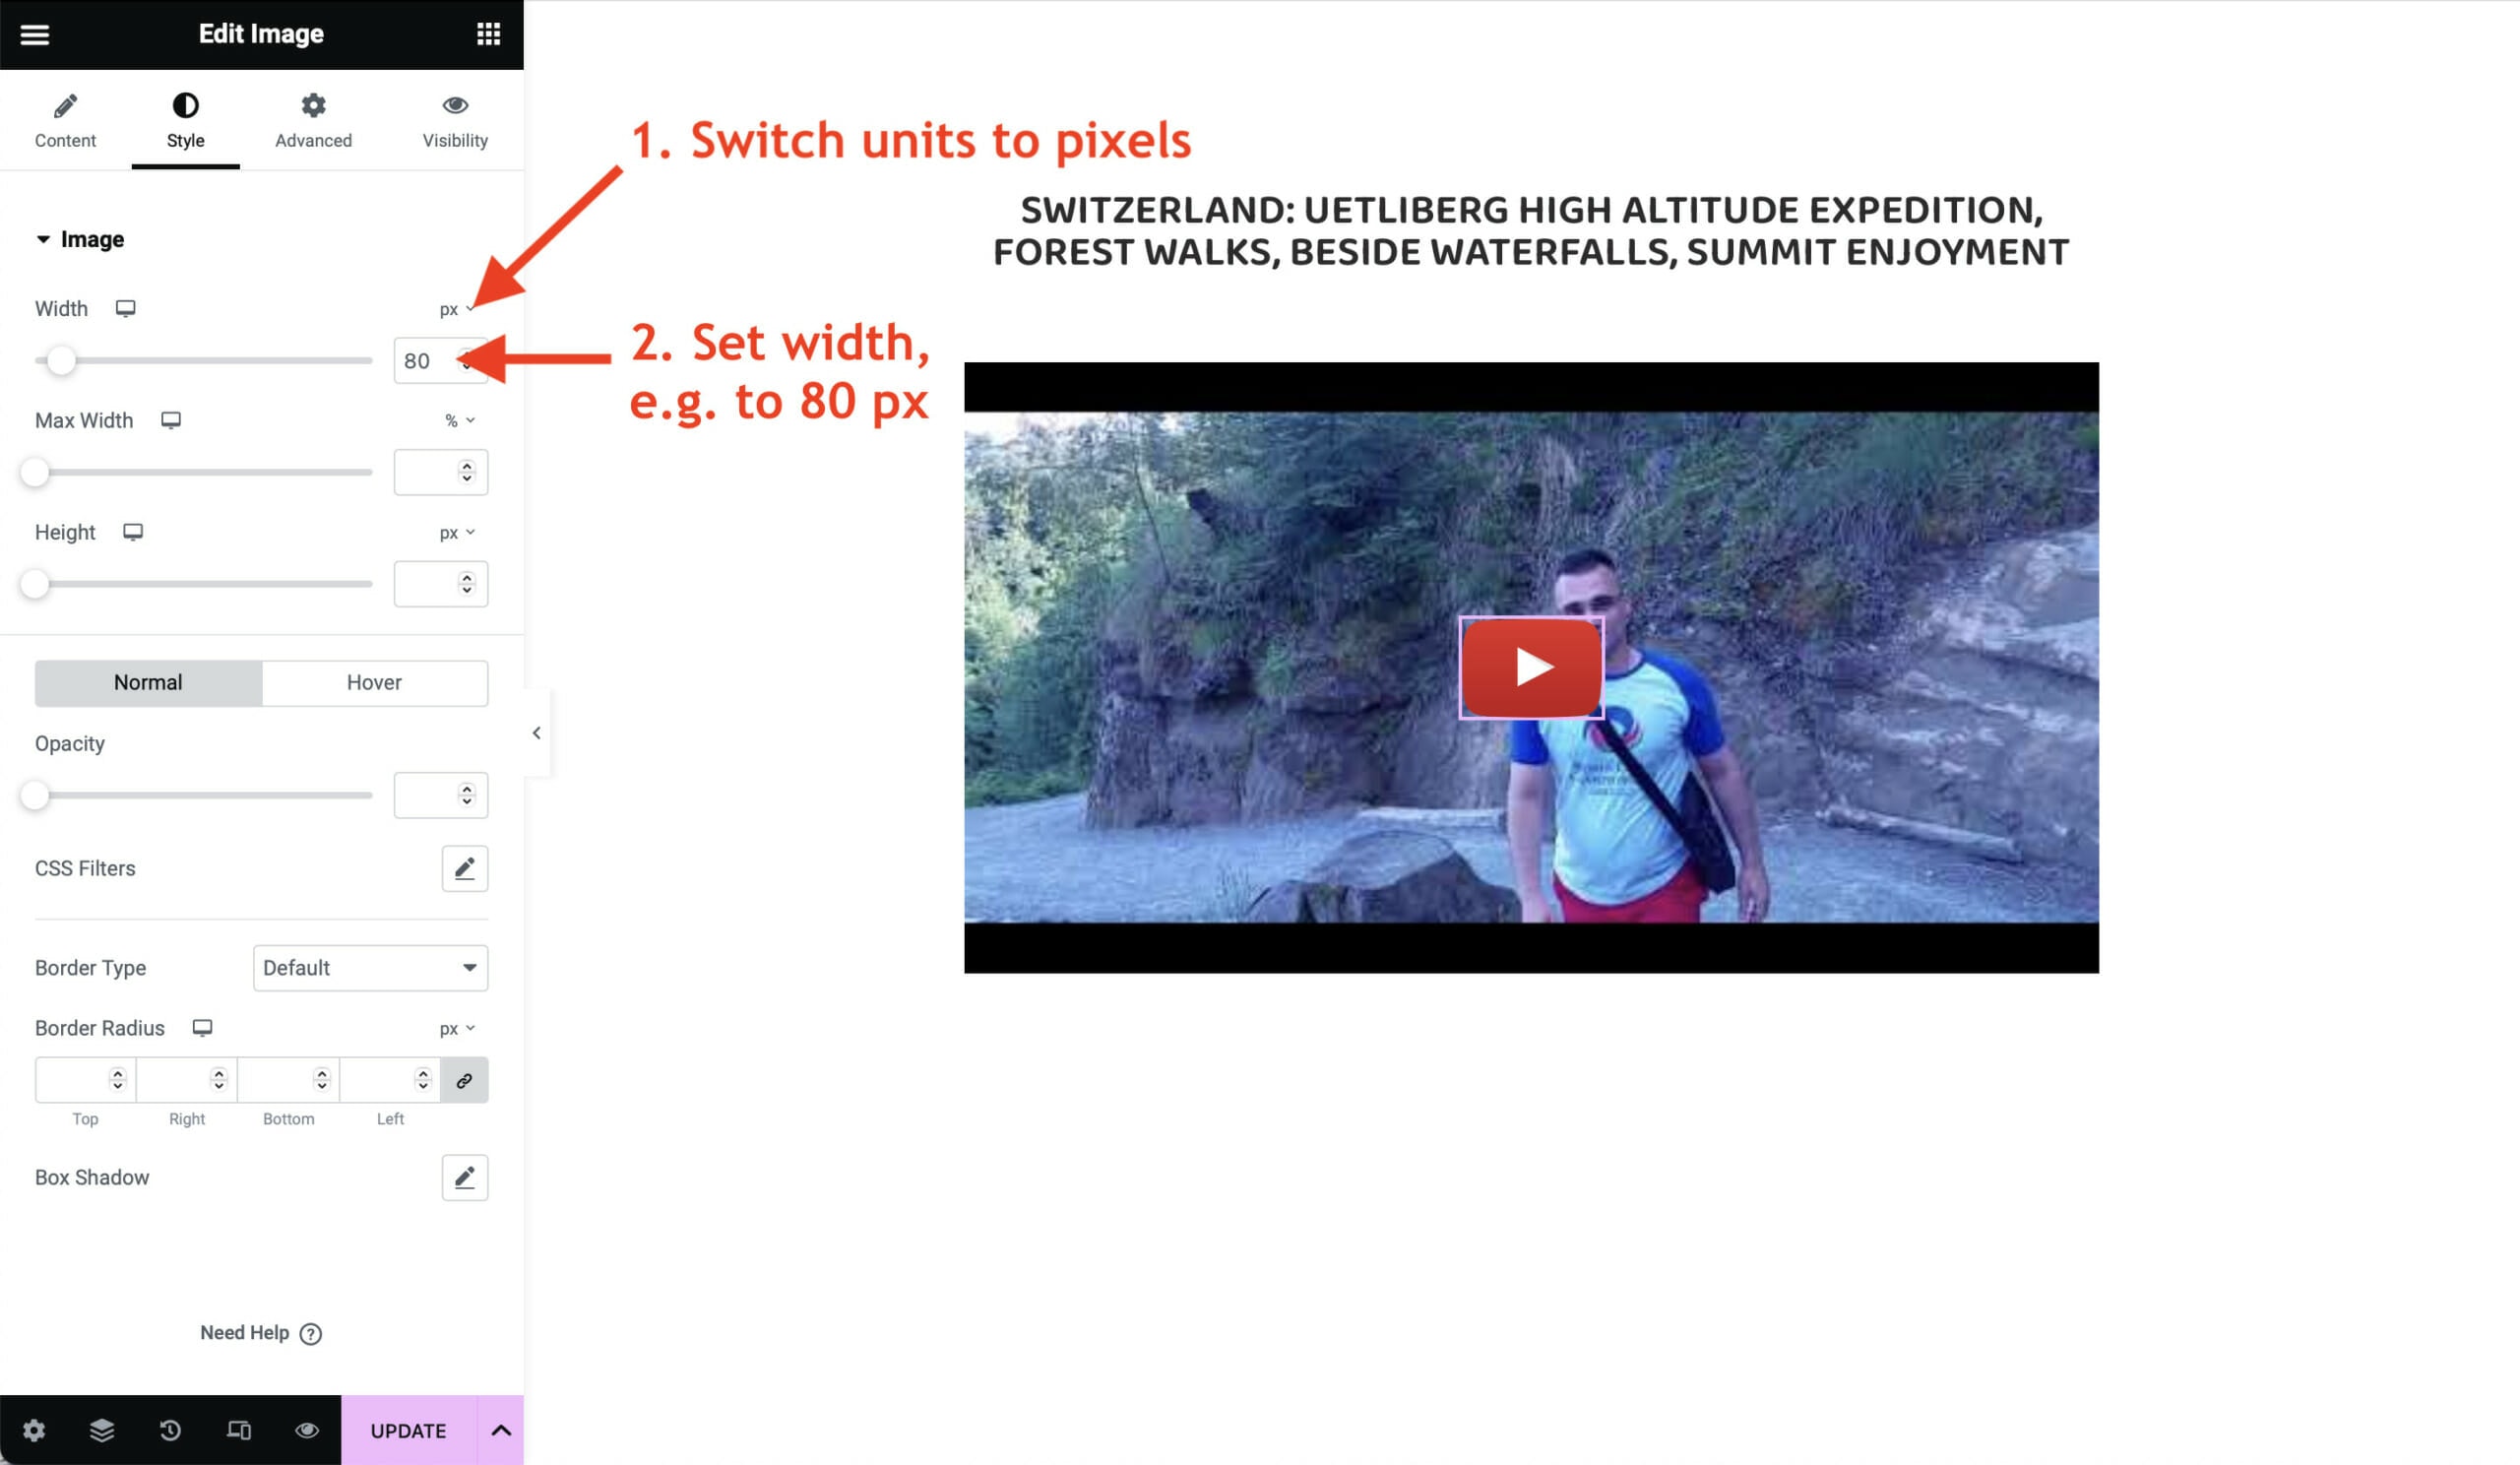
Now we just need to add a play button inside the container, so that it looks like a youtube video. For this, simply drag and drop the Image Widget inside the container with the featured image.
Click on Choose Image and upload a play button of your choice. For example, we used the standard play button which you can get here.

When uploading the play button image, it might at first appear larger than the image container, as shown below.
But don’t worry, we can easily fix this by clicking on the Style tab and setting the image width e.g. to 80px, as follows.
Optionally, you can add an animation to the play button, so that it enlarges when hovering over it with a mouse. You can click on Hover and select the animation, as shown below.

With this, we have finished embedding the video. If we want, we can also add some post meta as date and time, as shown in the following section.
For adding the date and time of the Video, we can simply drag and drop the Post Info Widget below the video.
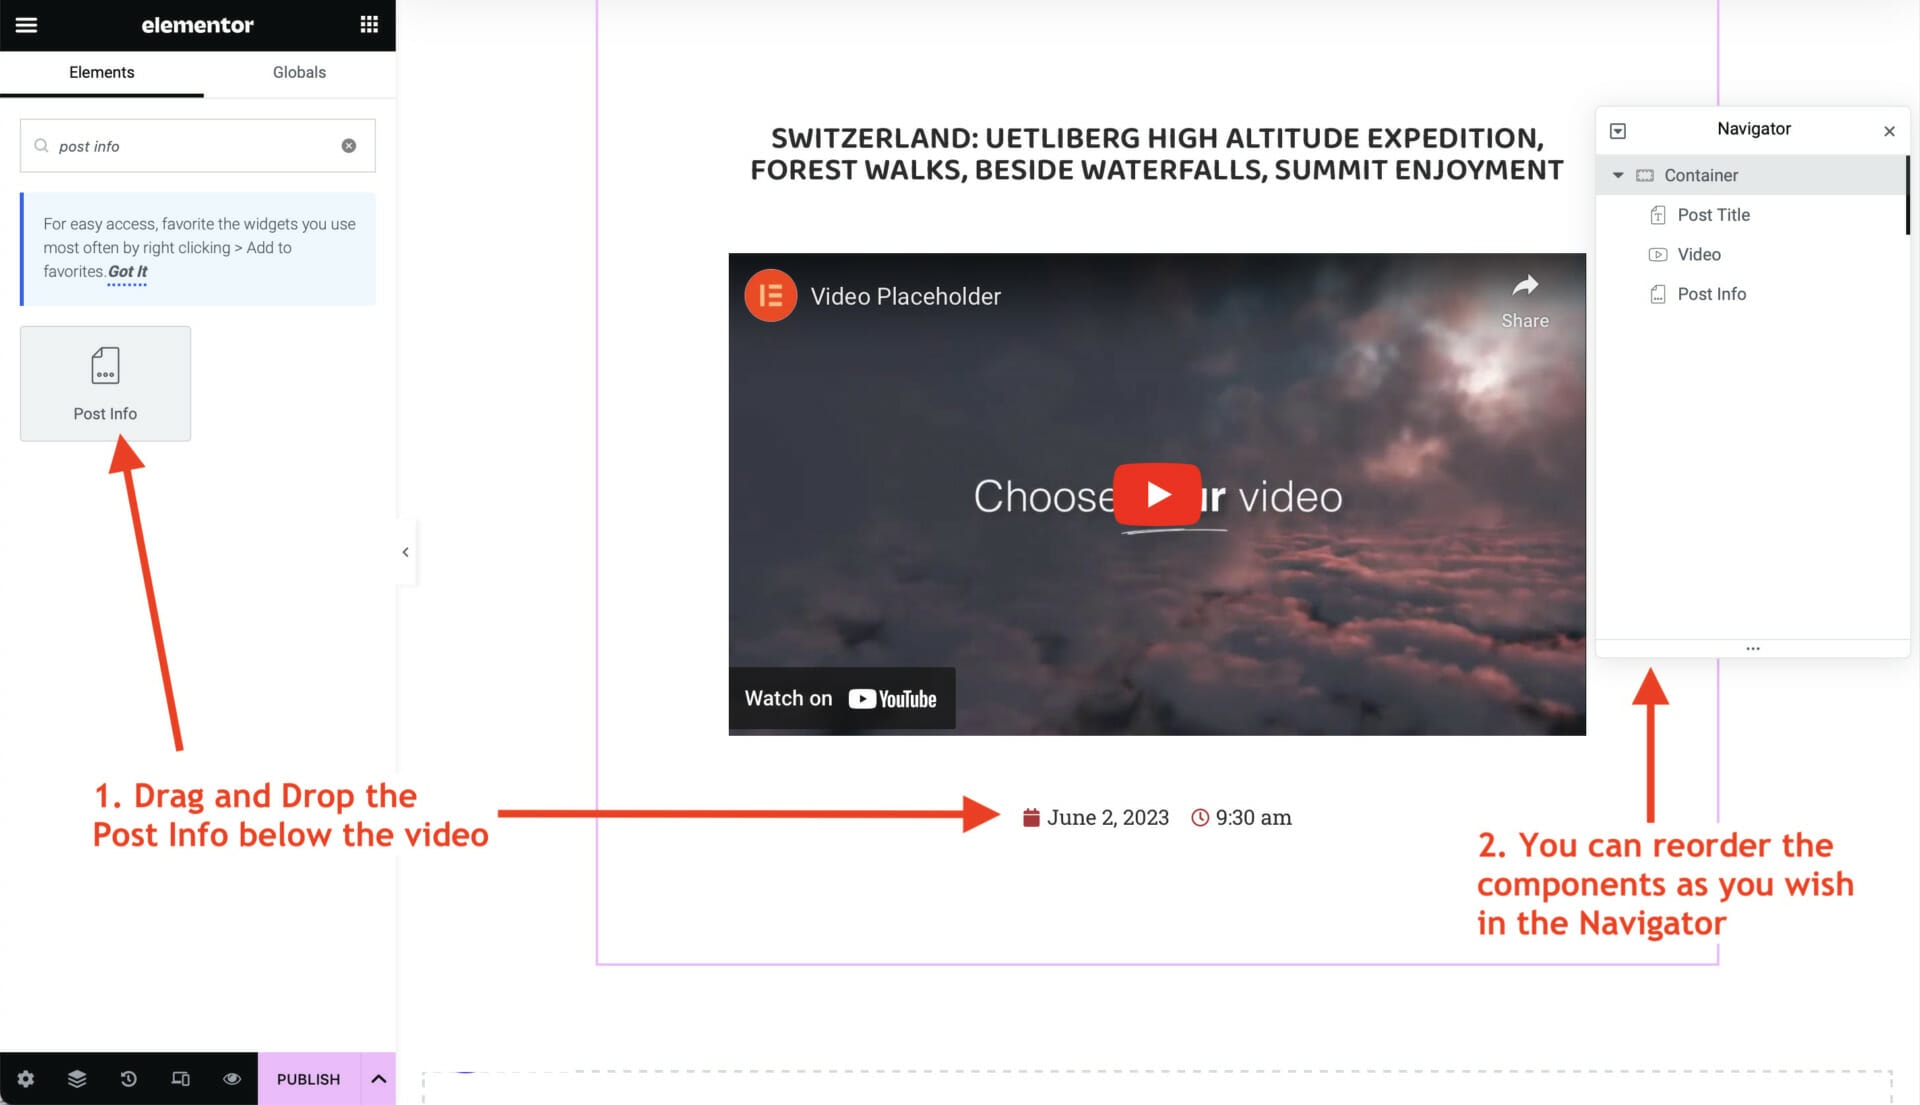
If you want to reorder the components, e.g. like putting the date and time right below the title, you can simply right click on the empty space and open the Navigator. In the Navigator box, you can drag and drop the components to change their order within the container.
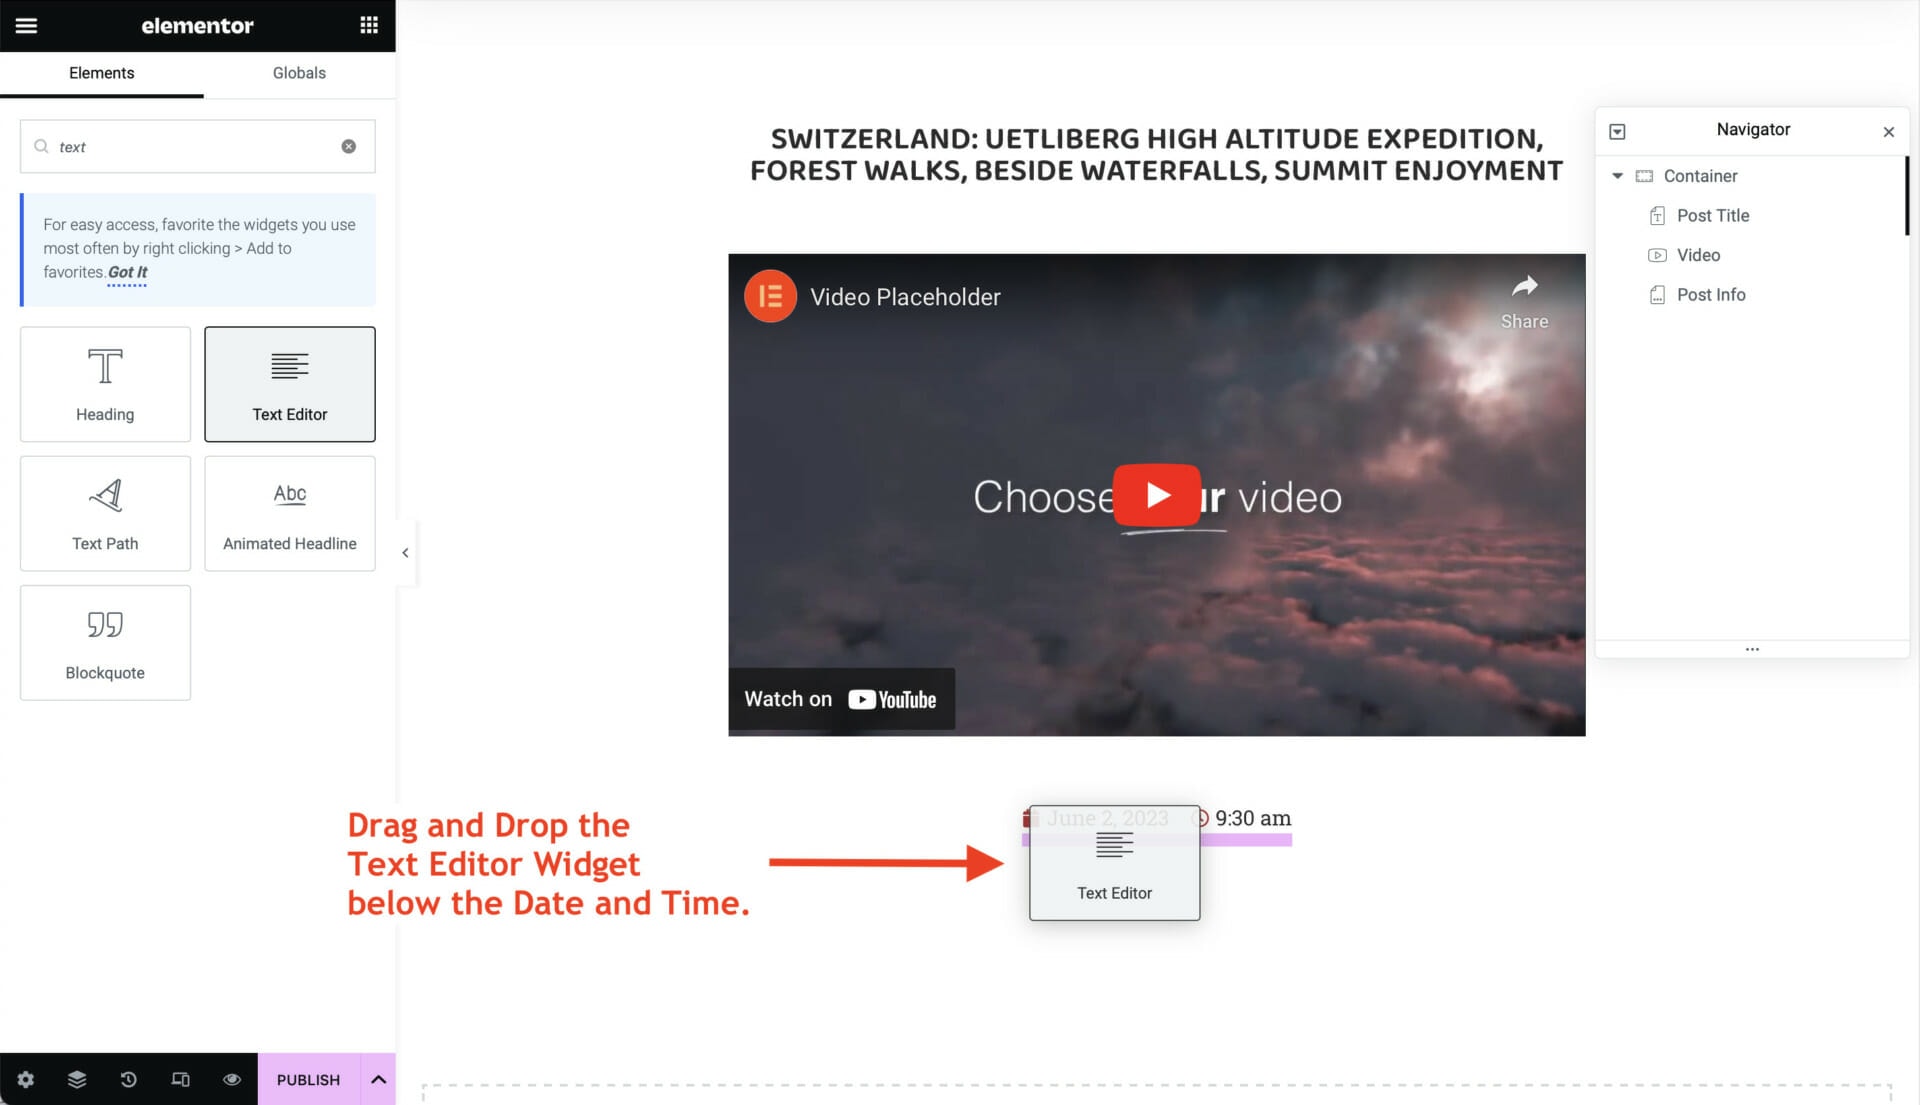
For the video description, we need to insert the Text Editor Widget below the Date and Time.
Now we need to set the the video description as the source of this widget. Since, the video description is saved as a custom post field “youtube_description”, we need to choose the Post Custom Field as the text source, as shown below.
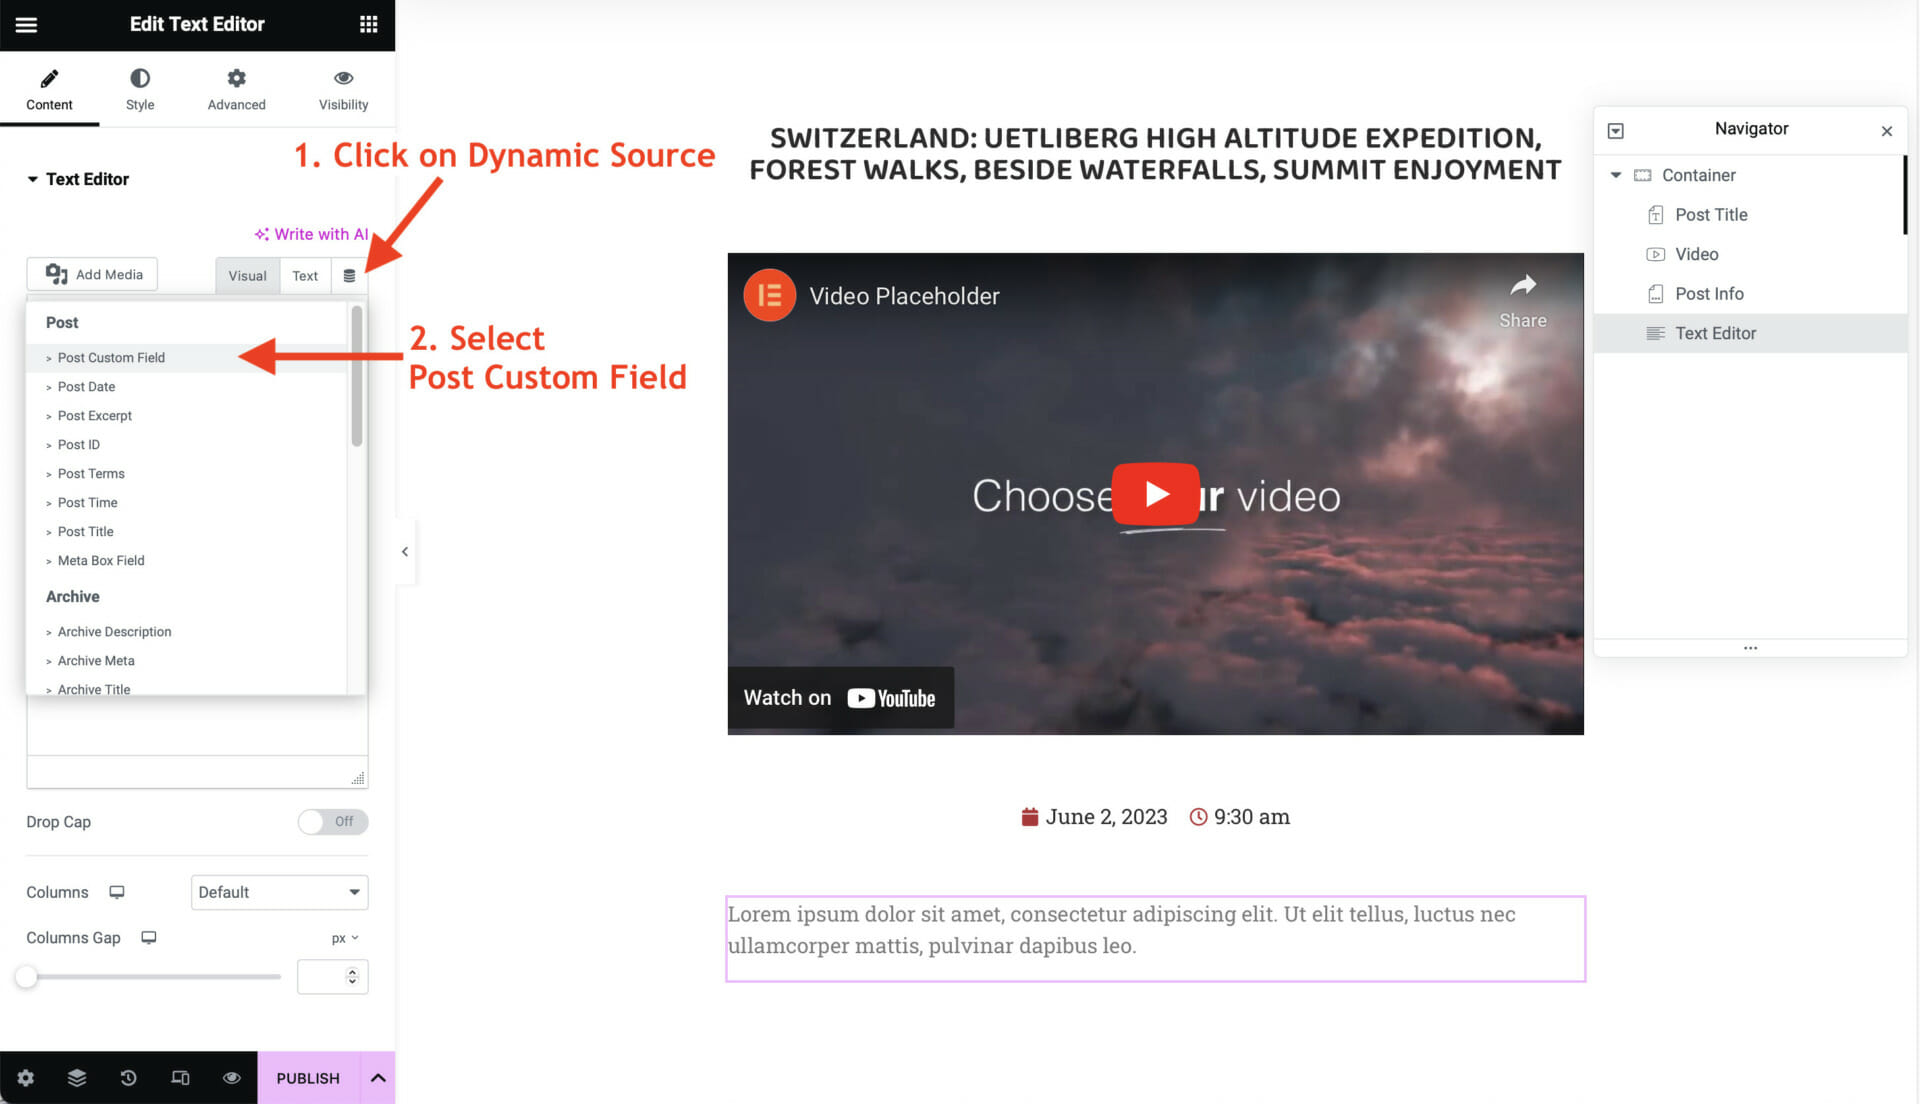
Now we need to click again on the Post Custom Field to open its settings popup. In the settings popup, we need to write “youtube_description”, since this is the name of the custom field where the video description is saved.
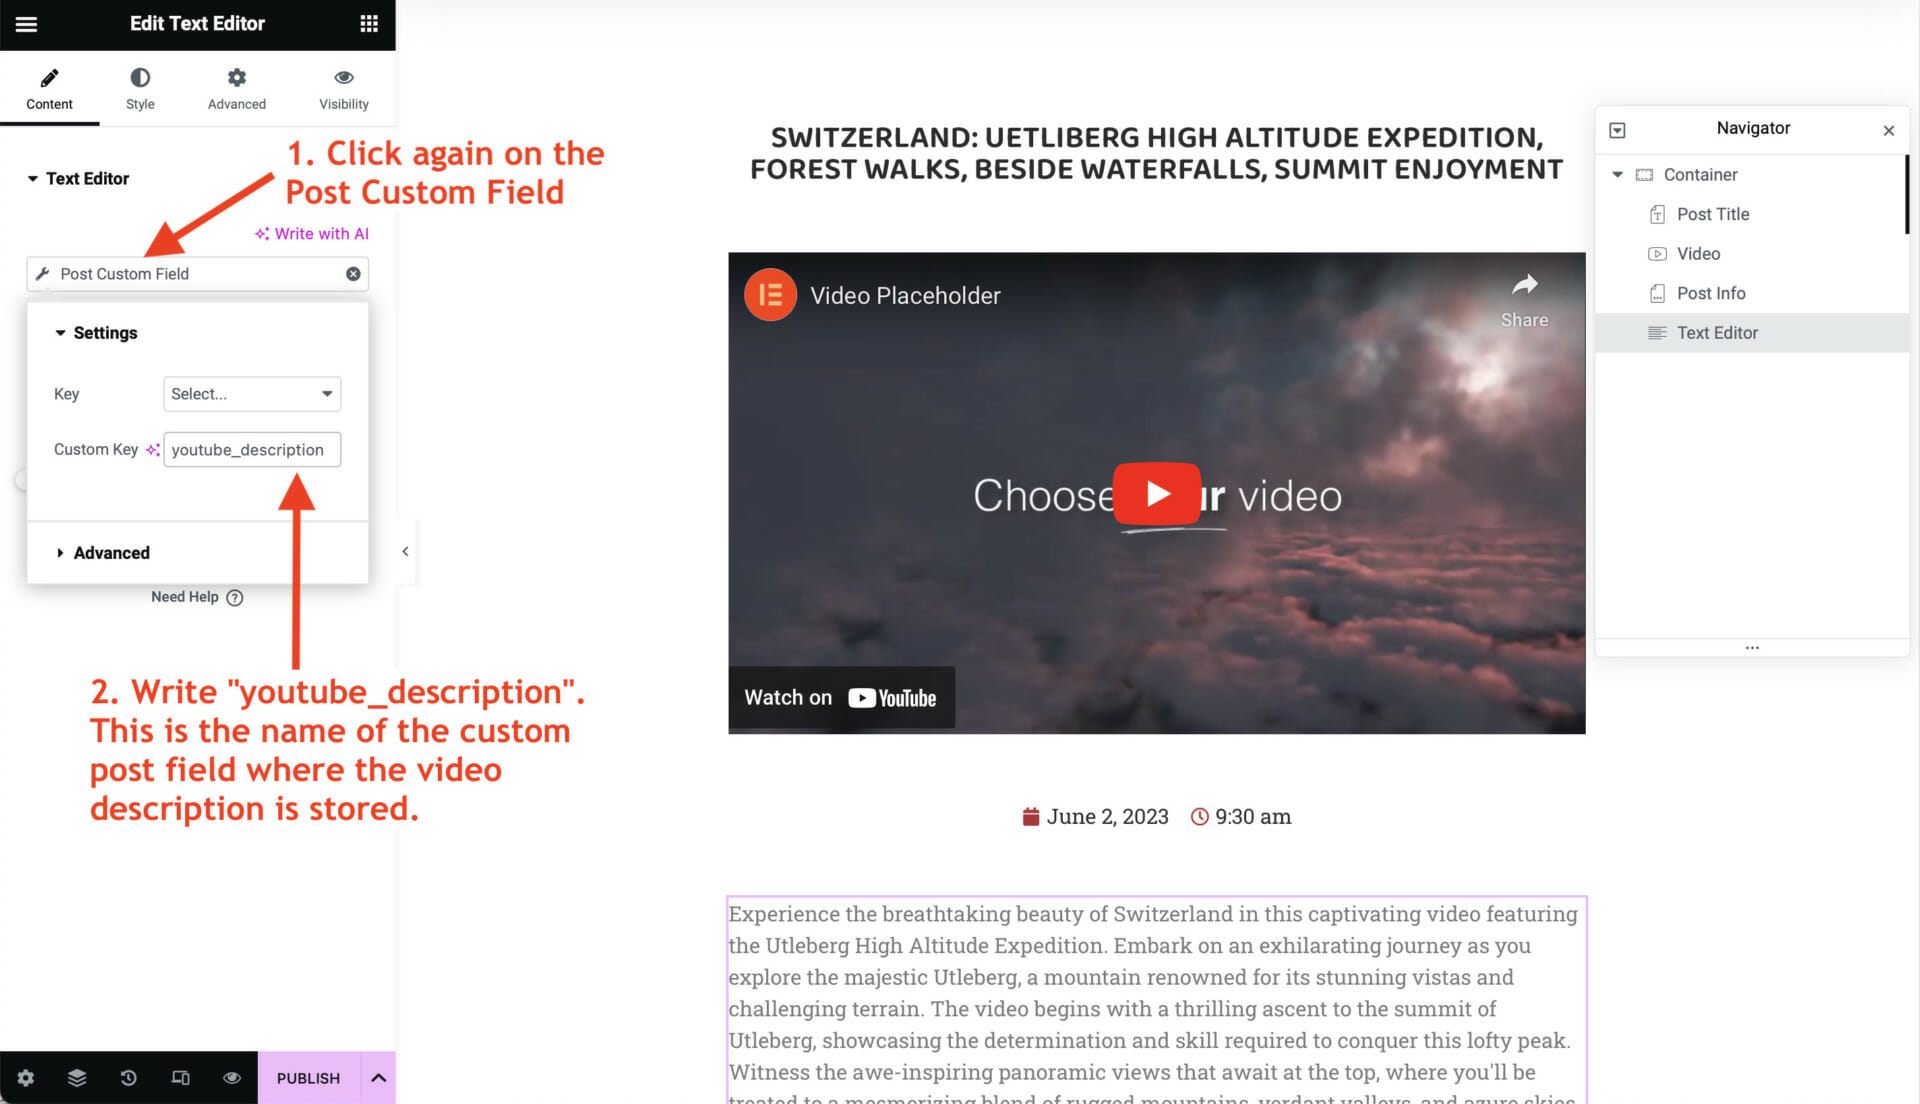
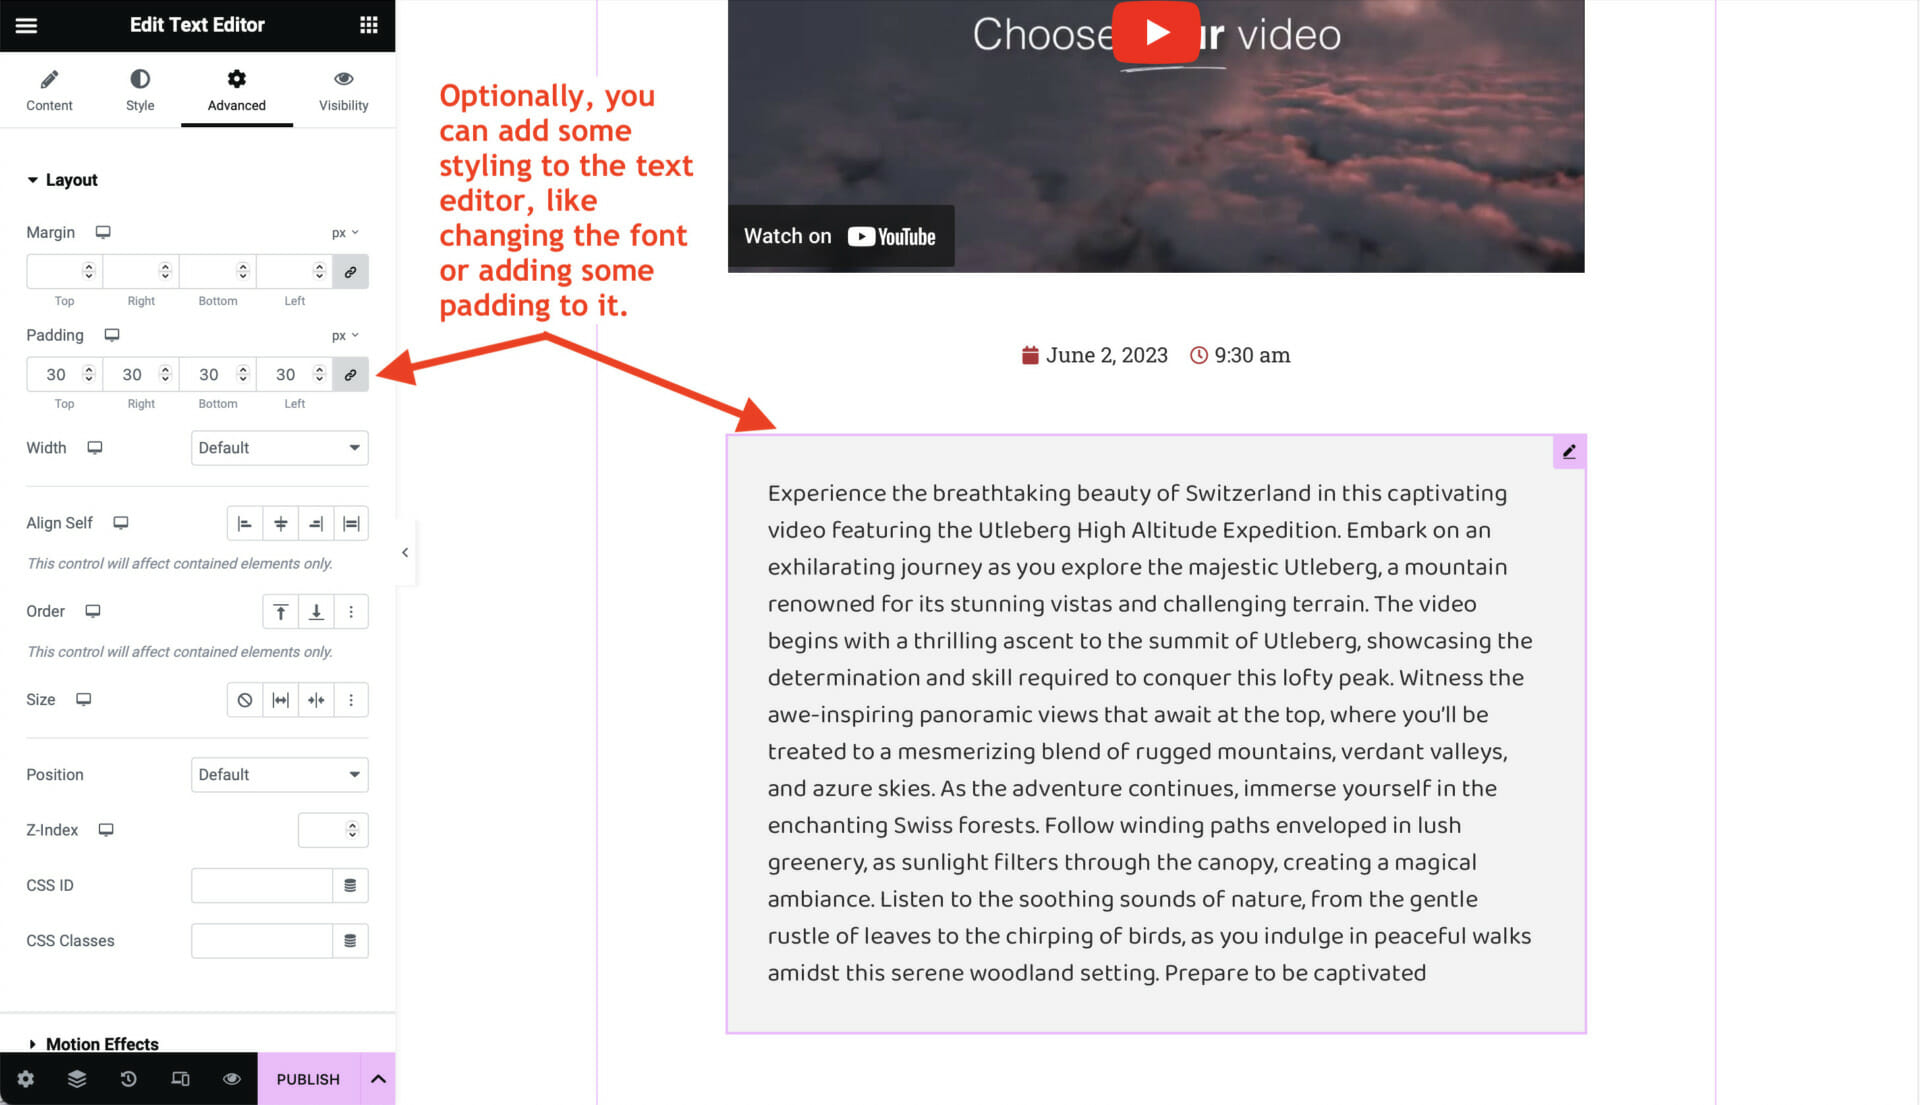
You will notice that the video description immediately appears in the text editor. If you want, you can now style the text editor. You can modify the font, the background and potentially add some padding, as you wish.
Finally, we can publish the template by clicking on “Publish” in the lower-left corner.
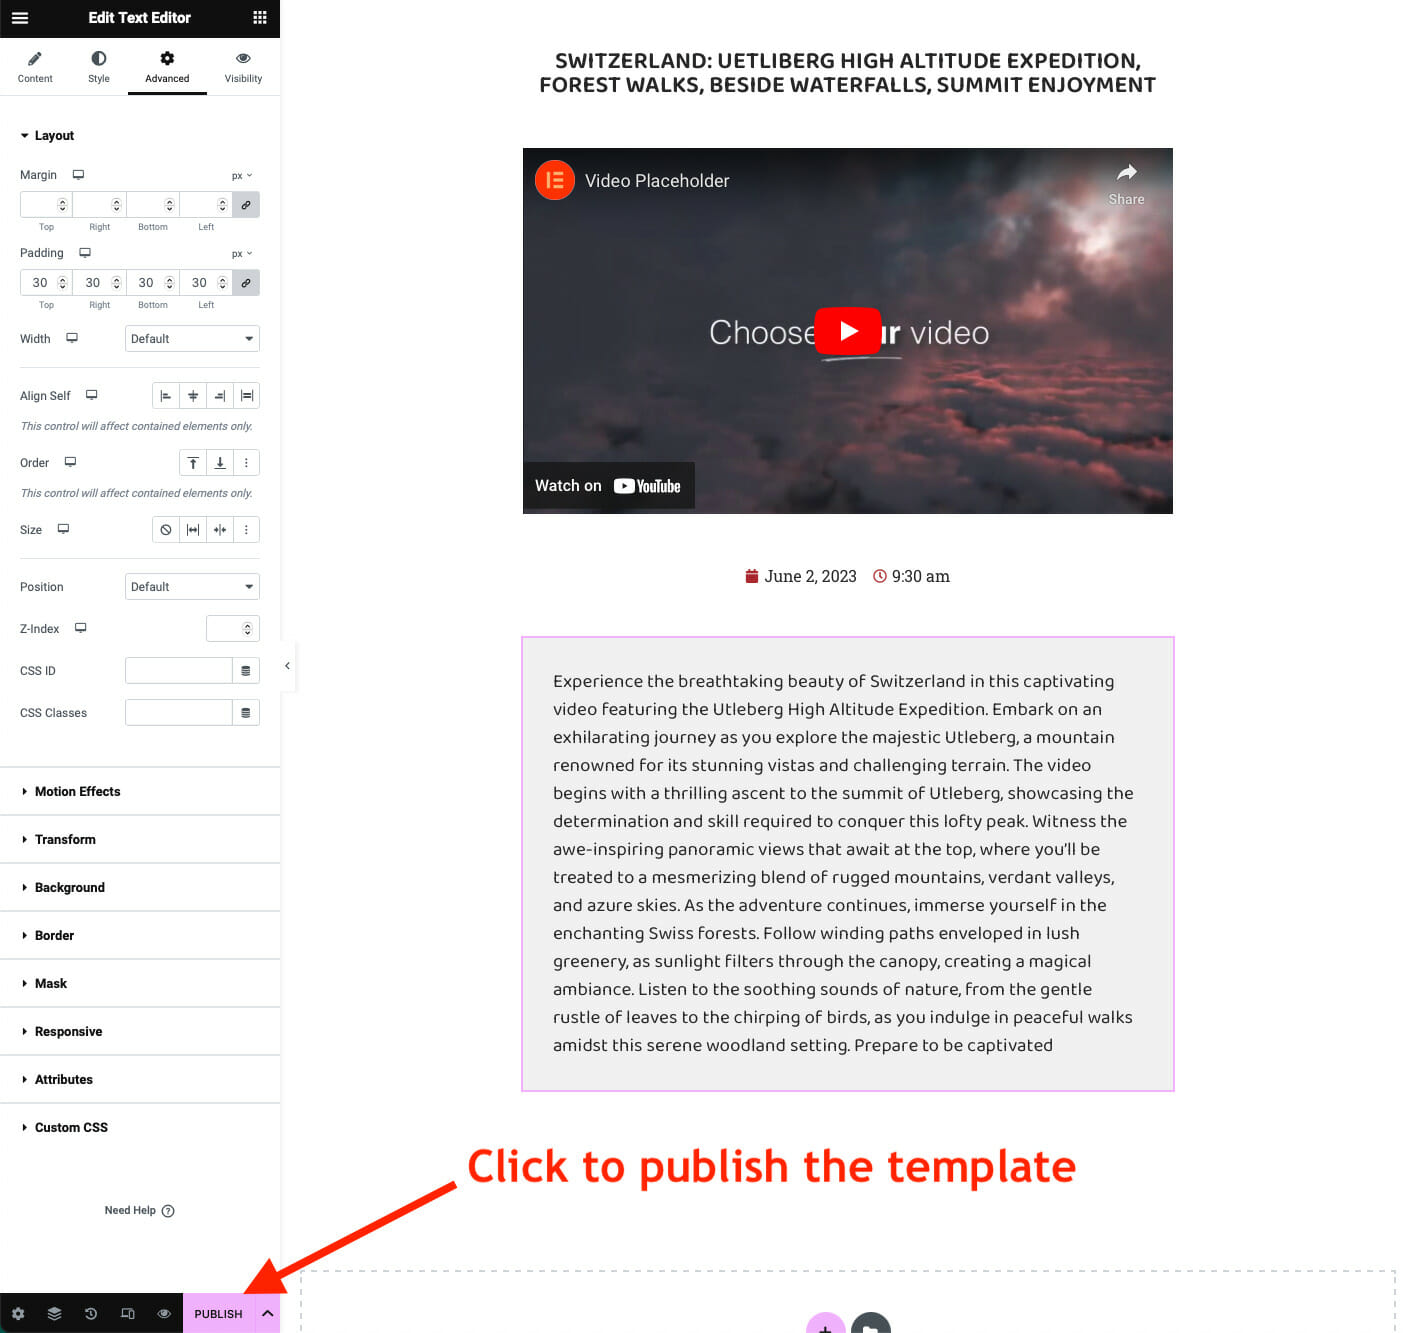
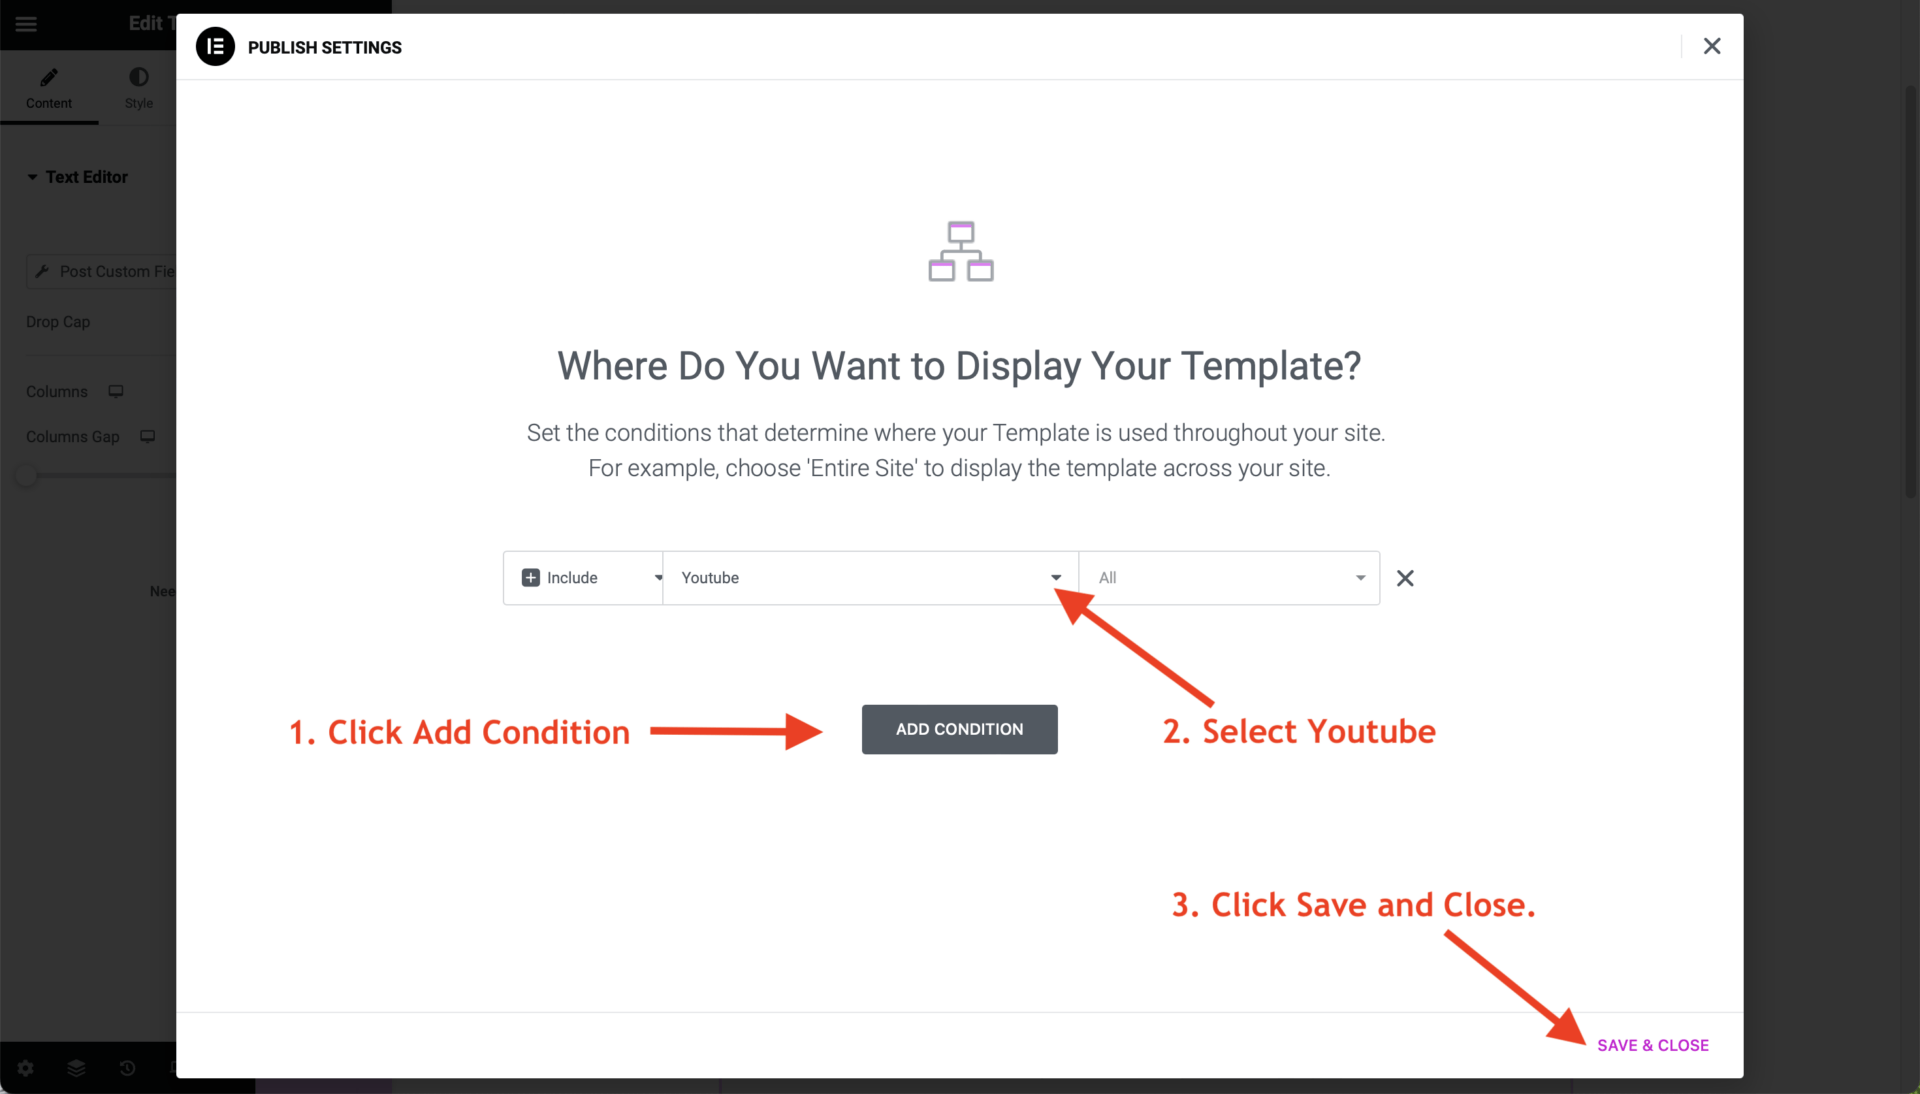
After publishing the template, a new window will pop-up where we need to specify the display conditions for this template, i.e. to specify when this template is to be applied.
Since we want to apply this template to Youtube post type, we need to click on Add Condition, then select Youtube from the dropdown menu and click on Save and Close.
In this article we have described how you can design your own templates for YouTube video posts. The main take-away here was that he video URL is given by shortcode yt2posts-url (with brackets) and the video description is stored in the custom post field called youtube_description. Everything else was just adding standard post widgets.