Warning: The newer version of this page can be found under Cards Layout – Elementor. This page will soon be removed since some of its parts are outdated.
YT2Posts plugin keeps converting the latest videos from your YouTube channel into WordPress posts. This means that showing the YouTube videos on your Elementor website, becomes as simple as using the Elementor’s Posts widget, as with any other posts. The biggest advantage of this approach is that it let’s you use Elementor’s built in widgets and features like lazy loading, without adding any additional bloat. Let’s see how it works!
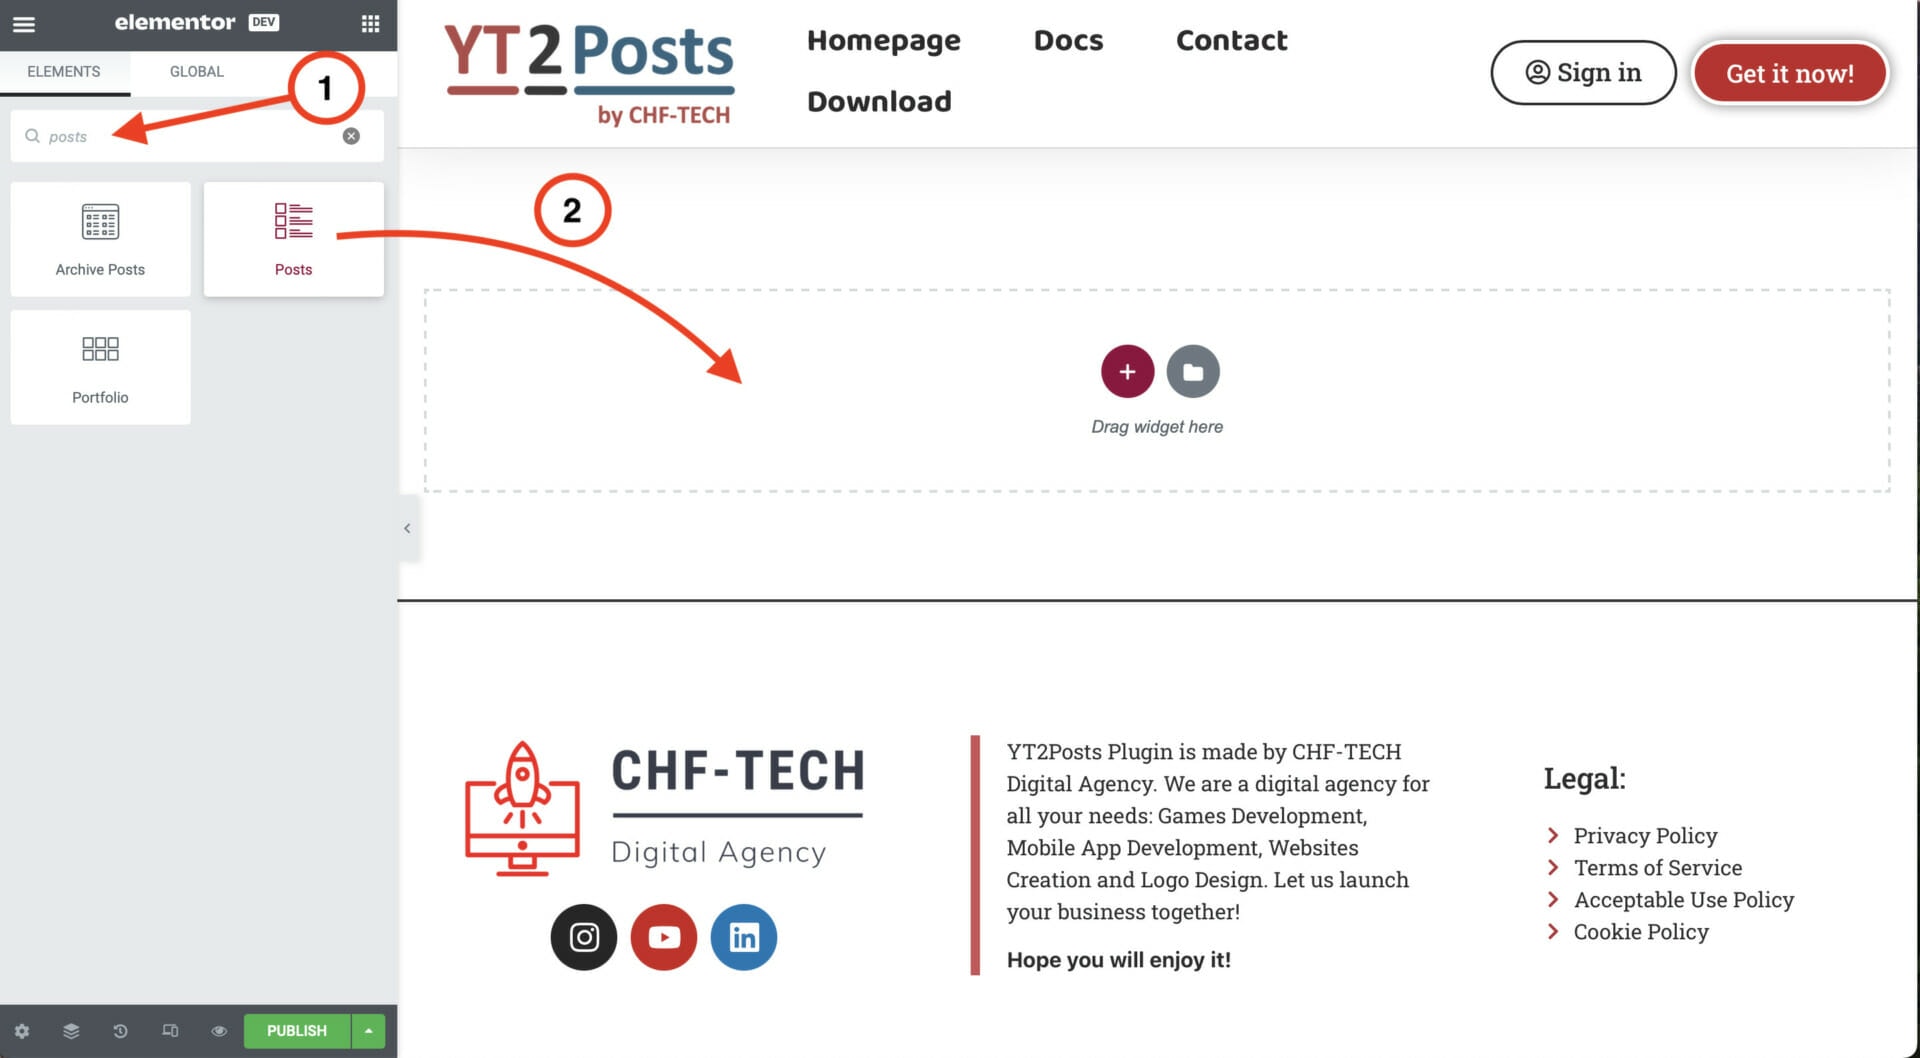
Open up an Elementor Page where you want to showcase your YouTube videos. In the widget section on the left search for “posts” and click enter. Then drag-and-drop the Posts widget to the page area, as in the image below.
In the layout subsection on the left, you can choose the skin — we chose the “Cards skin” in this example.

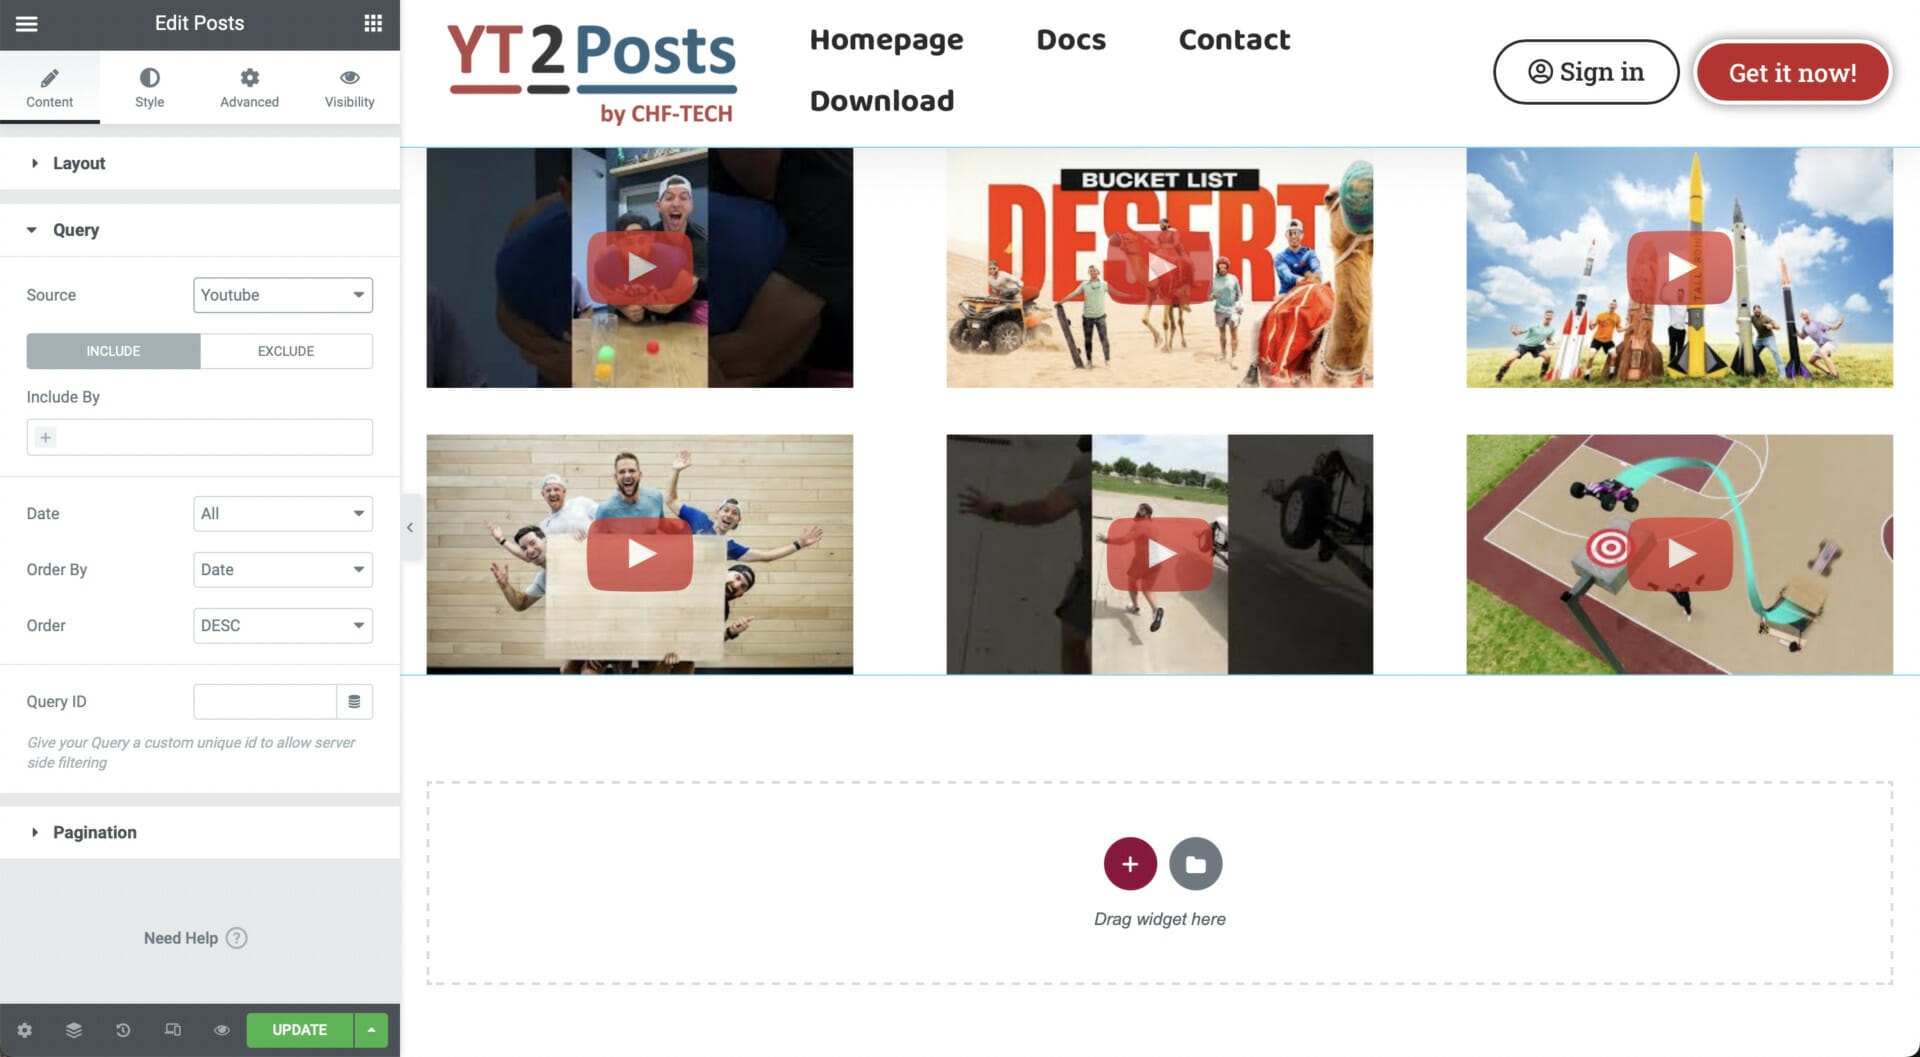
Then, in the section on the left scroll down and click on the “Query” subsection. In the “source” field, choose “Youtube” as the post type we want to show in this widget.
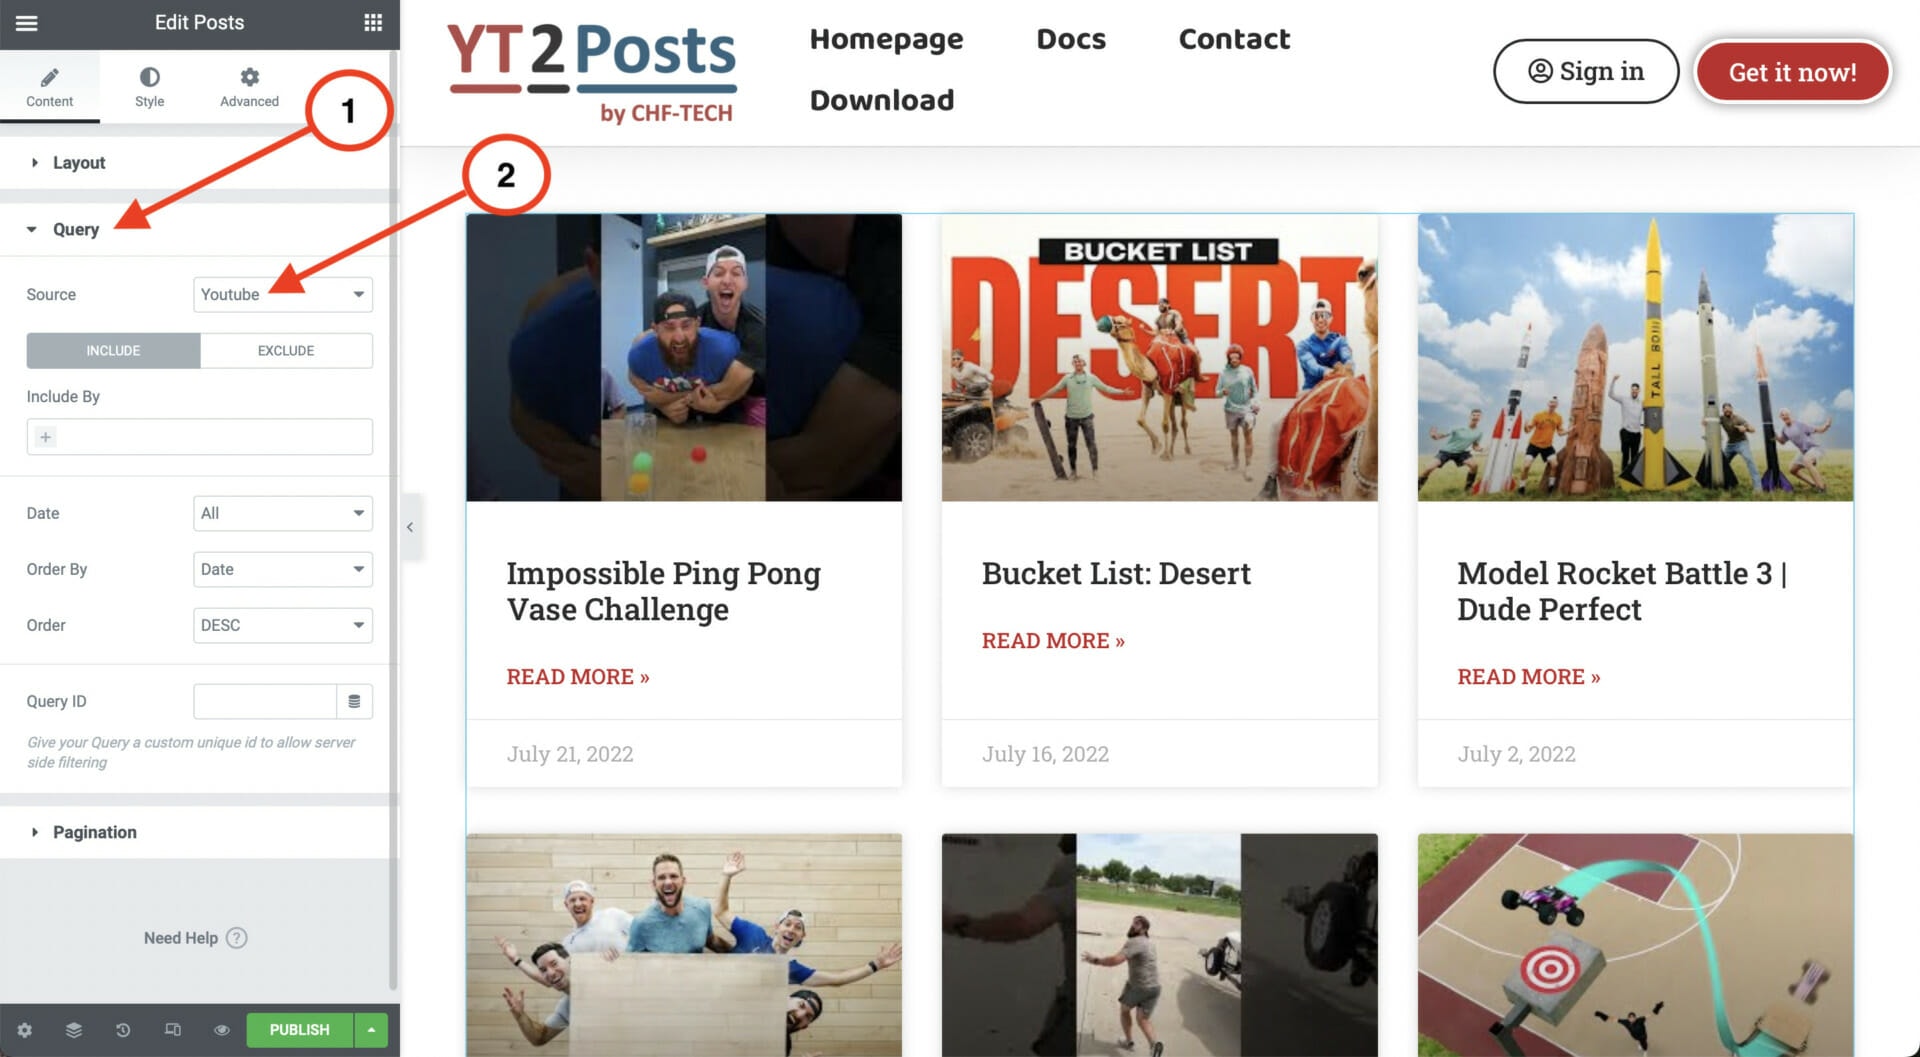
That’s it, on the right, your youtube videos will show up! You can keep styling your Elementor page as you wish. And the best part is — YT2Posts will always make sure only the latest videos from your YouTube channel will be shown!
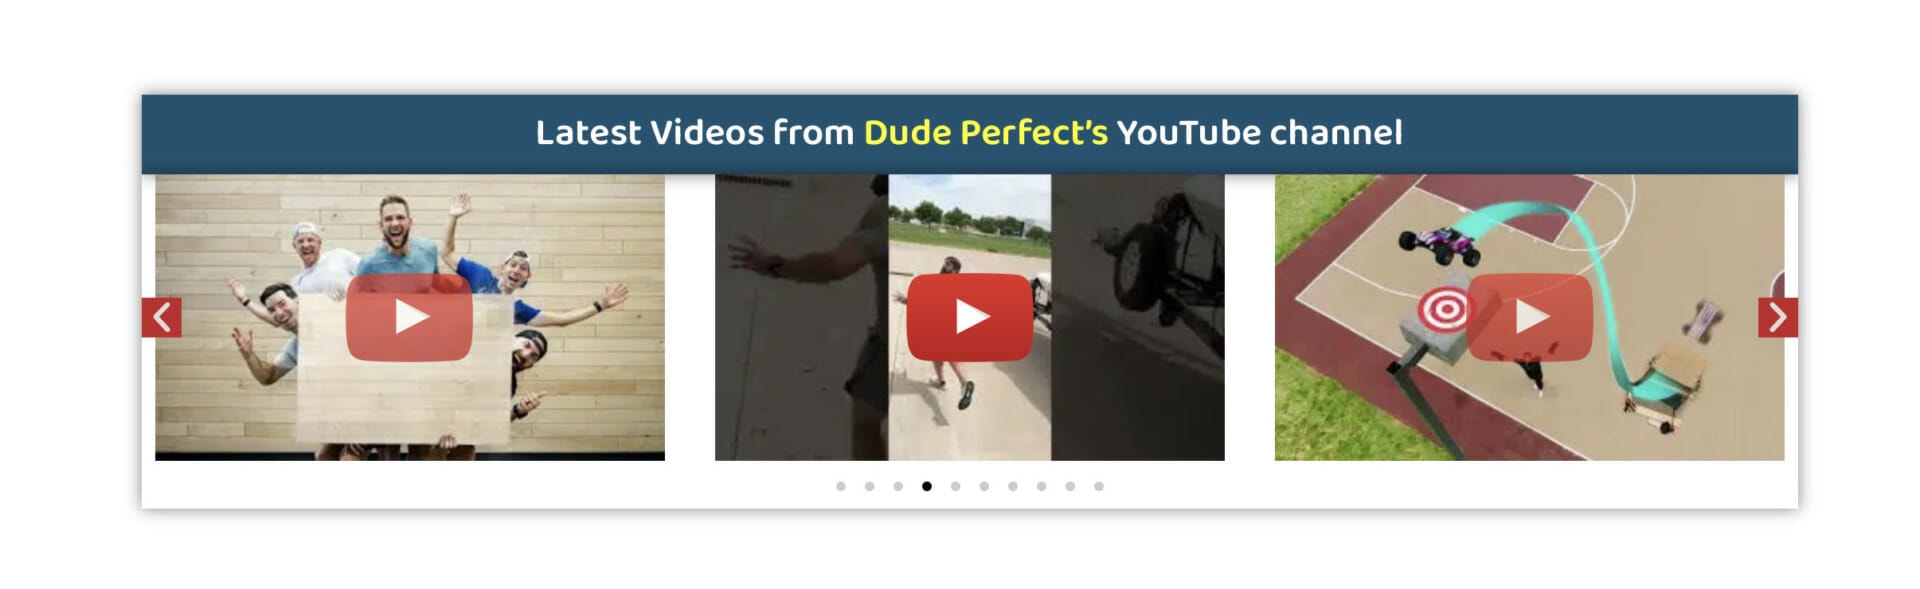
Let’s assume that you want to showcase your videos with a play button, as in the image below.
For this, we can use the Ele Custom Skin Plugin, or any other Query Loop Builder, which lets us design how a single post (in this case a single video) should be shown, which is then applied to all posts (i.e. videos) within the elementor’s posts widget.
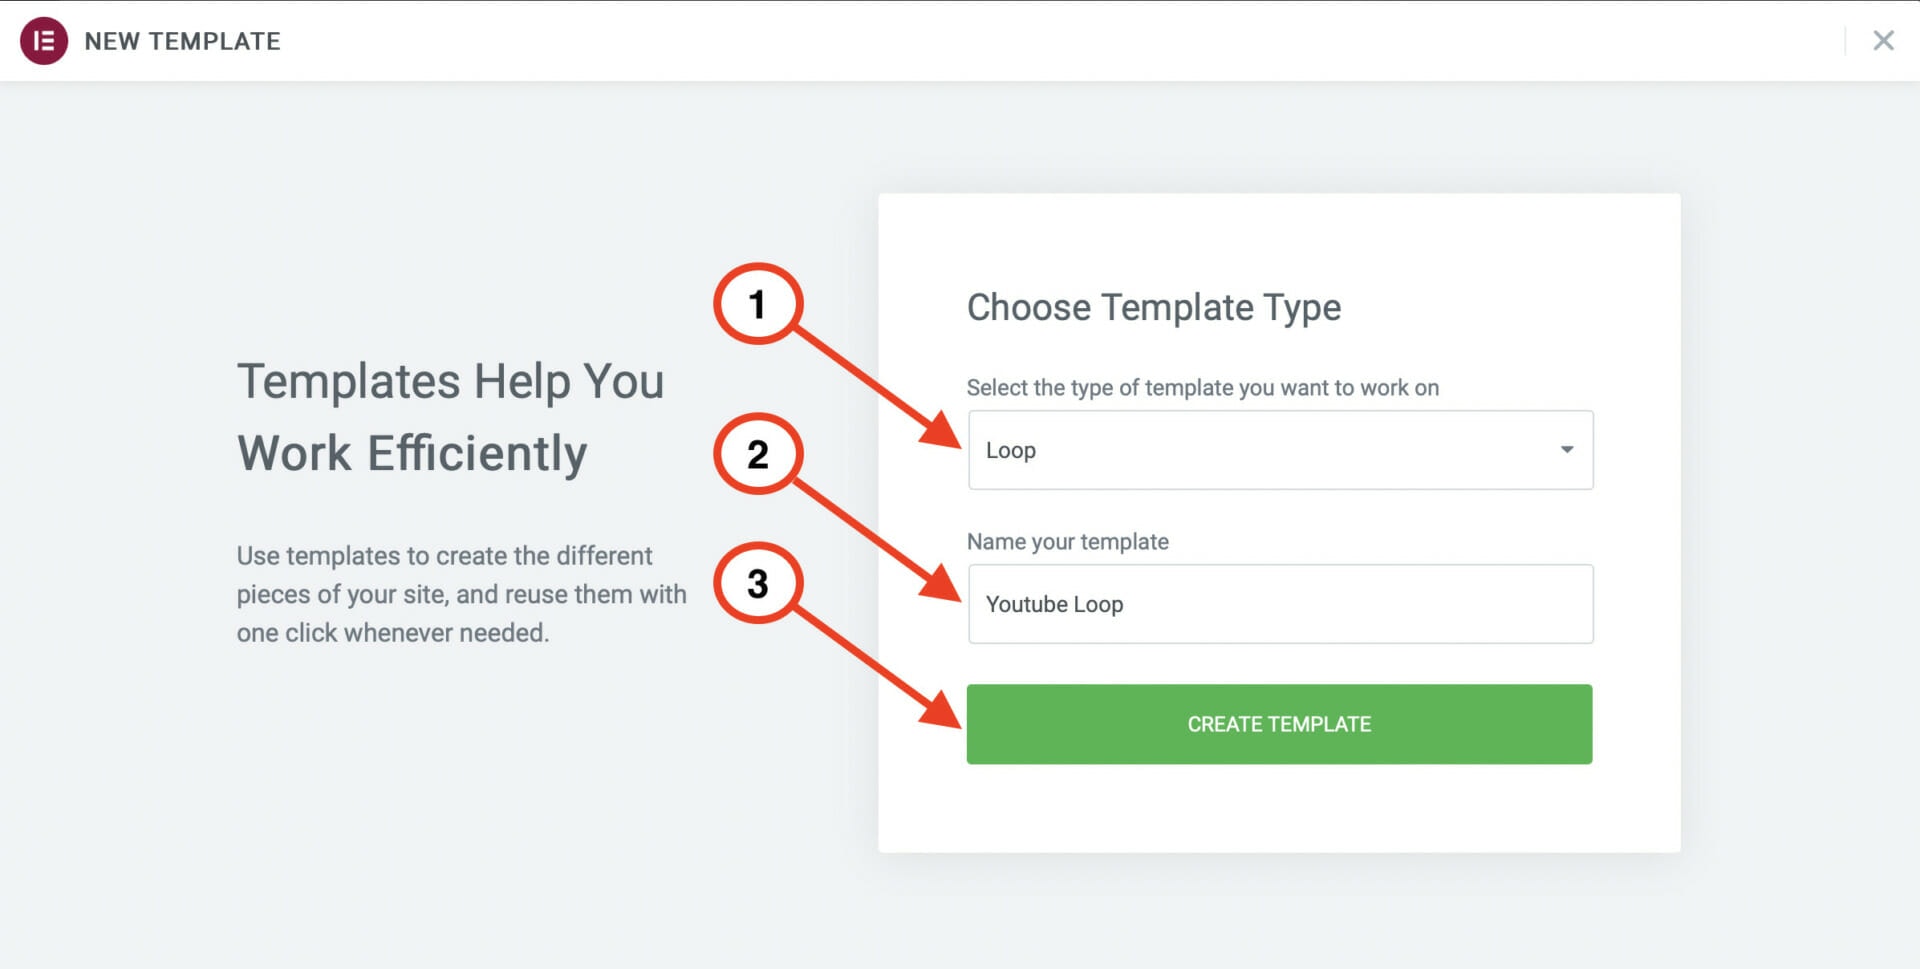
After installing this plugin, let’s start by creating a new Loop Template in Elementor, where we will design how a single video should be shown. The “Loop” template type will only appear as an option after installing the Ele Custom Skin plugin. You can name the template as you wish, e.g. “Youtube Loop“.
After clicking on the template settings in the bottom-left, choose Youtube post type for preview and type the title of any of your current videos. This video will be used for preview of our design.
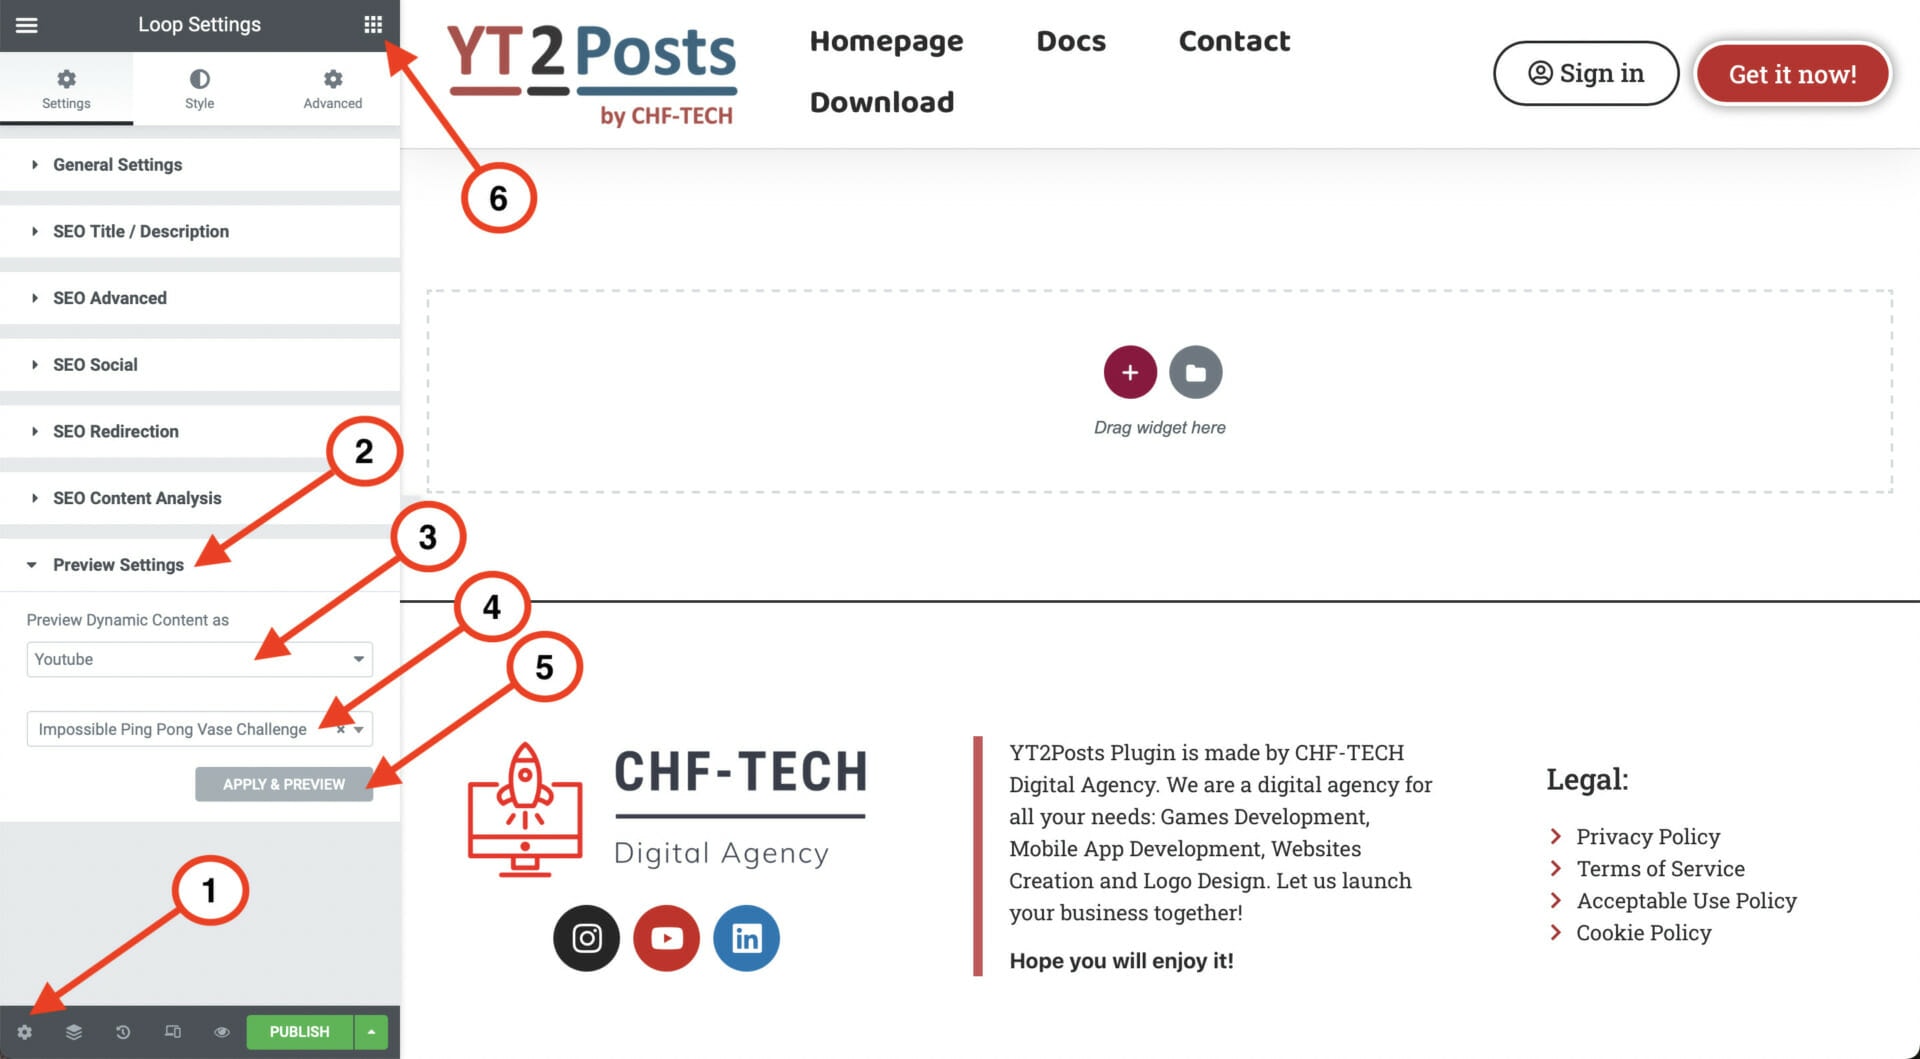
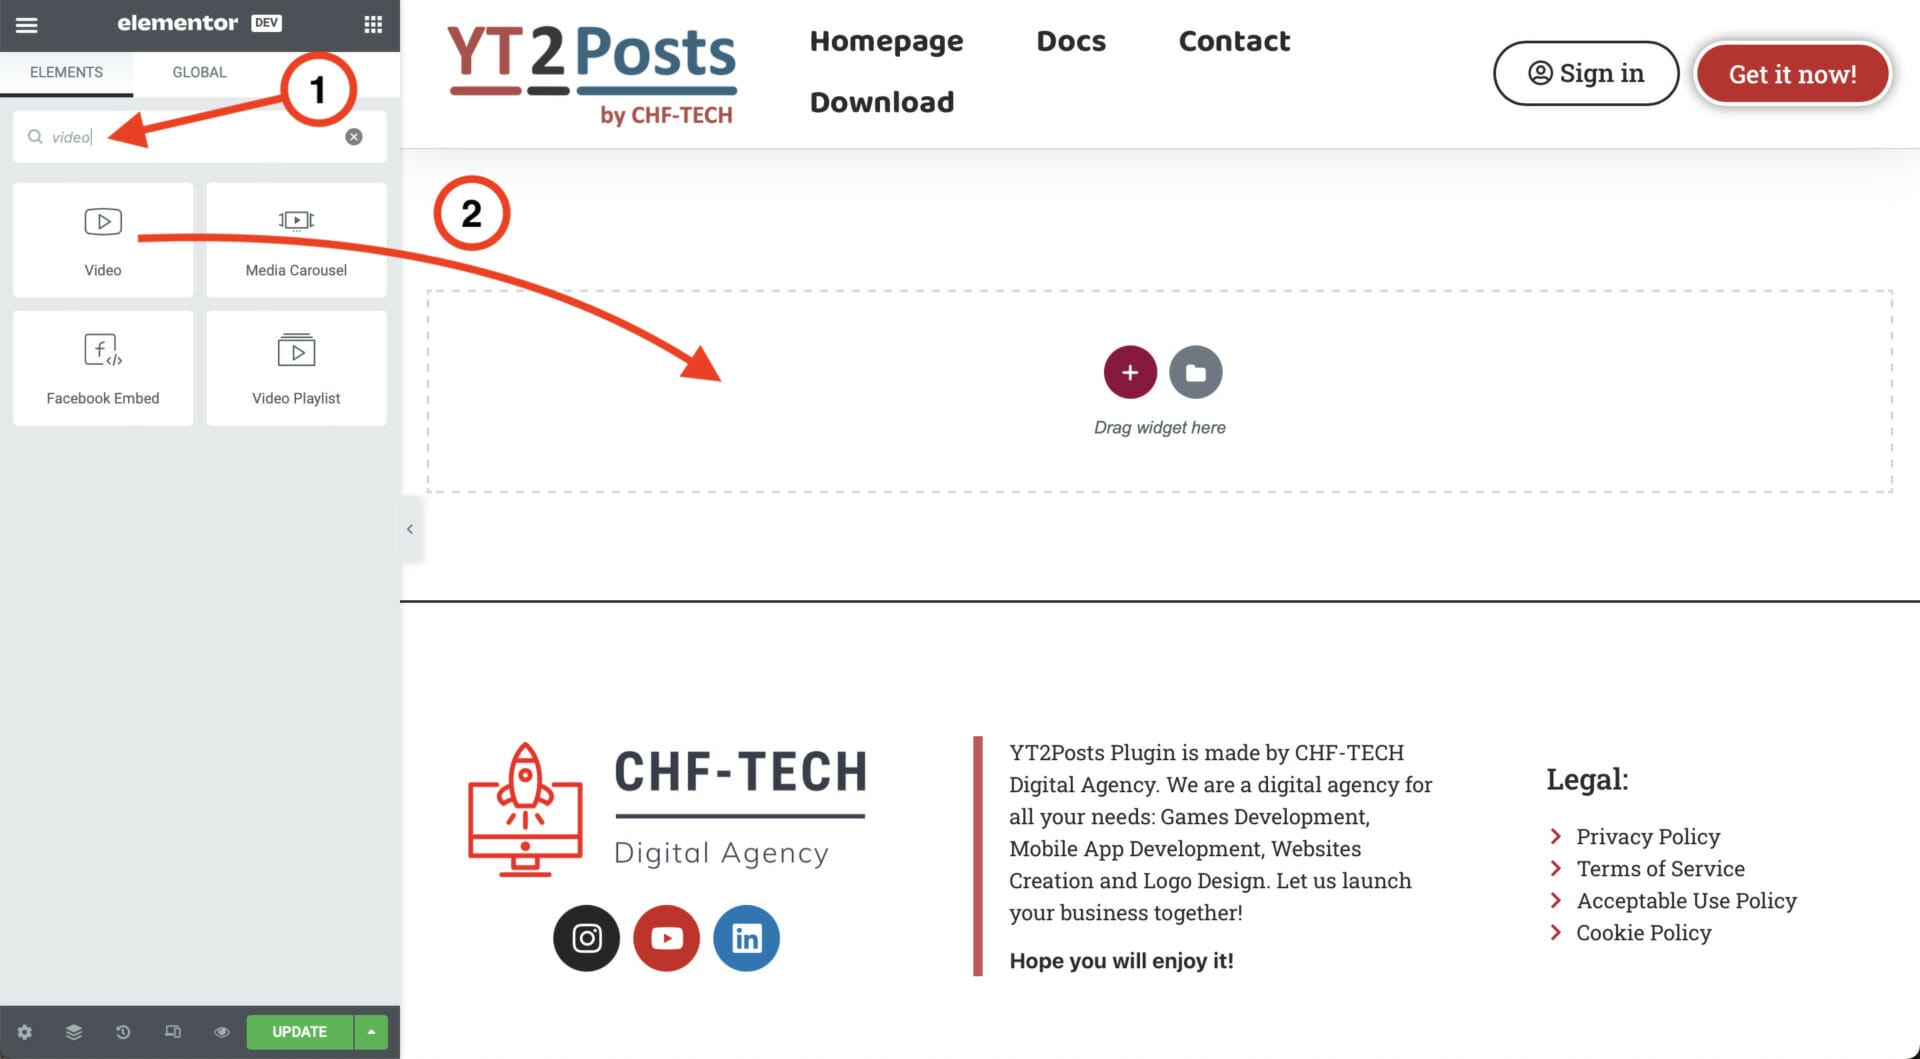
After clicking Apply & Preview, click on the widget section in the top to choose widgets. Drag-and-drop the Elementor’s video widget.
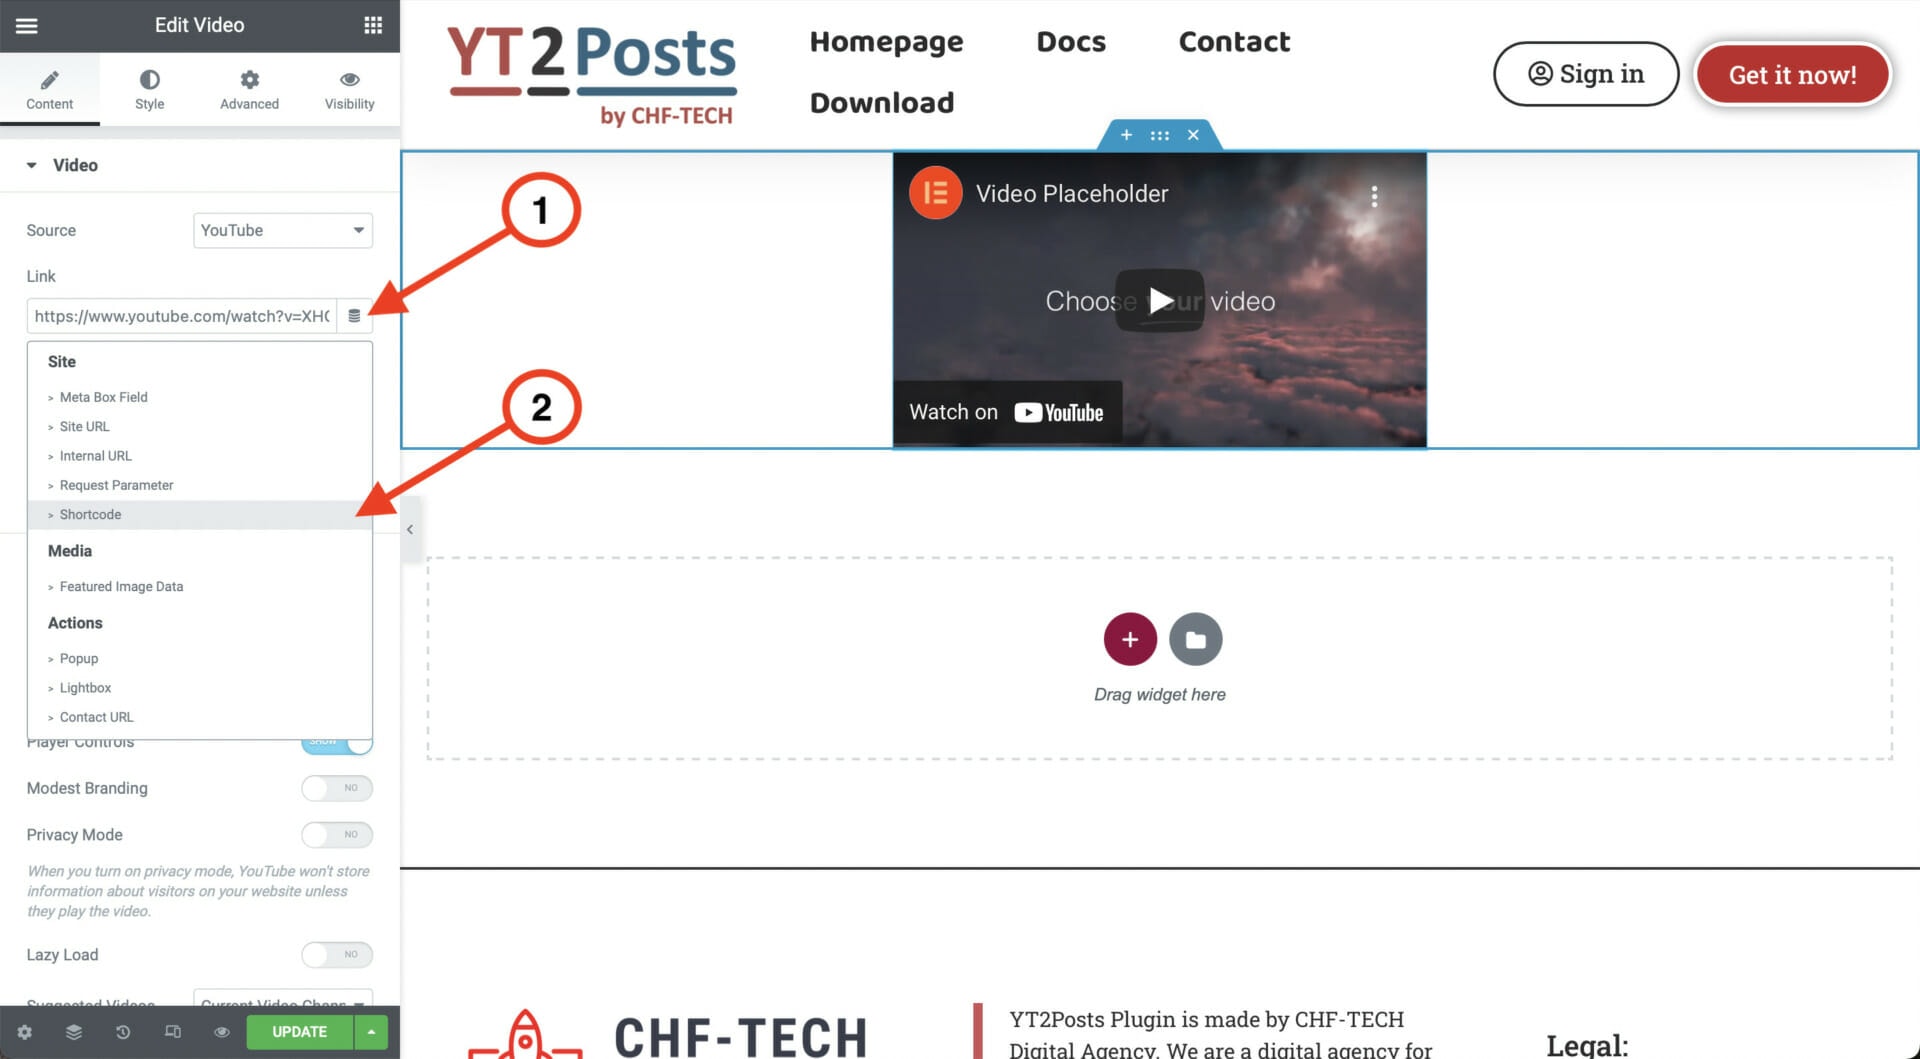
In the video settings, click on Link, then on a small icon Dynamic Tags and choose Shortcode in the dropdown menu.
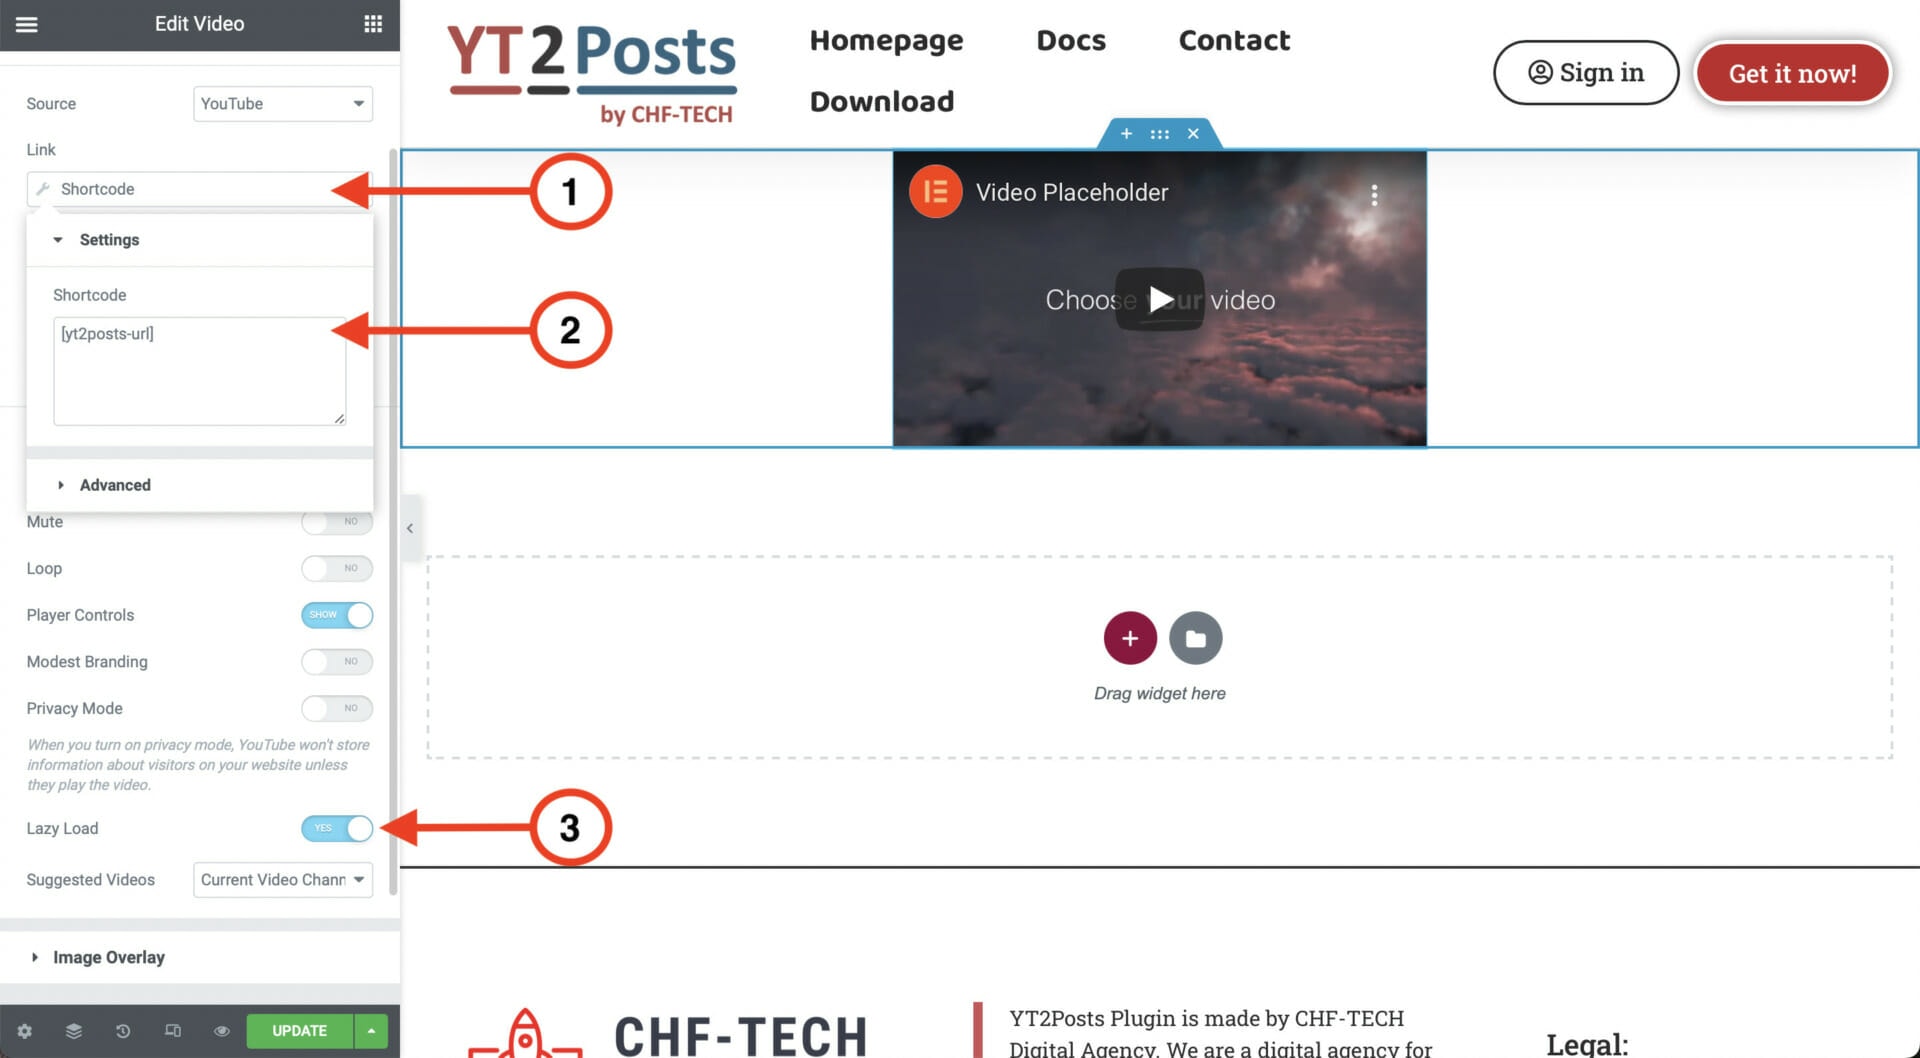
Click again on the shortcode field and type:
[yt2posts-url]You can also turn on lazy loading if you want.
Then click on the Image Overlay section and choose the Featured Image for the overlay.
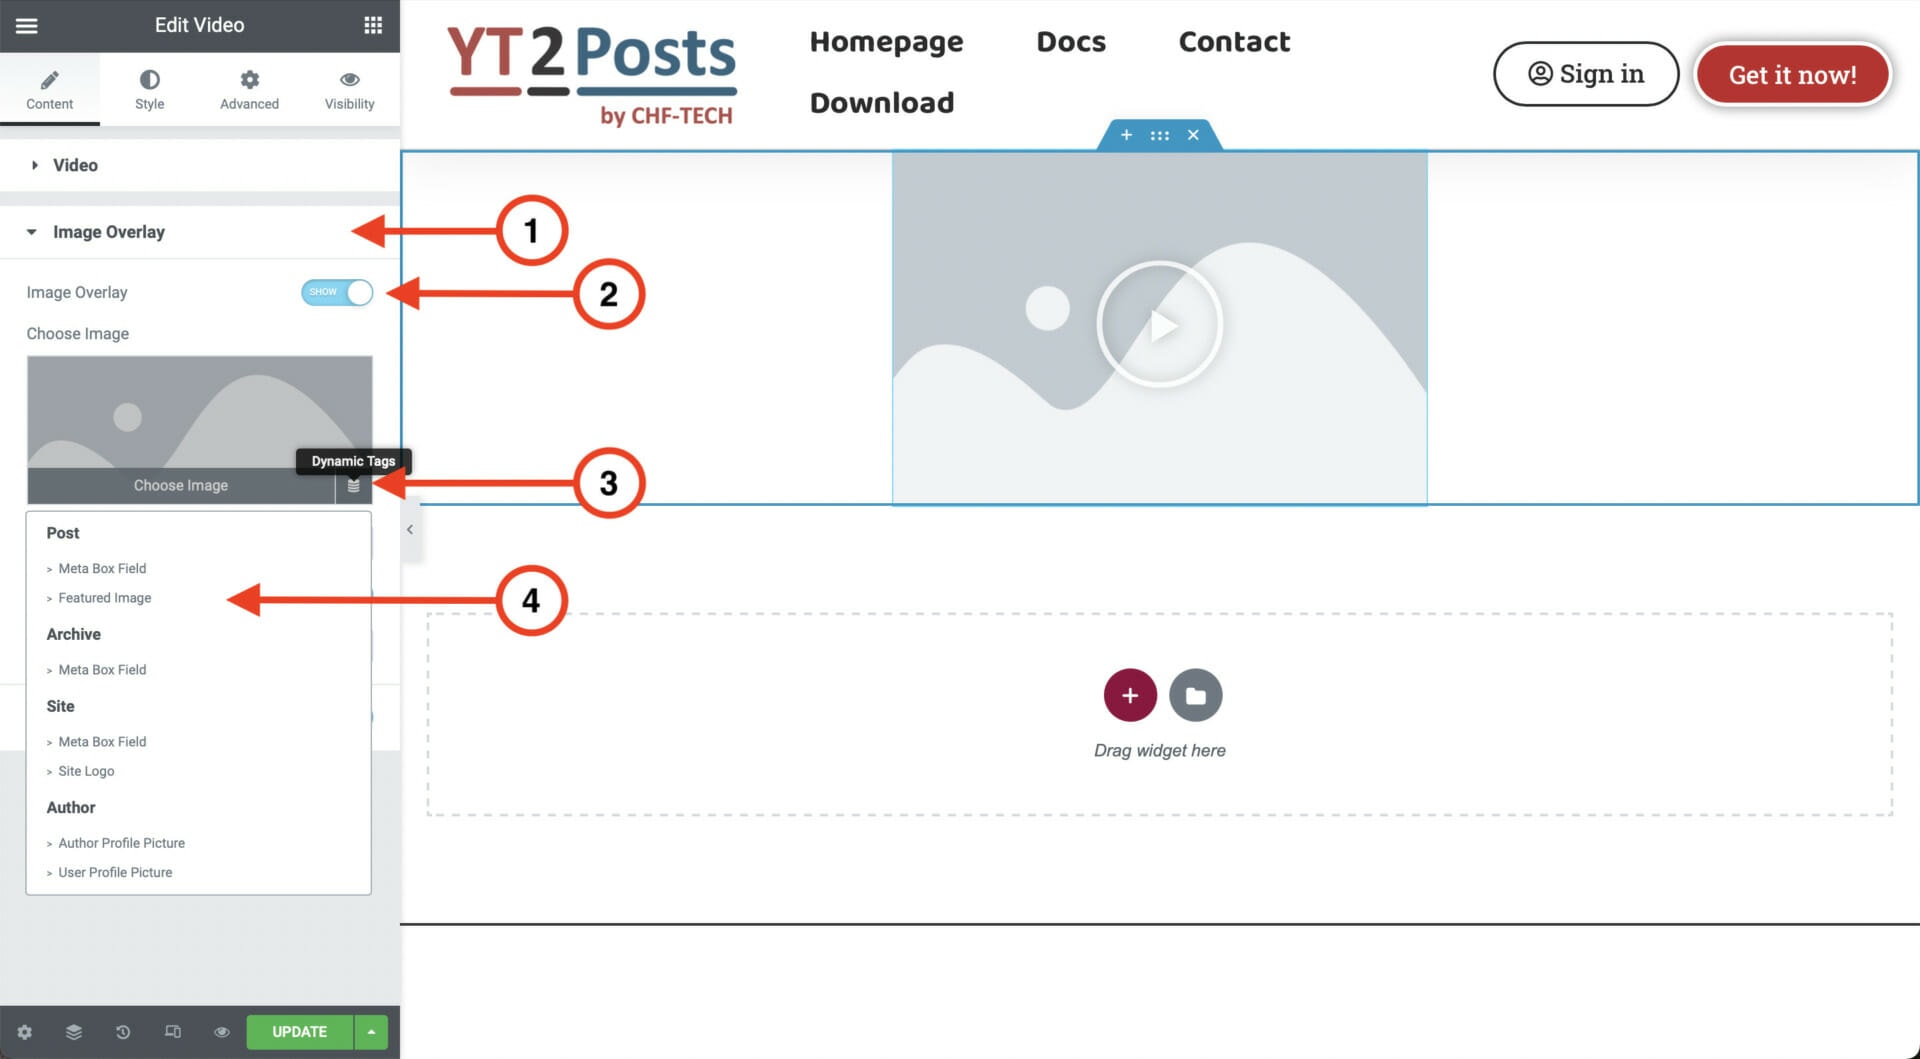
Now you can choose which play icon you want to be used and also if you want the video to open up in a lightbox or not. You can upload the famous youtube play button icon, or you can simply use the default one that Elementor is using.
Finally, you can publish the Loop Template! Now that we have specified how a single video should be shown, we will simply use elementor’s post widget and tell it to use this skin for each post, i.e. video.
As before, we can open up a page where we want to show our YouTube videos and drag-and-drop the elementor’s posts widget.
The only difference is that now we will choose Custom skin, instead of the Cards skin we used before, and select the Youtube Loop we have just created. Optionally, you can choose if you want the posts to be displayed in a grid or in a slider. For the slider option, a premium version of Ele Custom Skin Pro is neccessary.
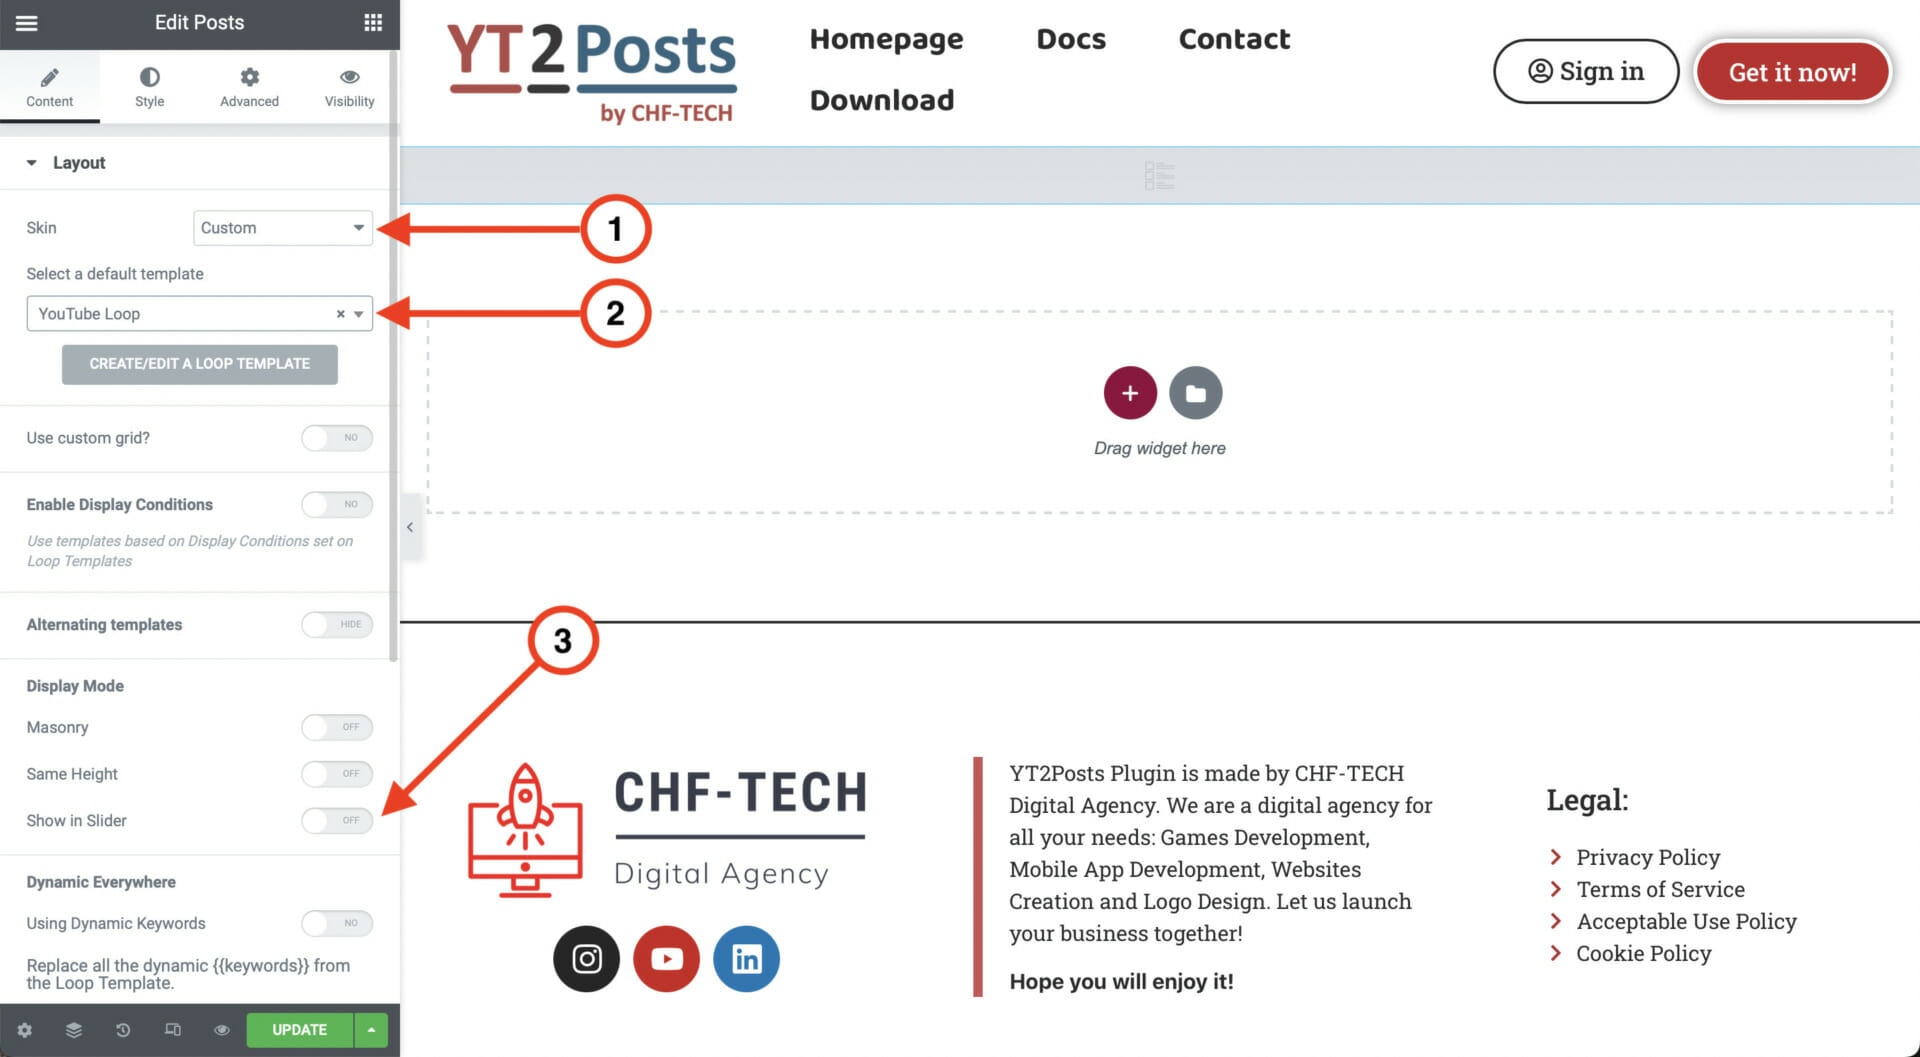
Finally, scroll down on the left and in the Query section set the source to be Youtube.
That’s it, you can design it further using Elementor as you wish! We decided to use the slider option, as shown below.
But the options are unlimited. The best part is that you can use your favorite tool like Elementor to design it!