Loop Templates are a great way to fully customize how a single post would appear when shown within a grid or within a slider. The template we will create here is going to be GDPR-Compliant with great loading performance.
Note: Creating the Loop Template as describe does not create connections to YouTube, meaning that this approach is GDPR-compliant
Feel free to reach out to our support at [email protected] if you need any help, we are responding within 24h and are available 24/7.
In summary, we will go over the following topics:
When showing multiple posts within a grid or within a slider, we usually want to showcase only the featured image, the play button and optionally the video title. Here, we will show how the following Loop Template can be created:
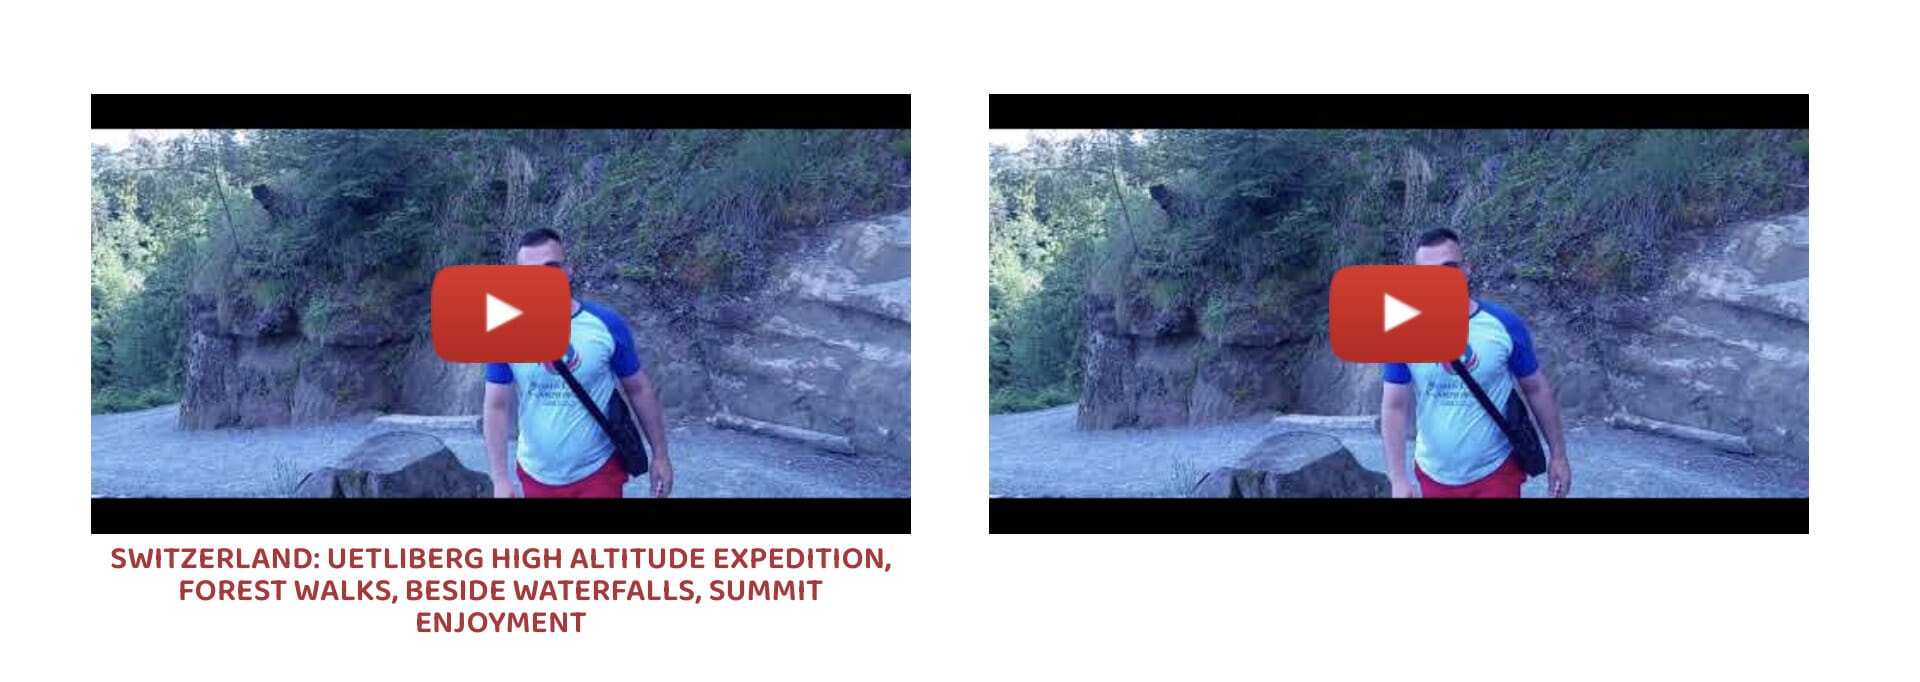
When clicking on the play button, we want to user to be redirected to YouTube, instead of embedding the full video. The advantages of this approach are:
Let’s go through the steps to create this template.
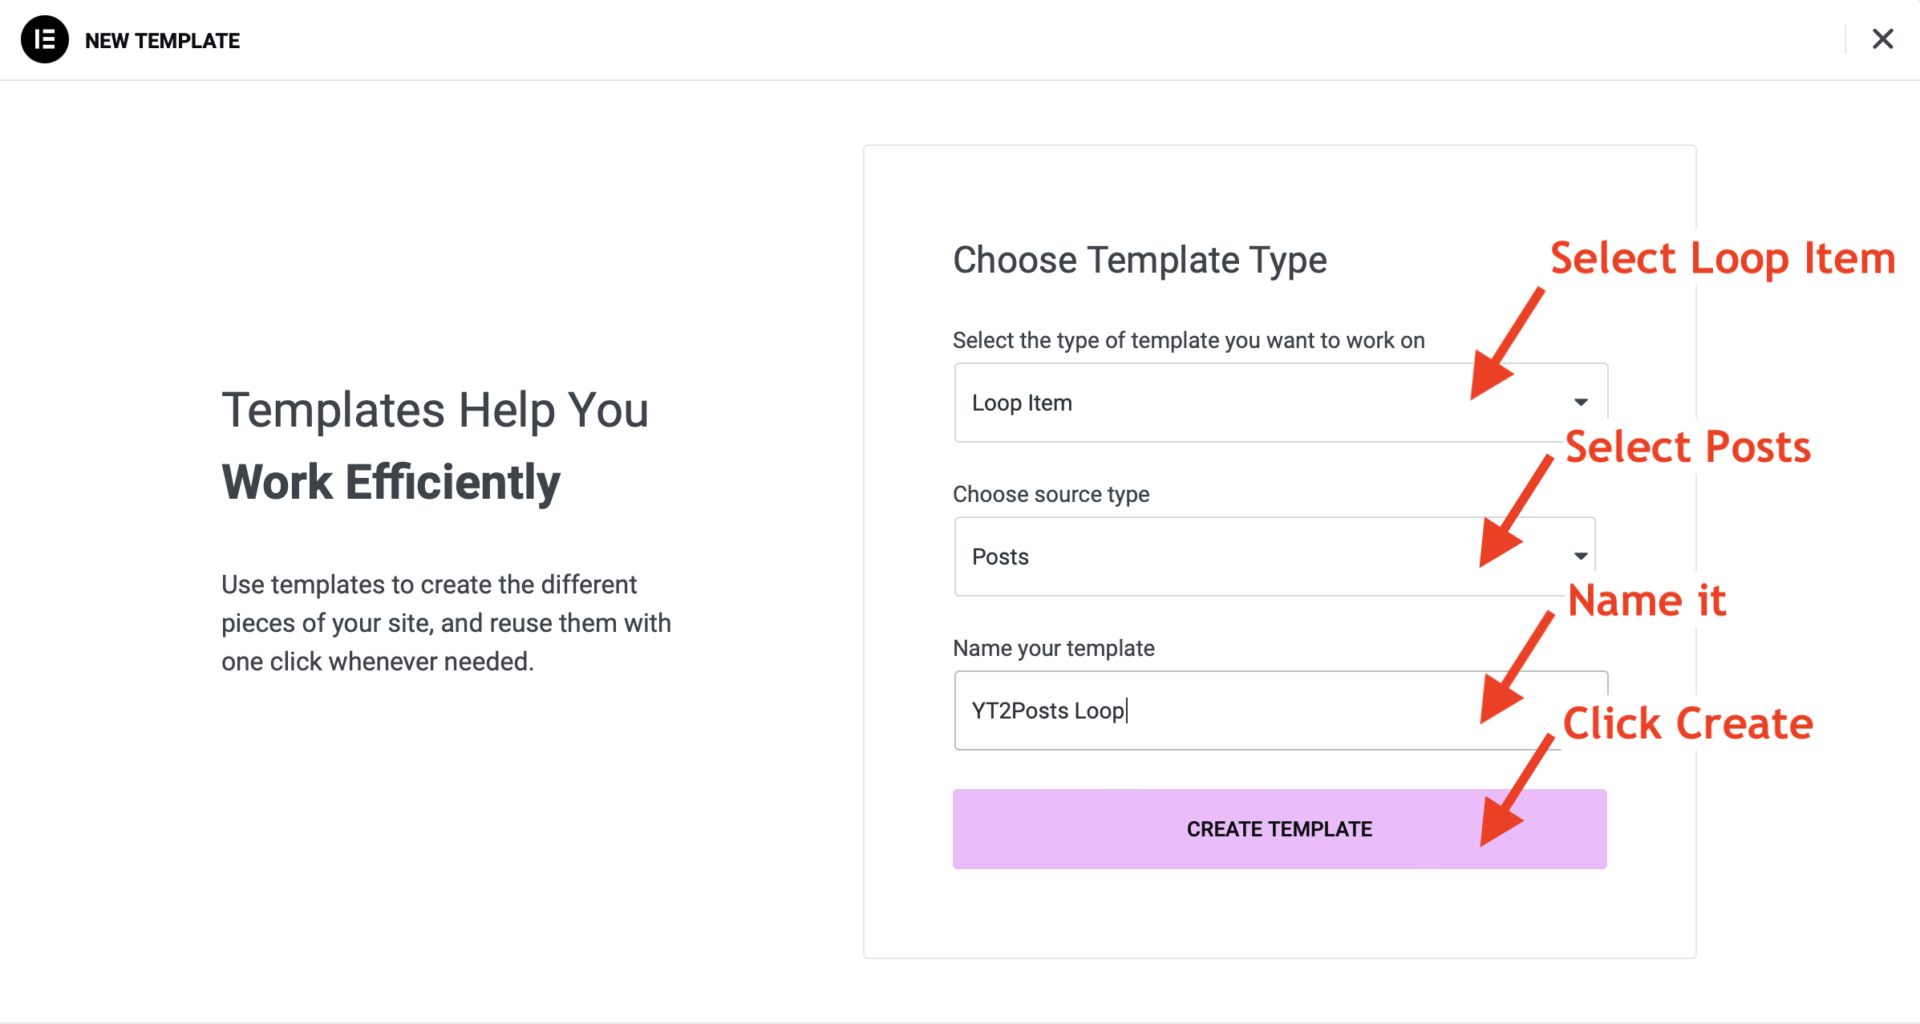
In your WordPress dashboard, go to Templates->Add New to create a new template as shown below:
Now we have to set up which video article we want to use to preview the template while designing it. To achieve this, click on Settings in the bottom-left corner and in the Preview Settings section set the dynamic content to Youtube and type a name of an arbitrary video post, then click on Apply & Preview, as shown below:

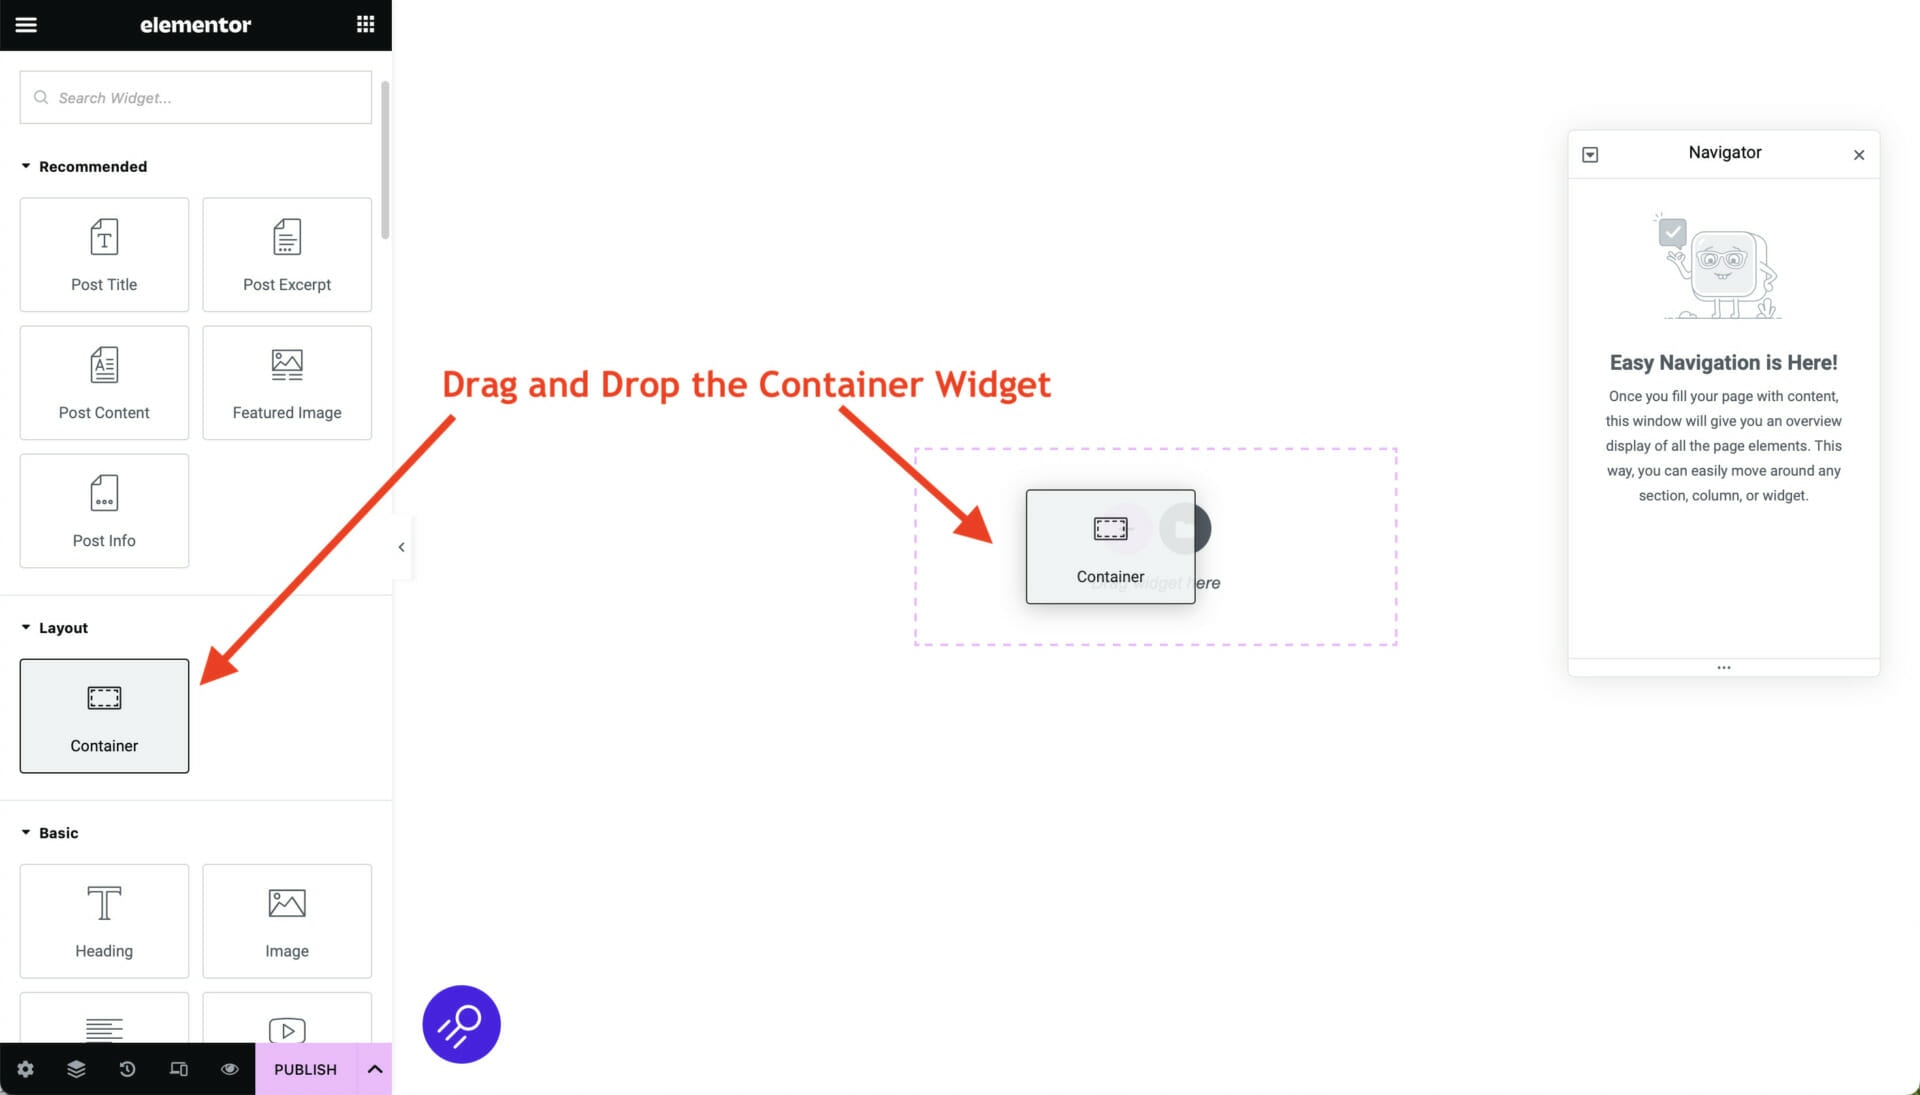
We start by adding a container that will wrap the full post. Drag and drop the container widget:
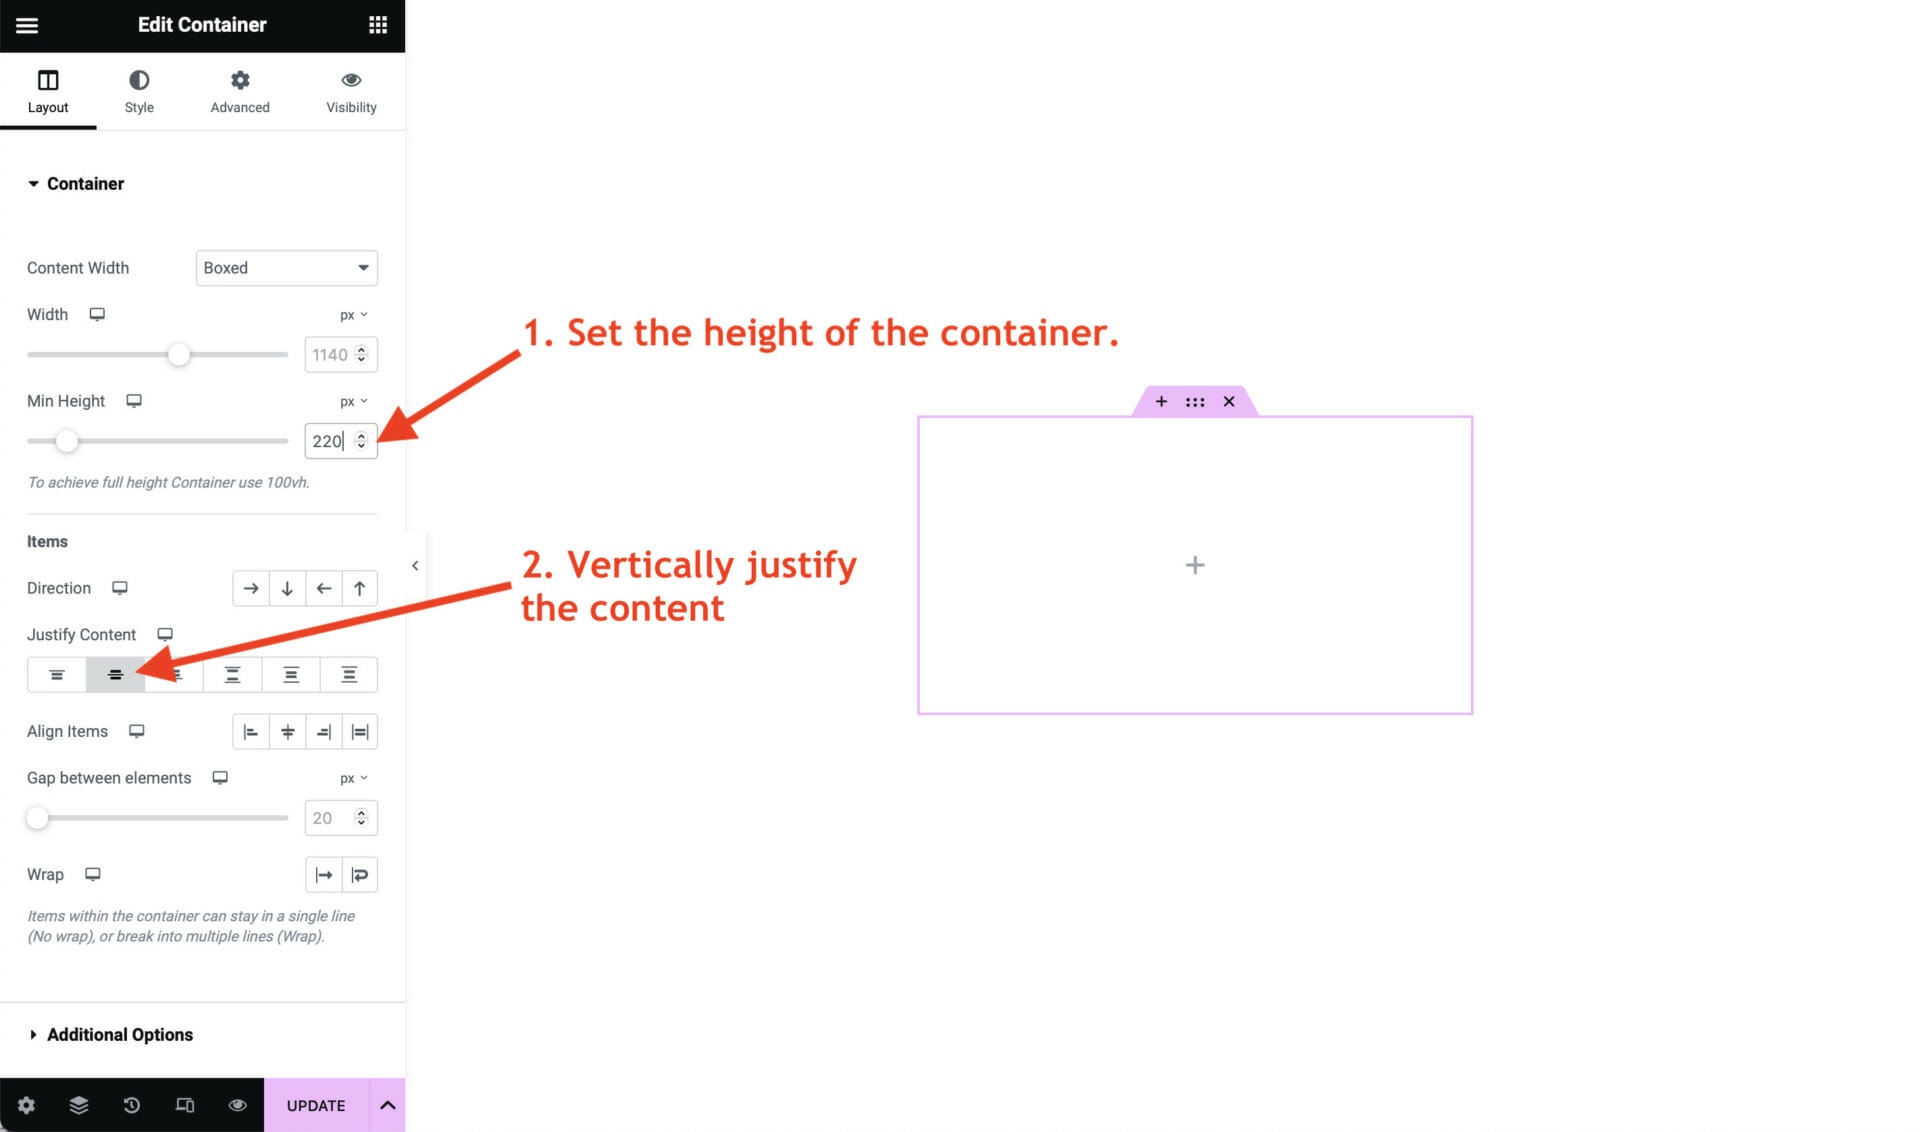
Set an arbitrary height to the container e.g. to 220px and justify the content vertically within the container, as shown below:
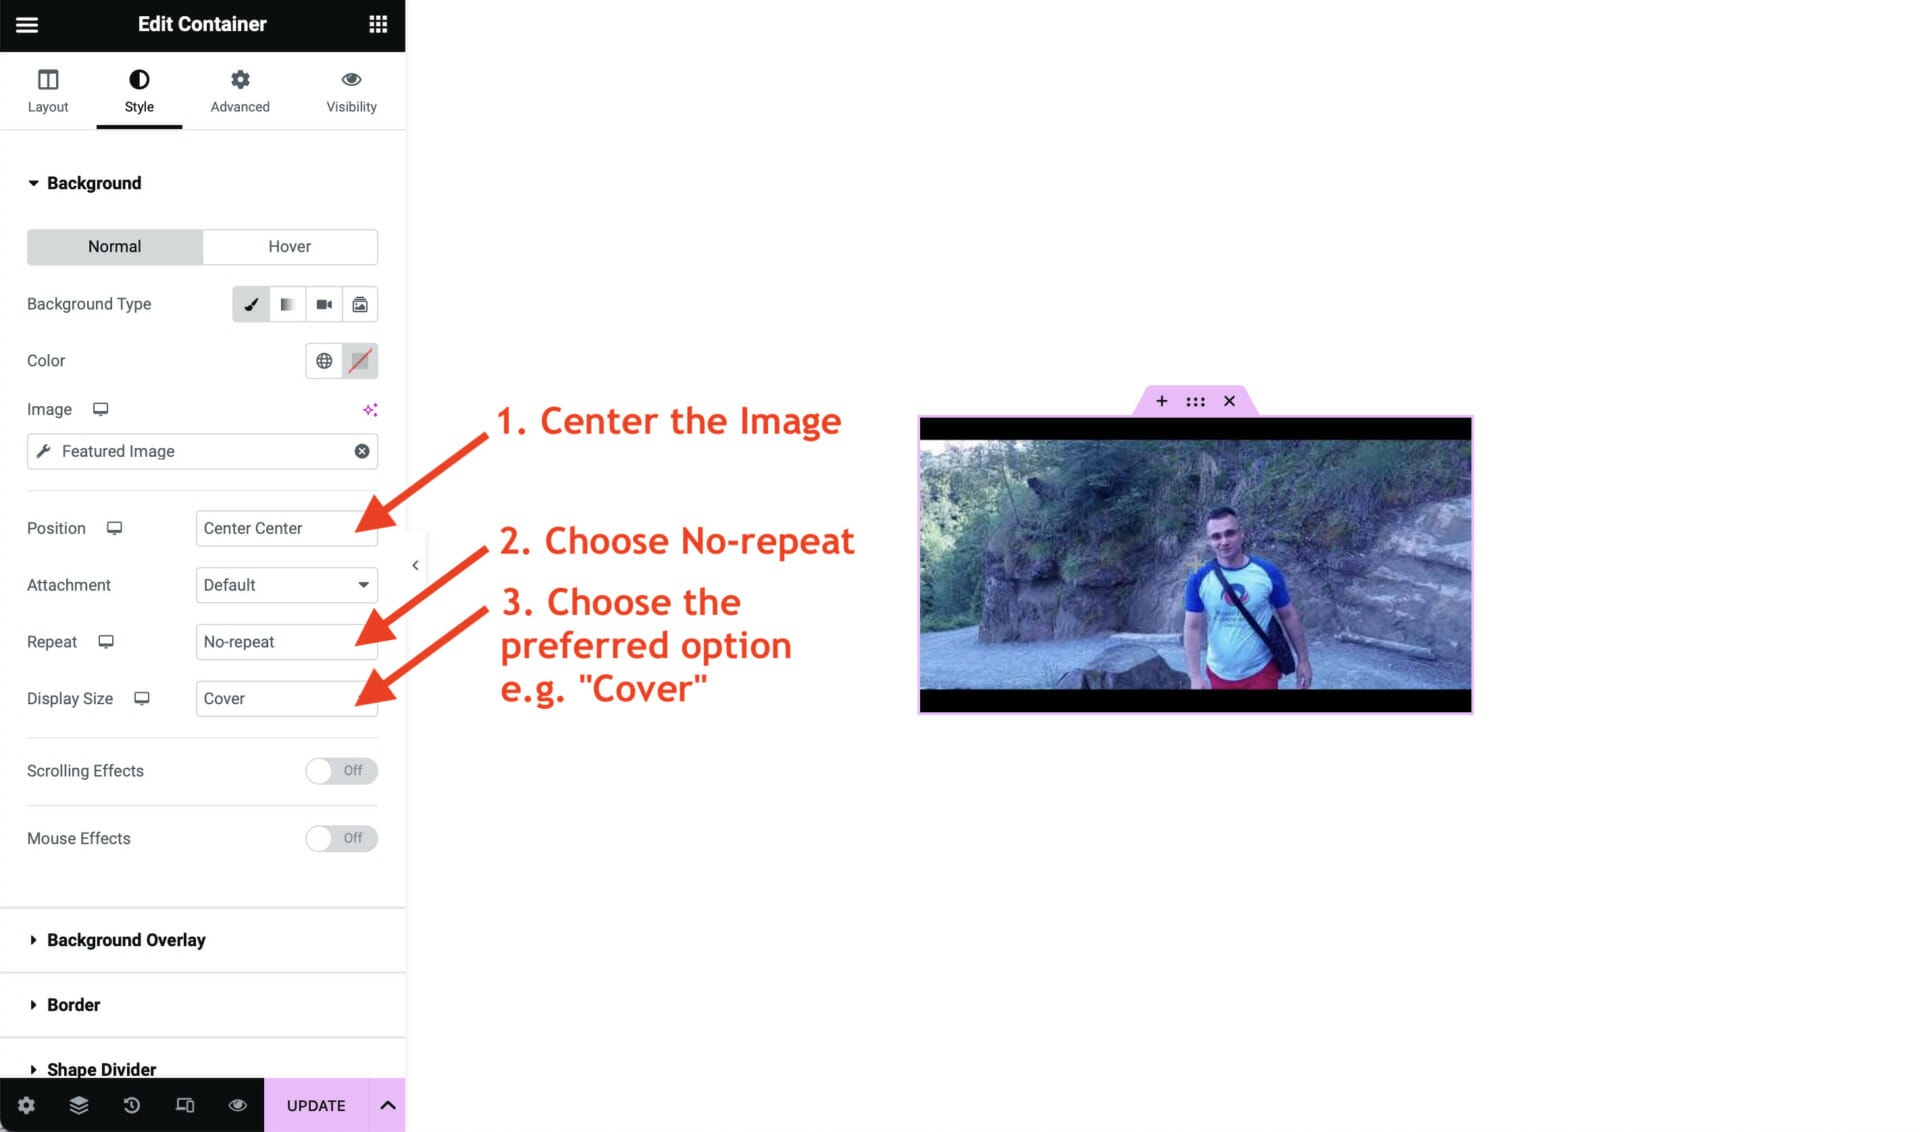
Next, we want to set the Featured Image (i.e. the video thumbnail image) as the background image of this container. To achieve this, click on the style tab and choose the Featured Image as the background image:

Once the featured image appears, center its position and choose how the image is displayed, as shown below:
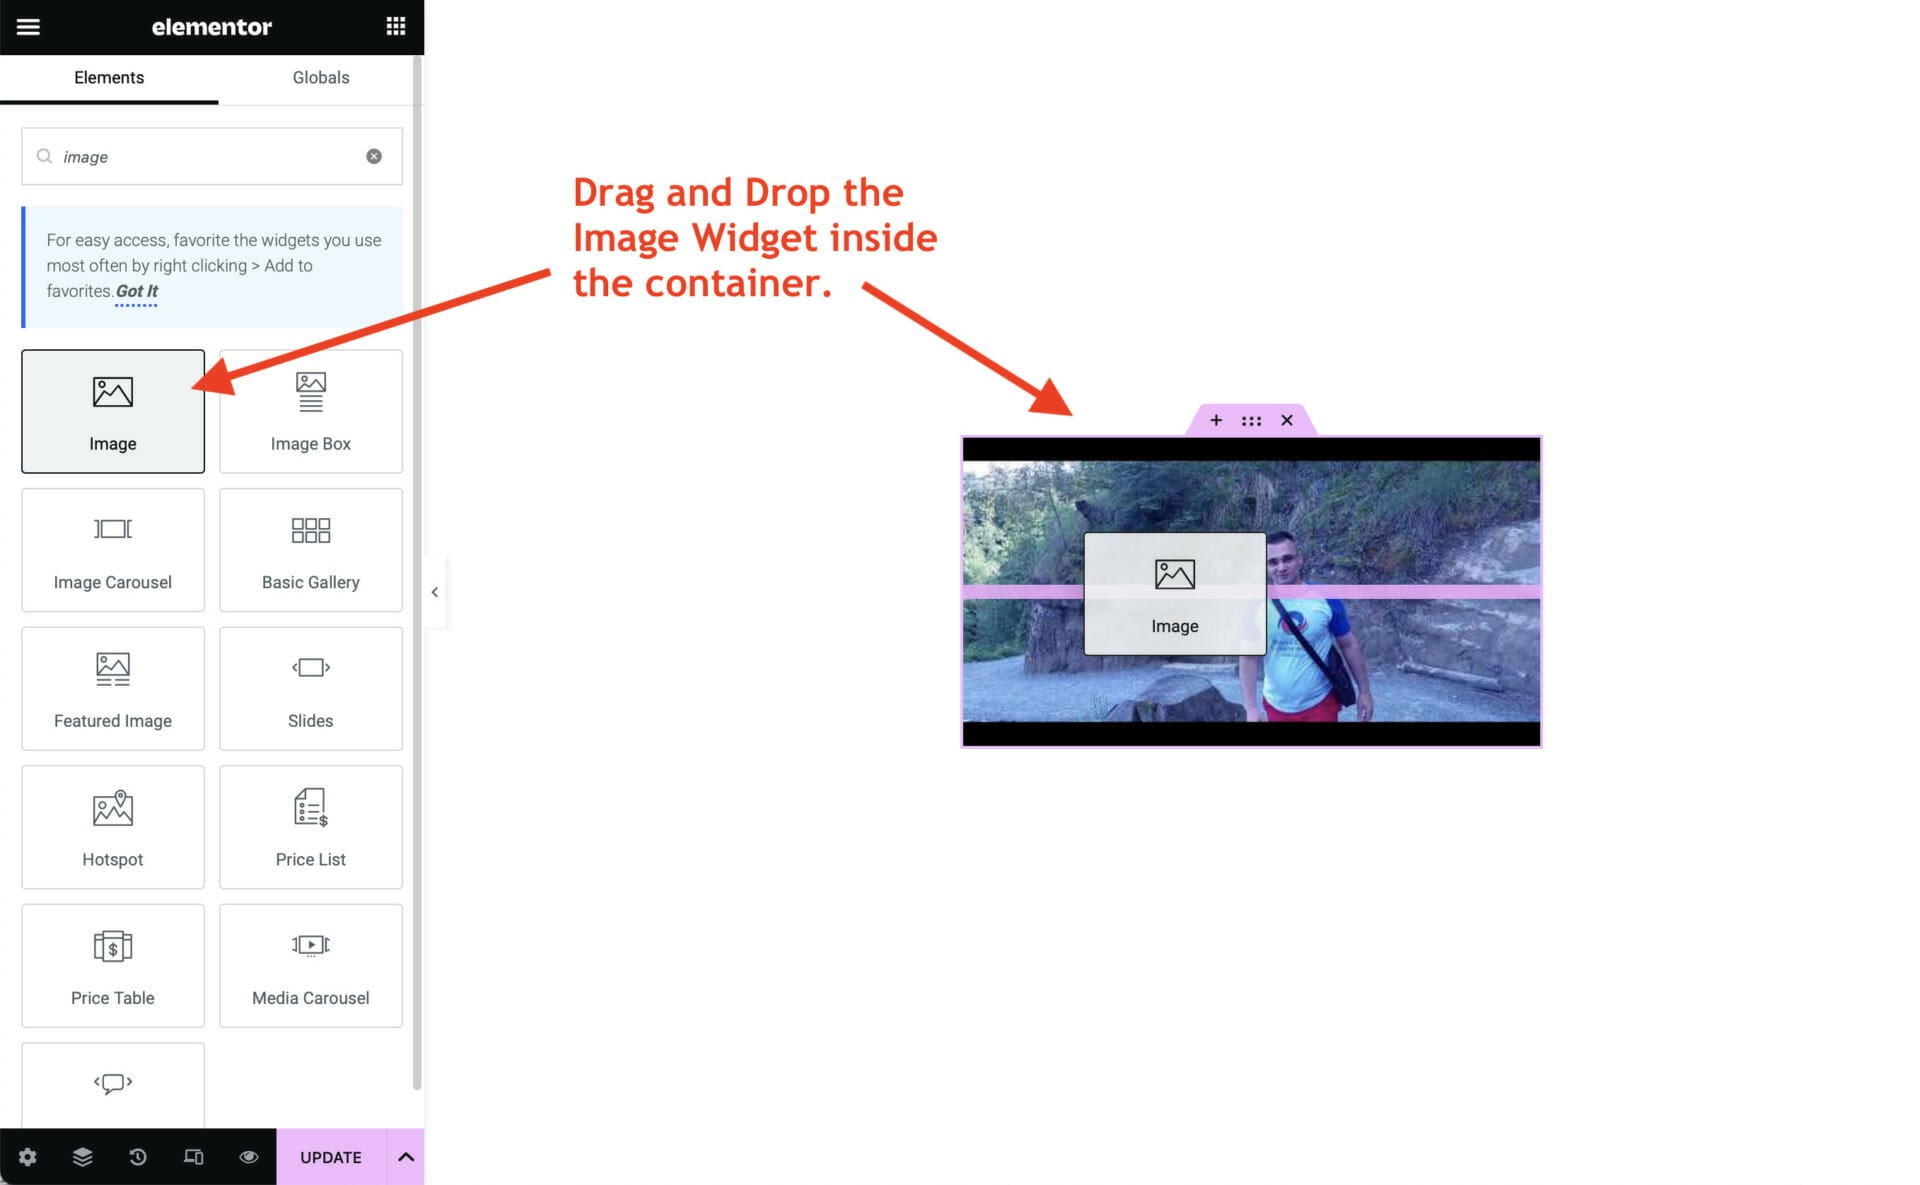
Next, we want to add a play button that overlays the featured image.
In order to add a play button over the featured image, drag and drop the Image Widget inside the container.
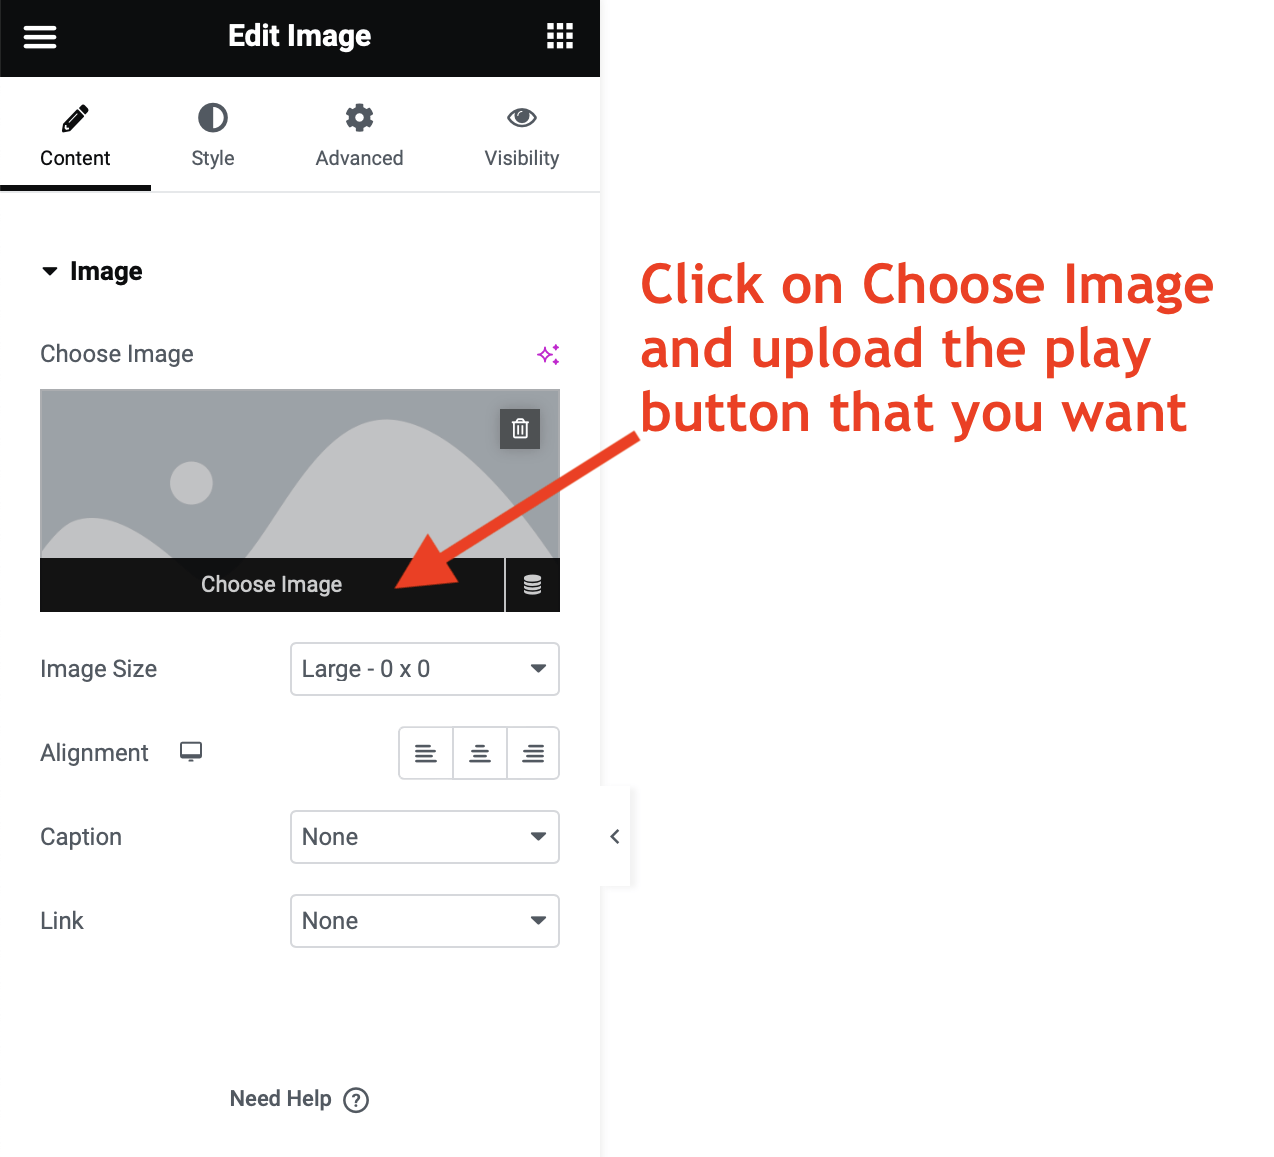
Now click on Choose Image to upload the play button of your choice. We used the standard youtube play button that can be downloaded from here.
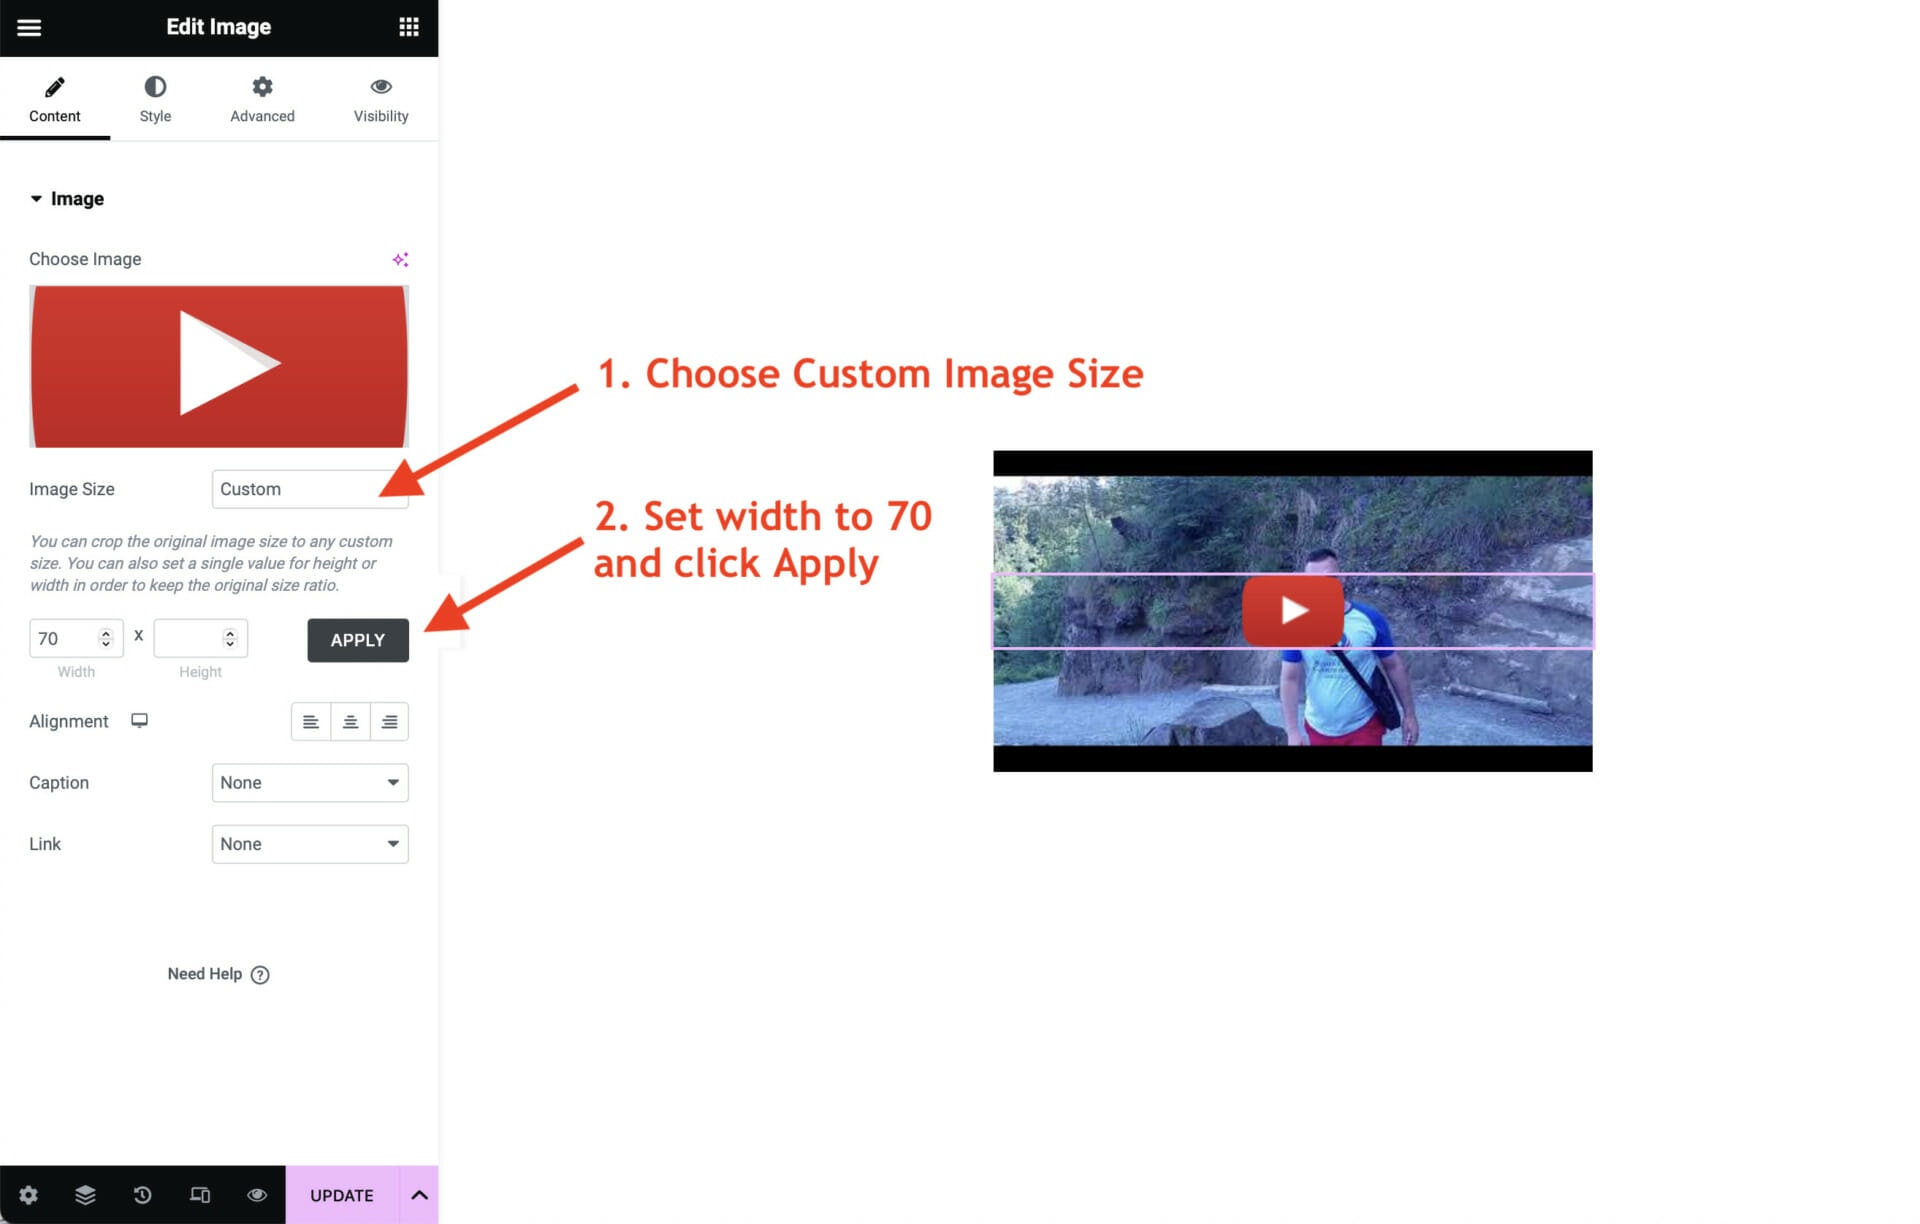
Set the play button size, e.g. to 70px, as shown below:
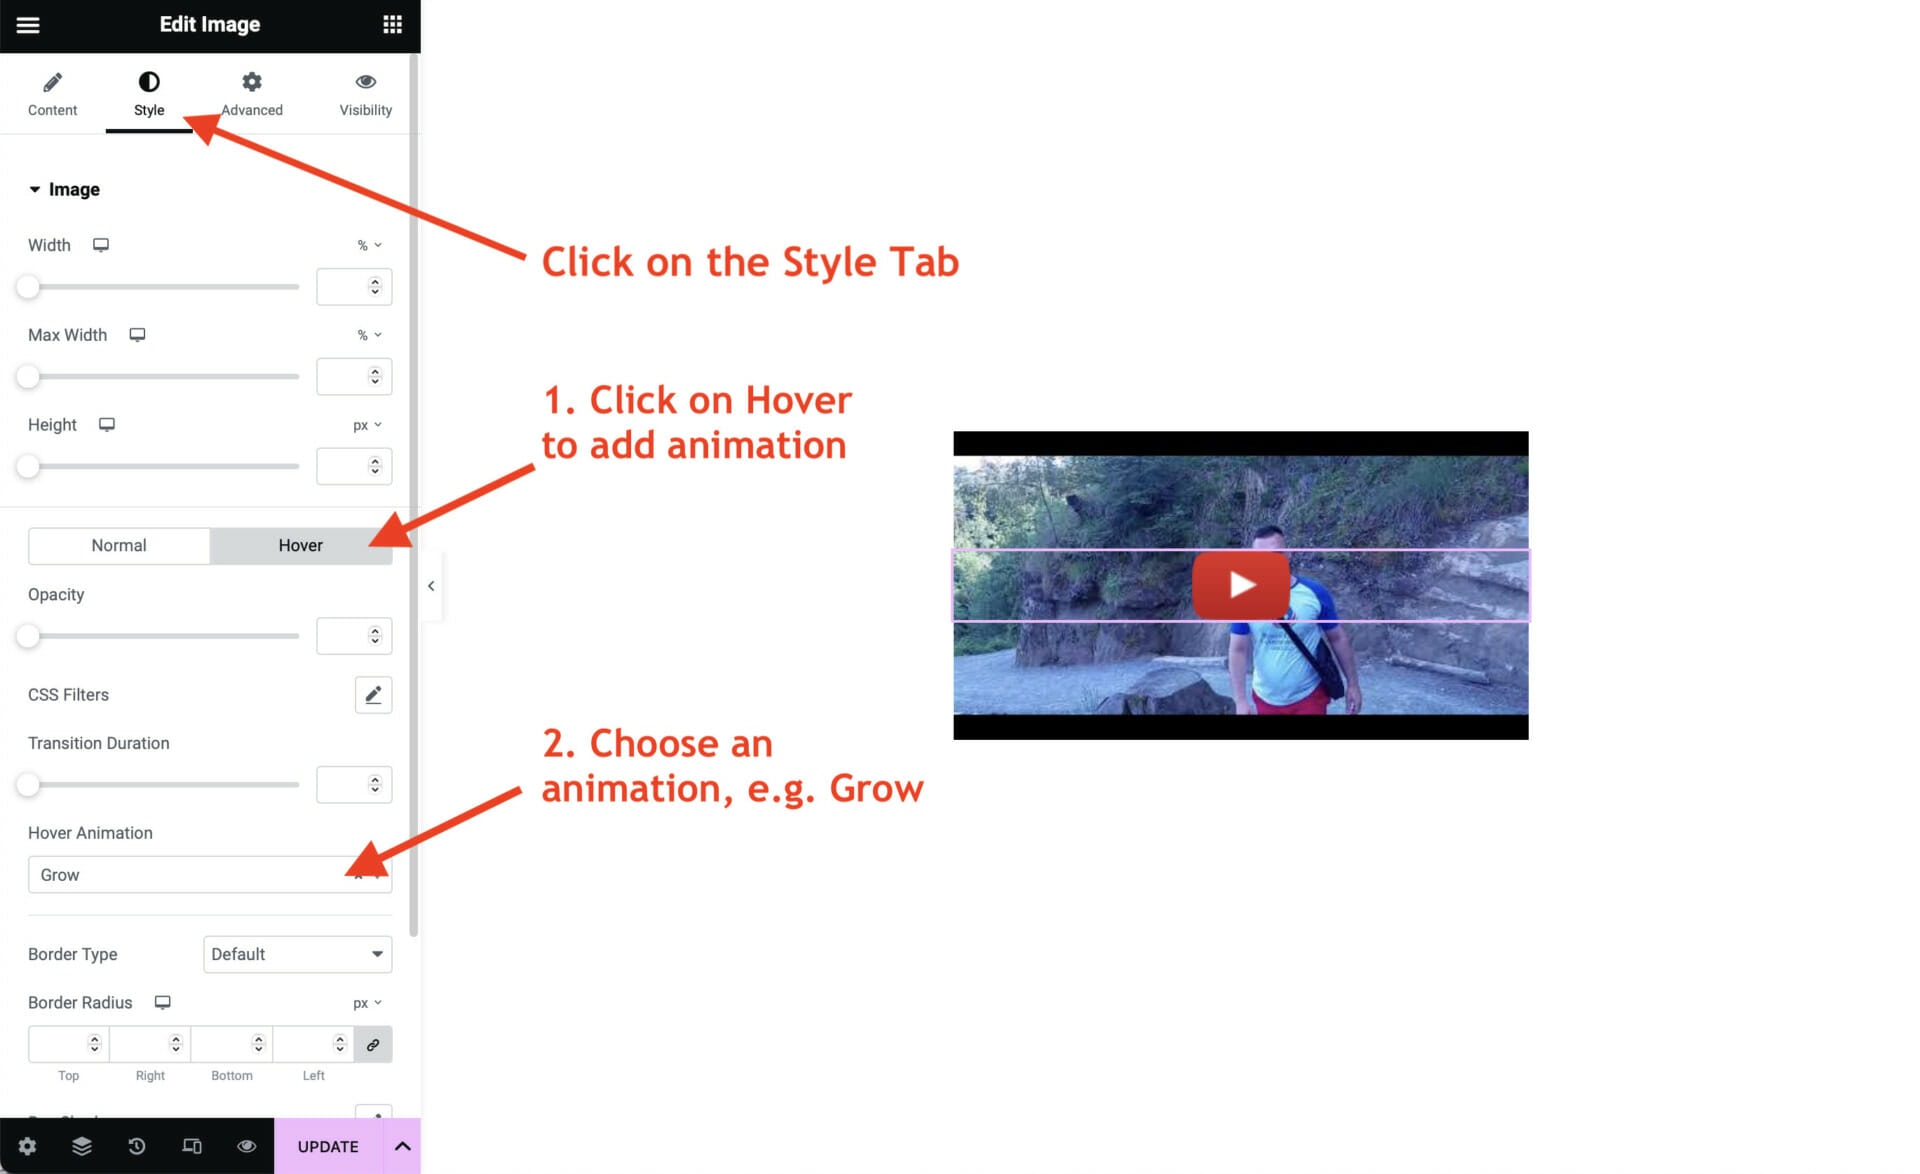
Optionally, you can add an animation when hovering over the play button. To do this, click on the Style tab, and choose an animation of your choice, as shown below:
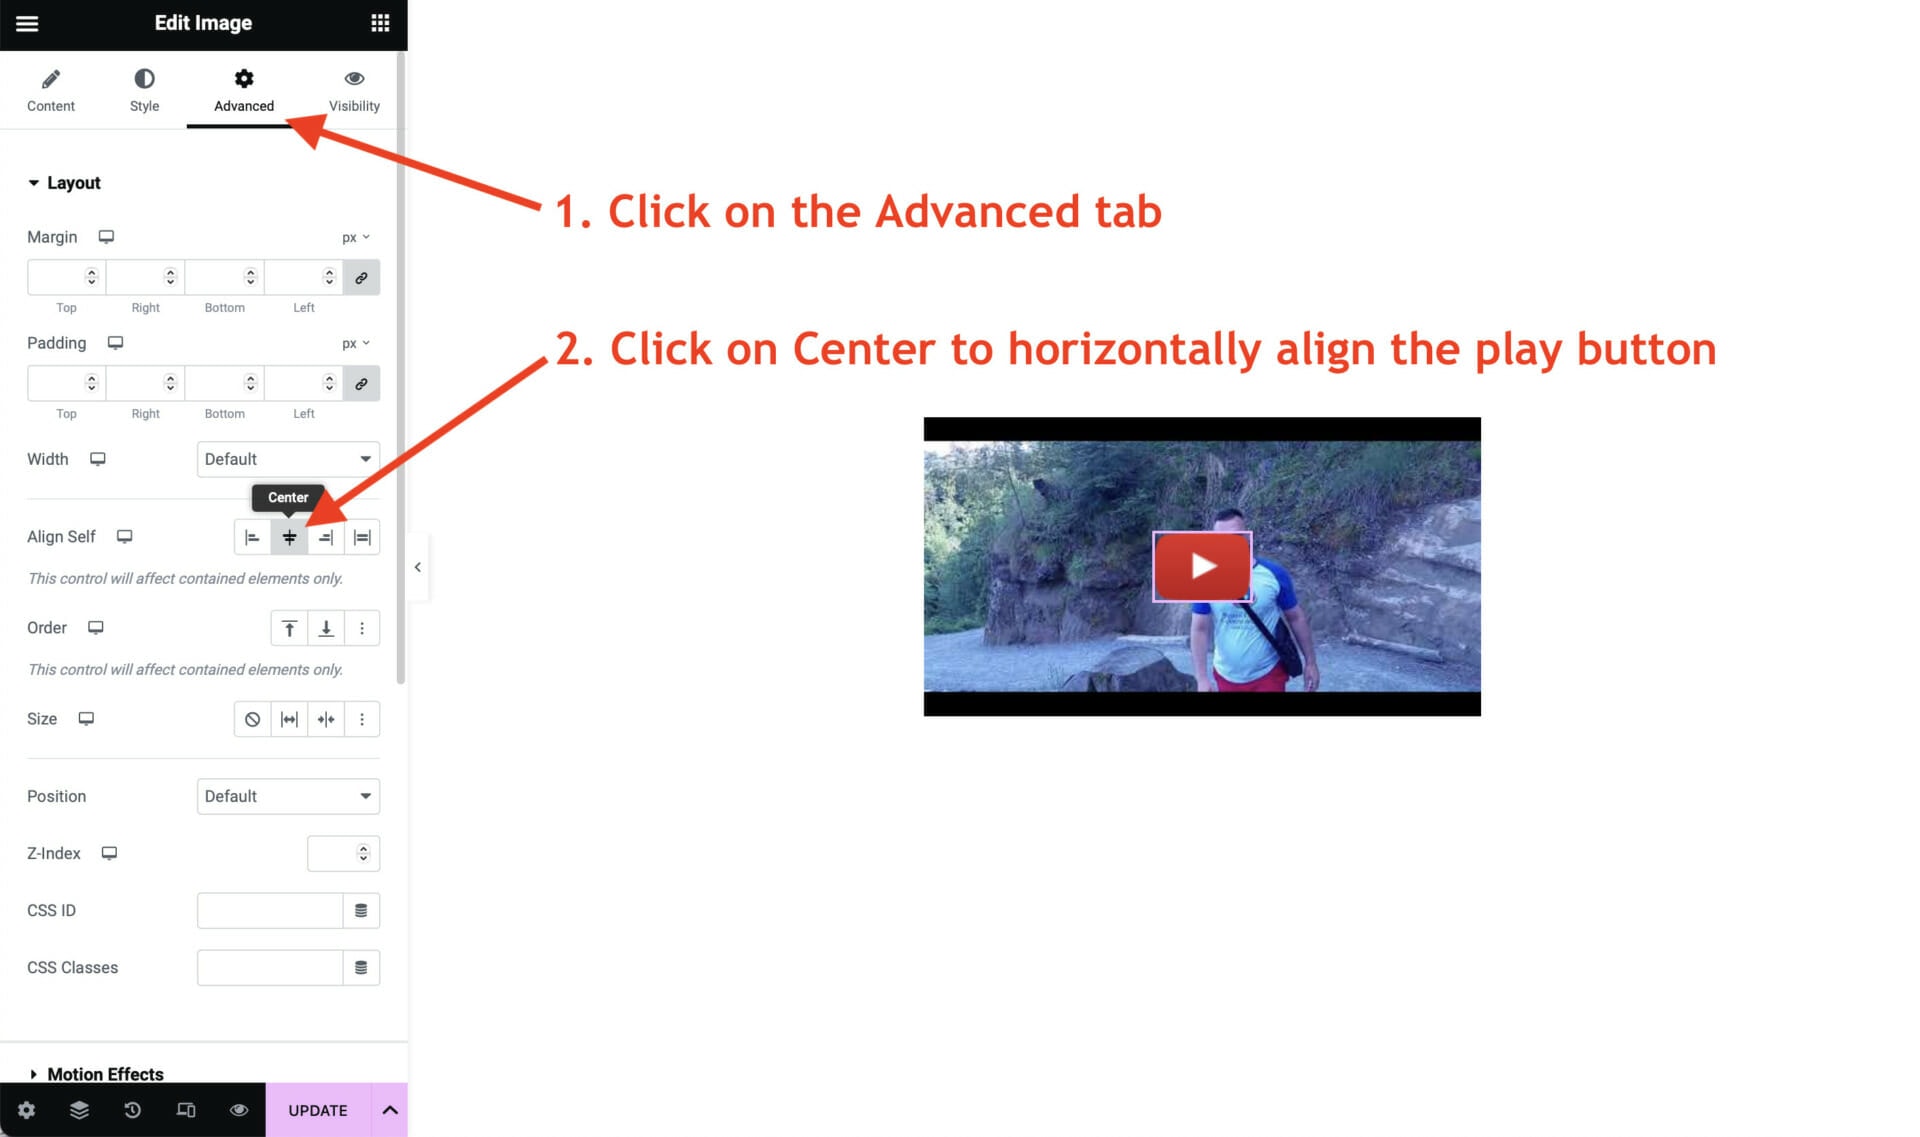
Finally, in the Advanced tab, in the Align Self field select the Center justification to horizontally center the play button, as follows:
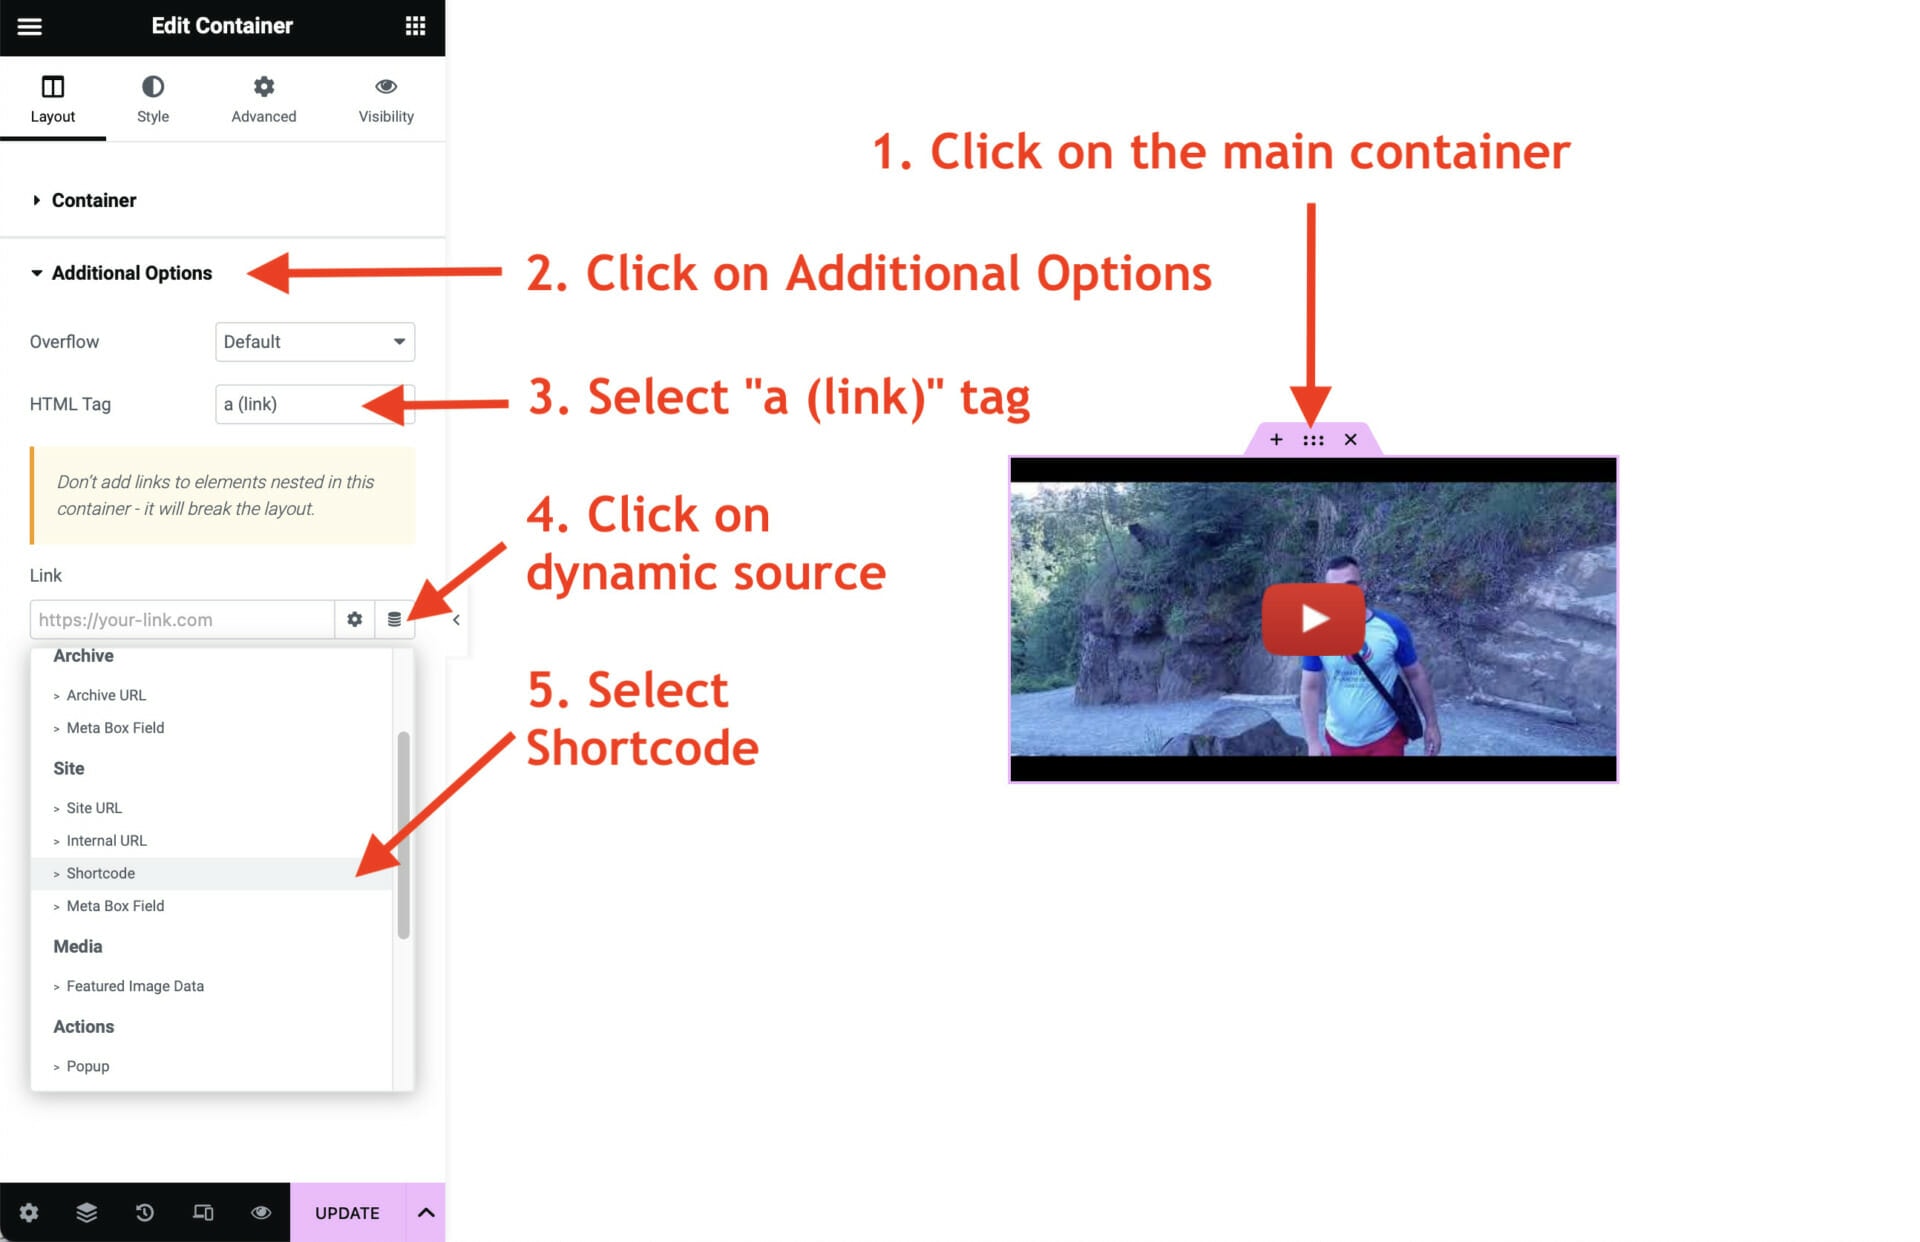
When clicking anywhere inside the container, we want to visitor to be redirected to the youtube video. For this, we need to turn the whole container into a link. Click on the main container and in the Additional Options set the HTML tag to “a (link)”. In the Link field, click on dynamic source and choose the shortcode, as shown below.
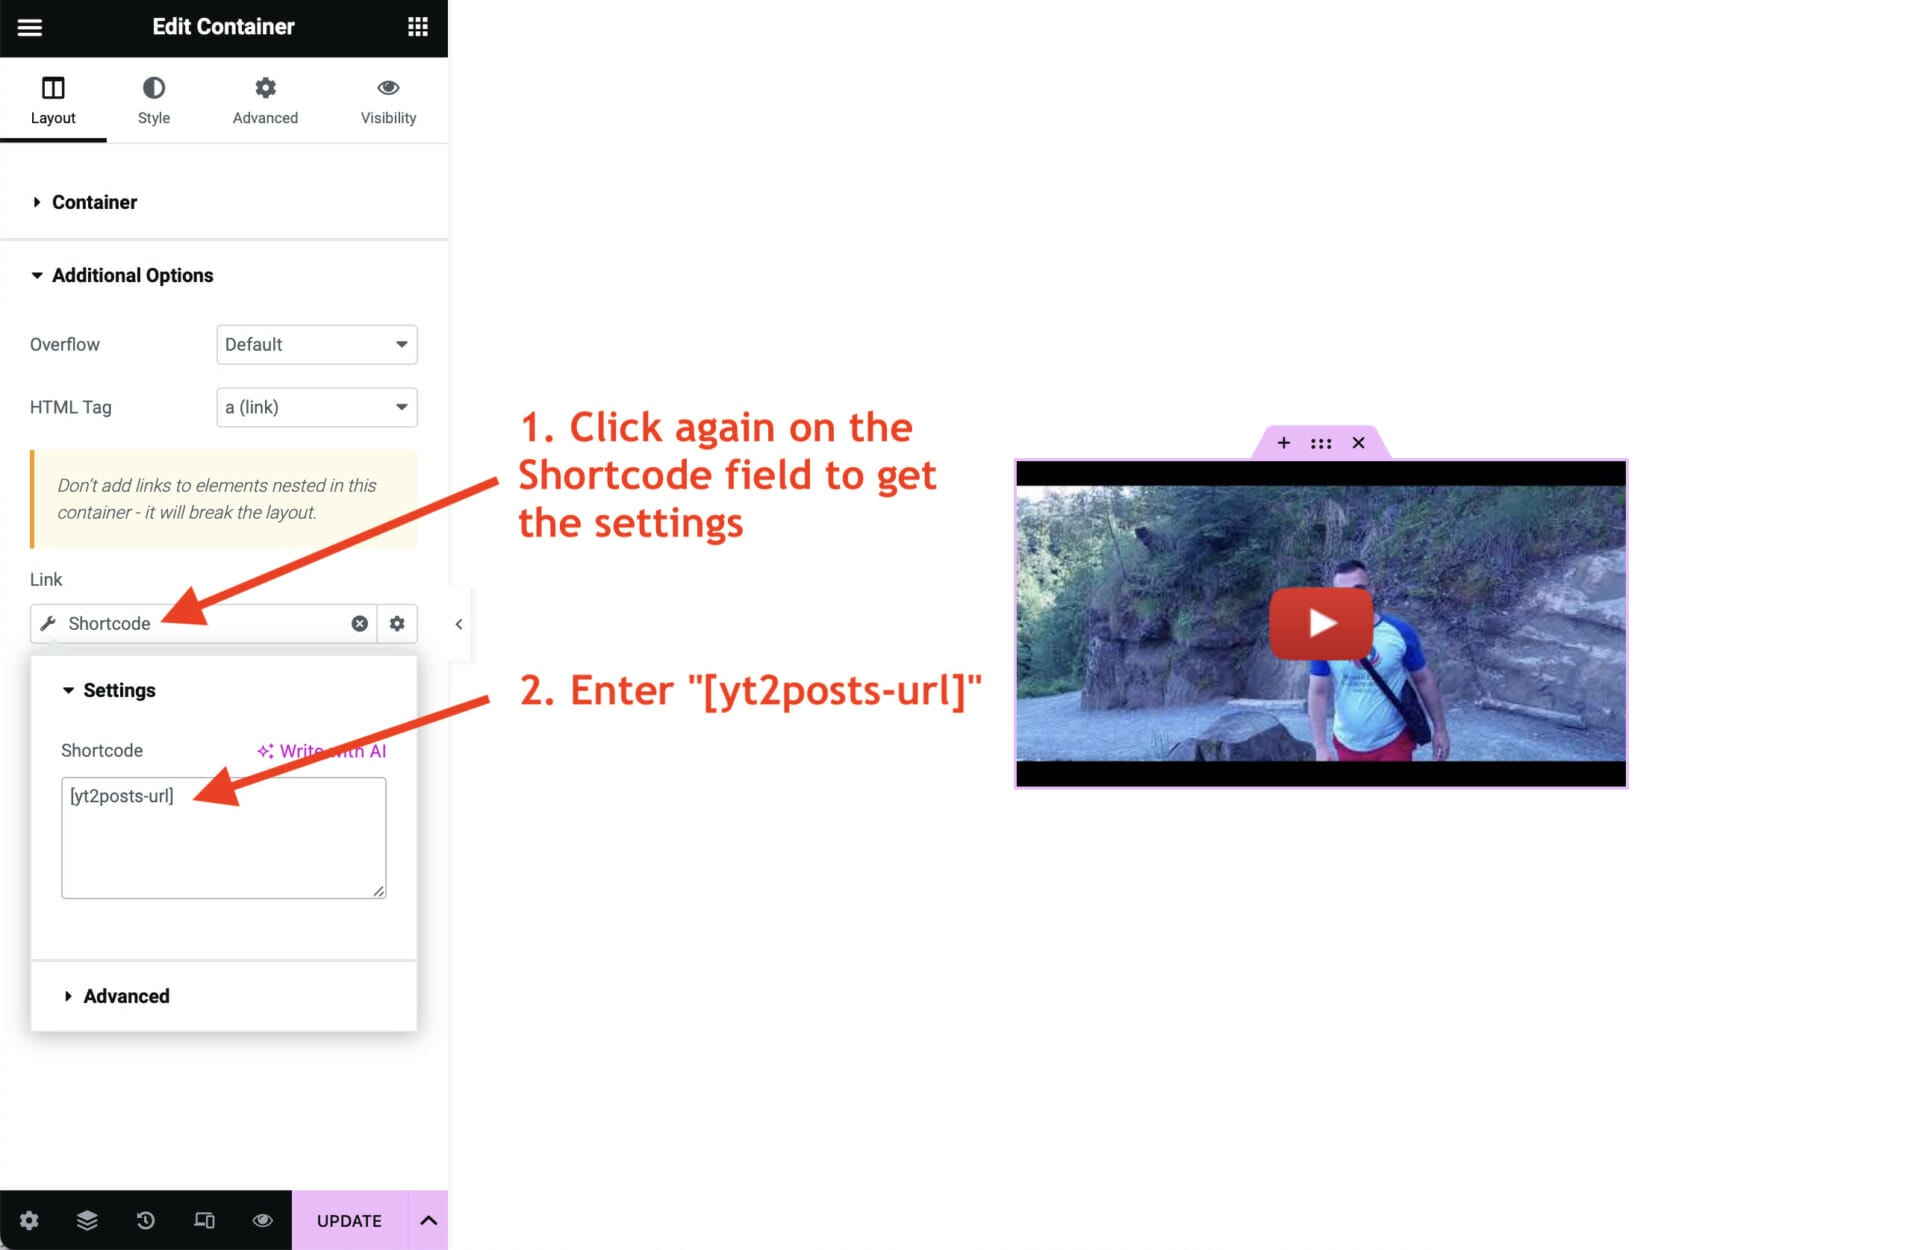
Click again on the Shortcode field and enter yt2posts-url (with brackets) to get the link of the current video.
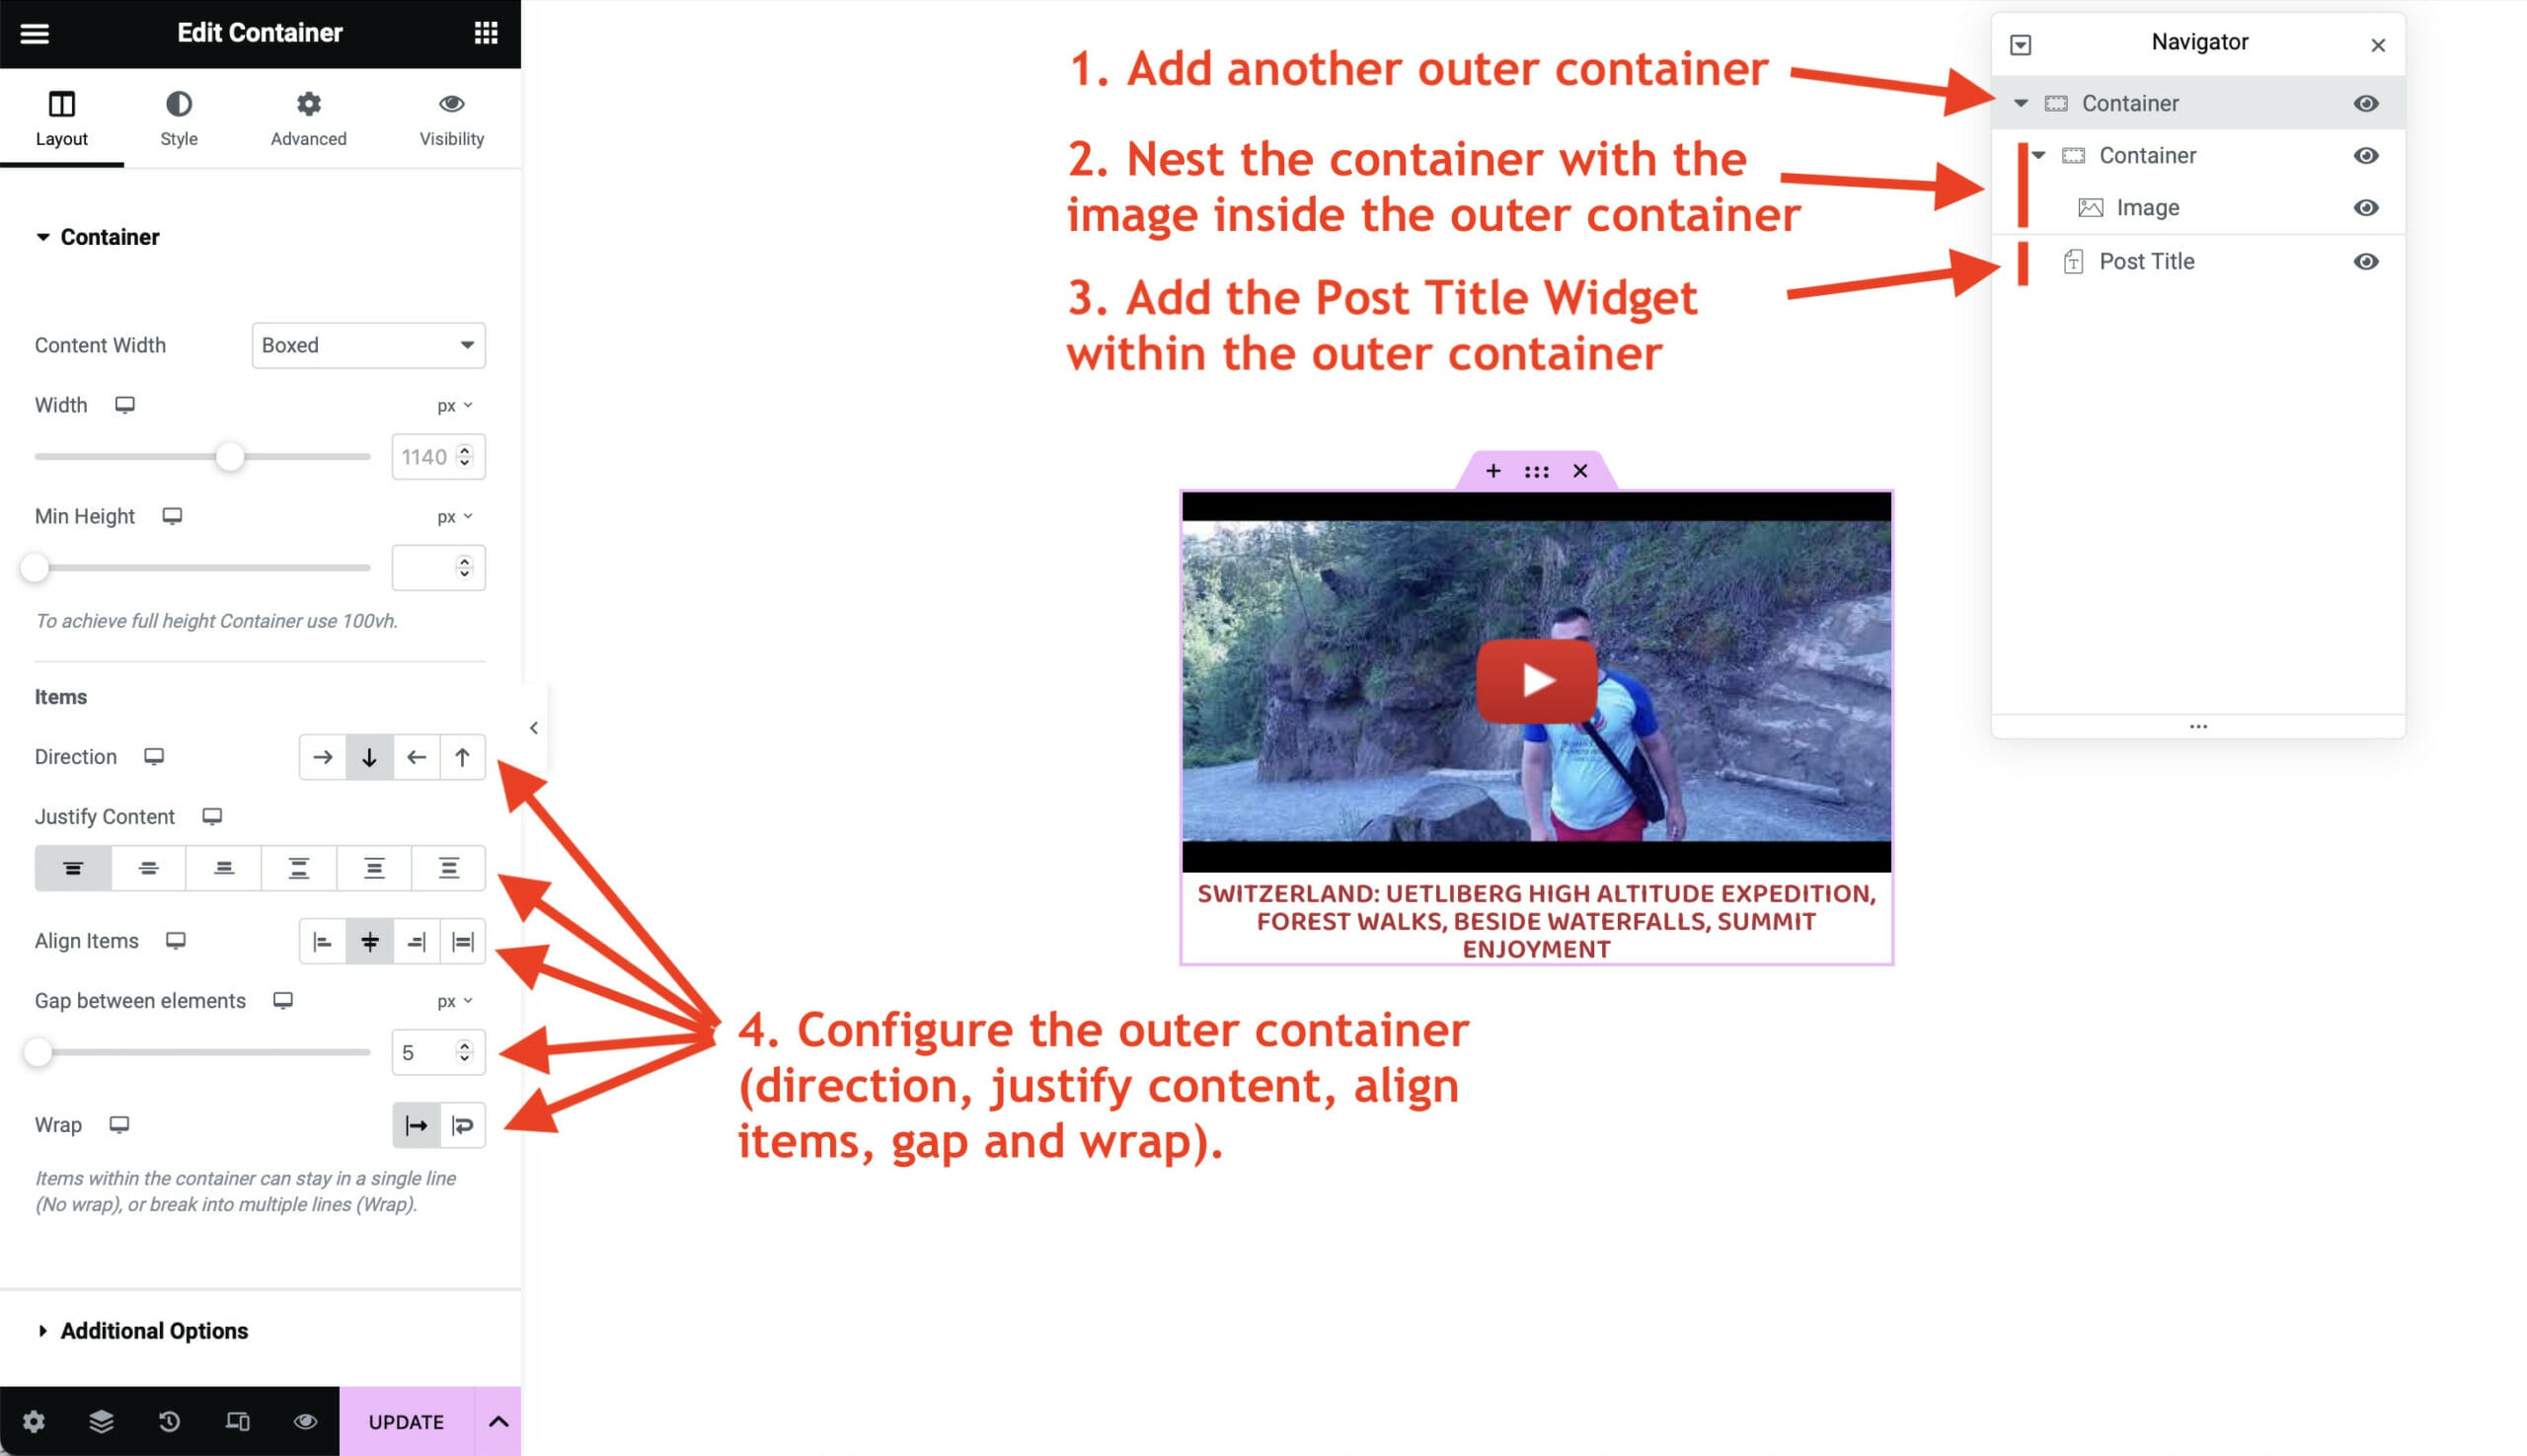
If you also want to add a video title below the image, you can add another outer container that wraps everything up and add another Post Title widget within this outer container. The steps are described in the image below.
Finally, click on Publish (or Update) in the lower left corner to publish (or update) the template.
Here we have shown have a Loop Template can be created for the YT2Posts video articles. This template is very flexible and can be used in the Loop Carousel Widget to create a slider or inside the Loop Grid to create a grid.
In addition to the great flexibility that this approach provides, it also has the advantages that it is GDPR-compliant and offers the greatest loading performance.