To showcase multiple videos in a grid, we can use the Elementor’s Loop Grid Widget, which we also used to showcase the videos on our homepage yt2posts.com.
Note: Using the Loop Grid Widget as described here does not create connections to YouTube, meaning that this approach is GDPR-compliant
In summary, we will go over the following sections:
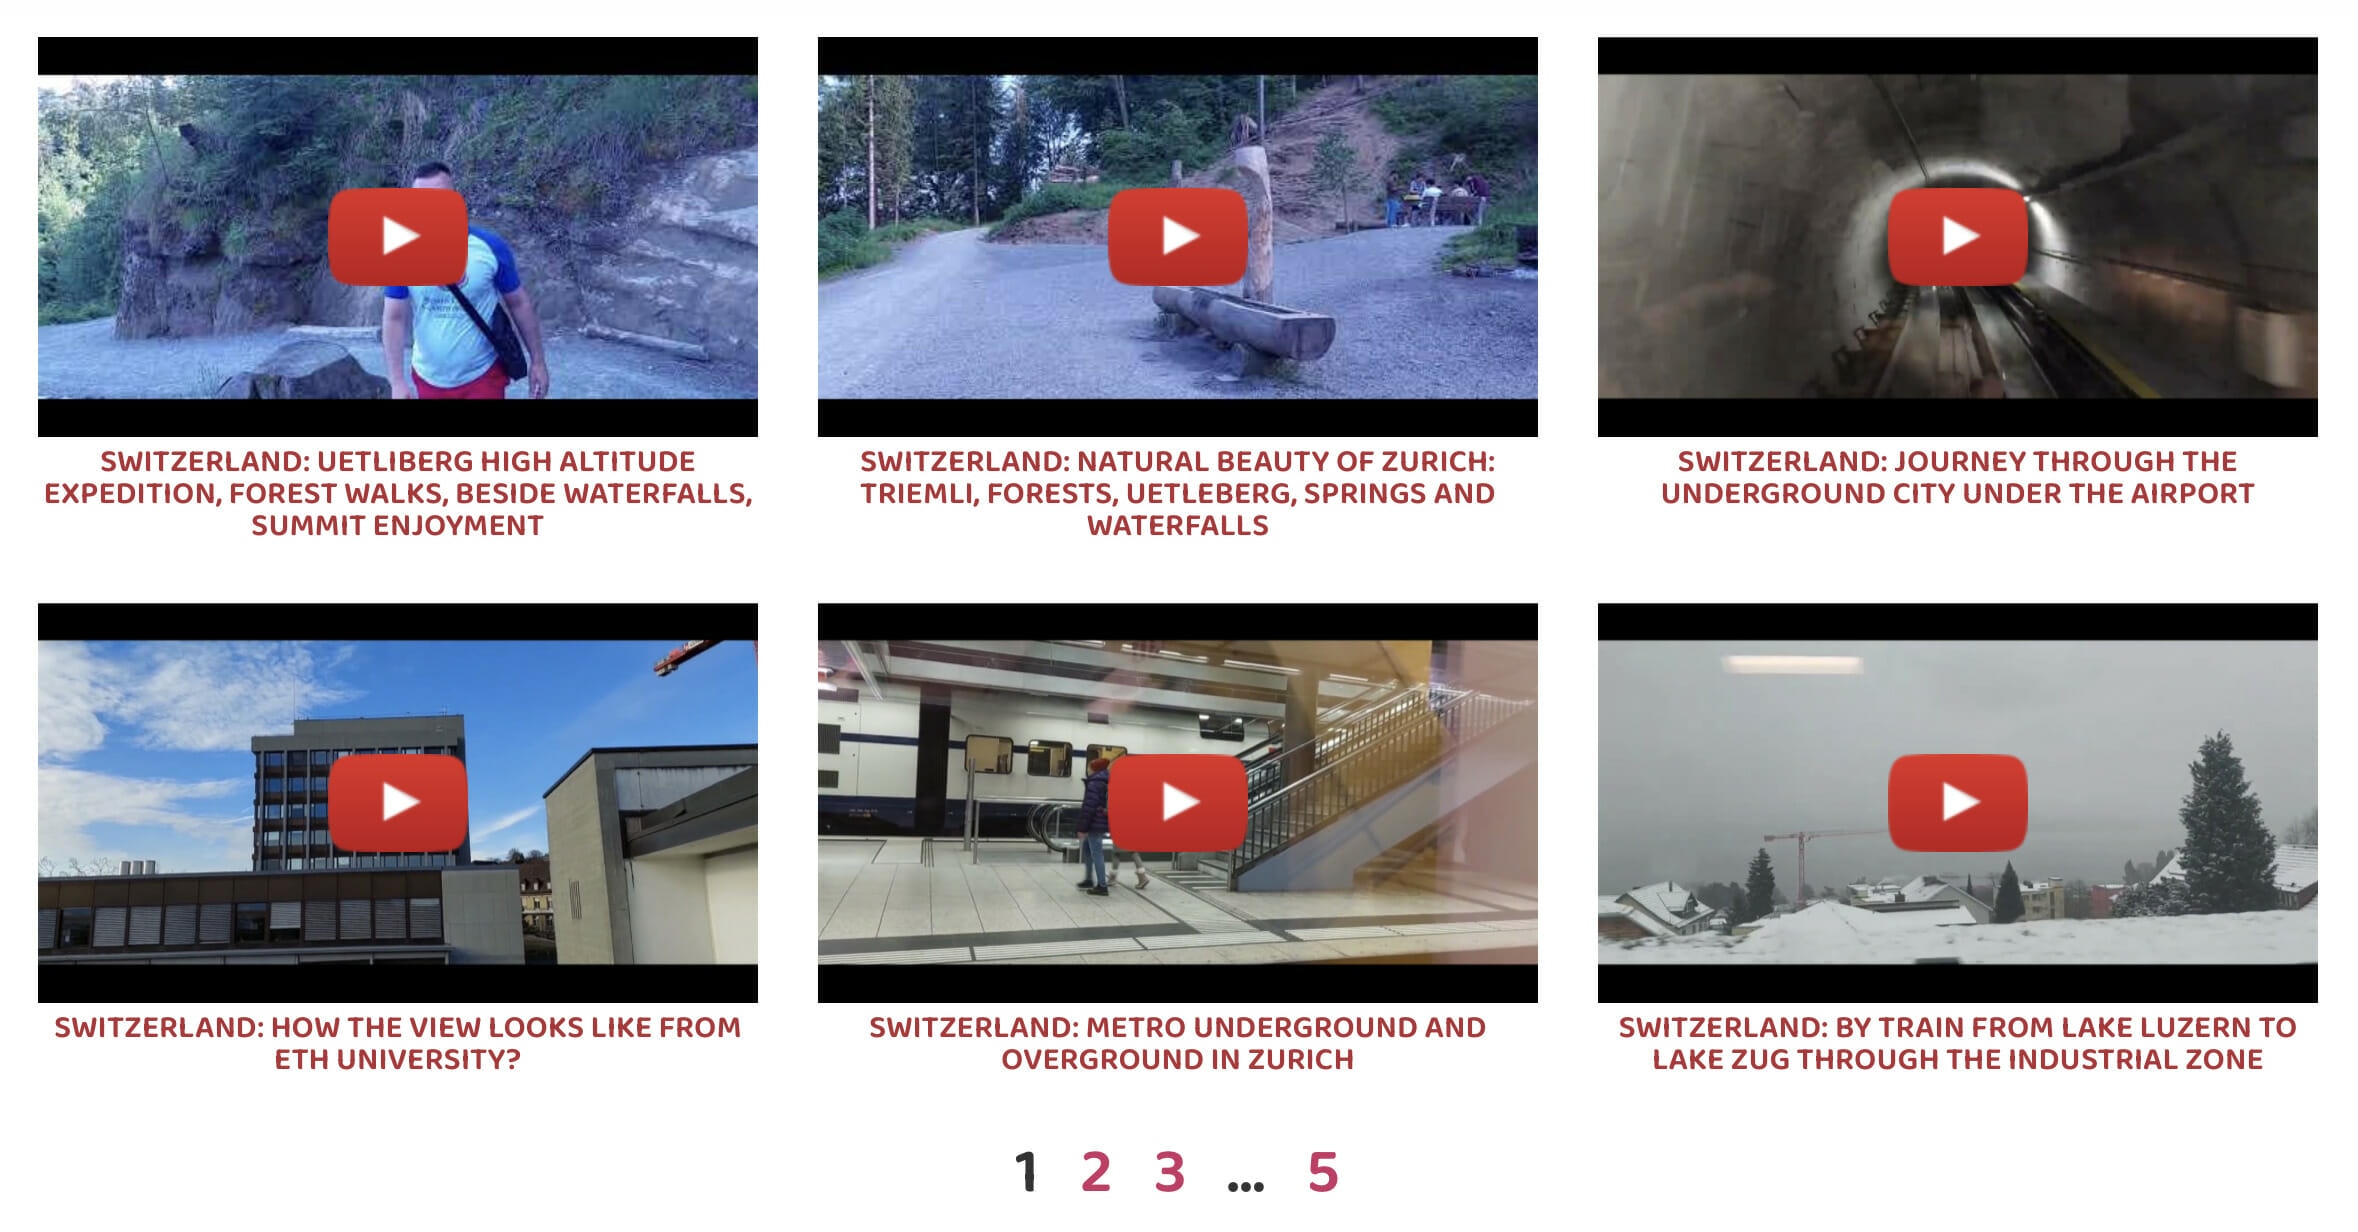
Here is the video grid that we are going to make in this tutorial:
The first step is to create a Loop Template. The loop template describes how a single video within the grid will be displayed. The grid then applies this Loop Template to each video within the grid. In our example, the Loop Template looks as follows:

We have described how to create such templates in our previous tutorial: Loop Templates – Elementor, so you can check it out for a step-by-step tutorial.
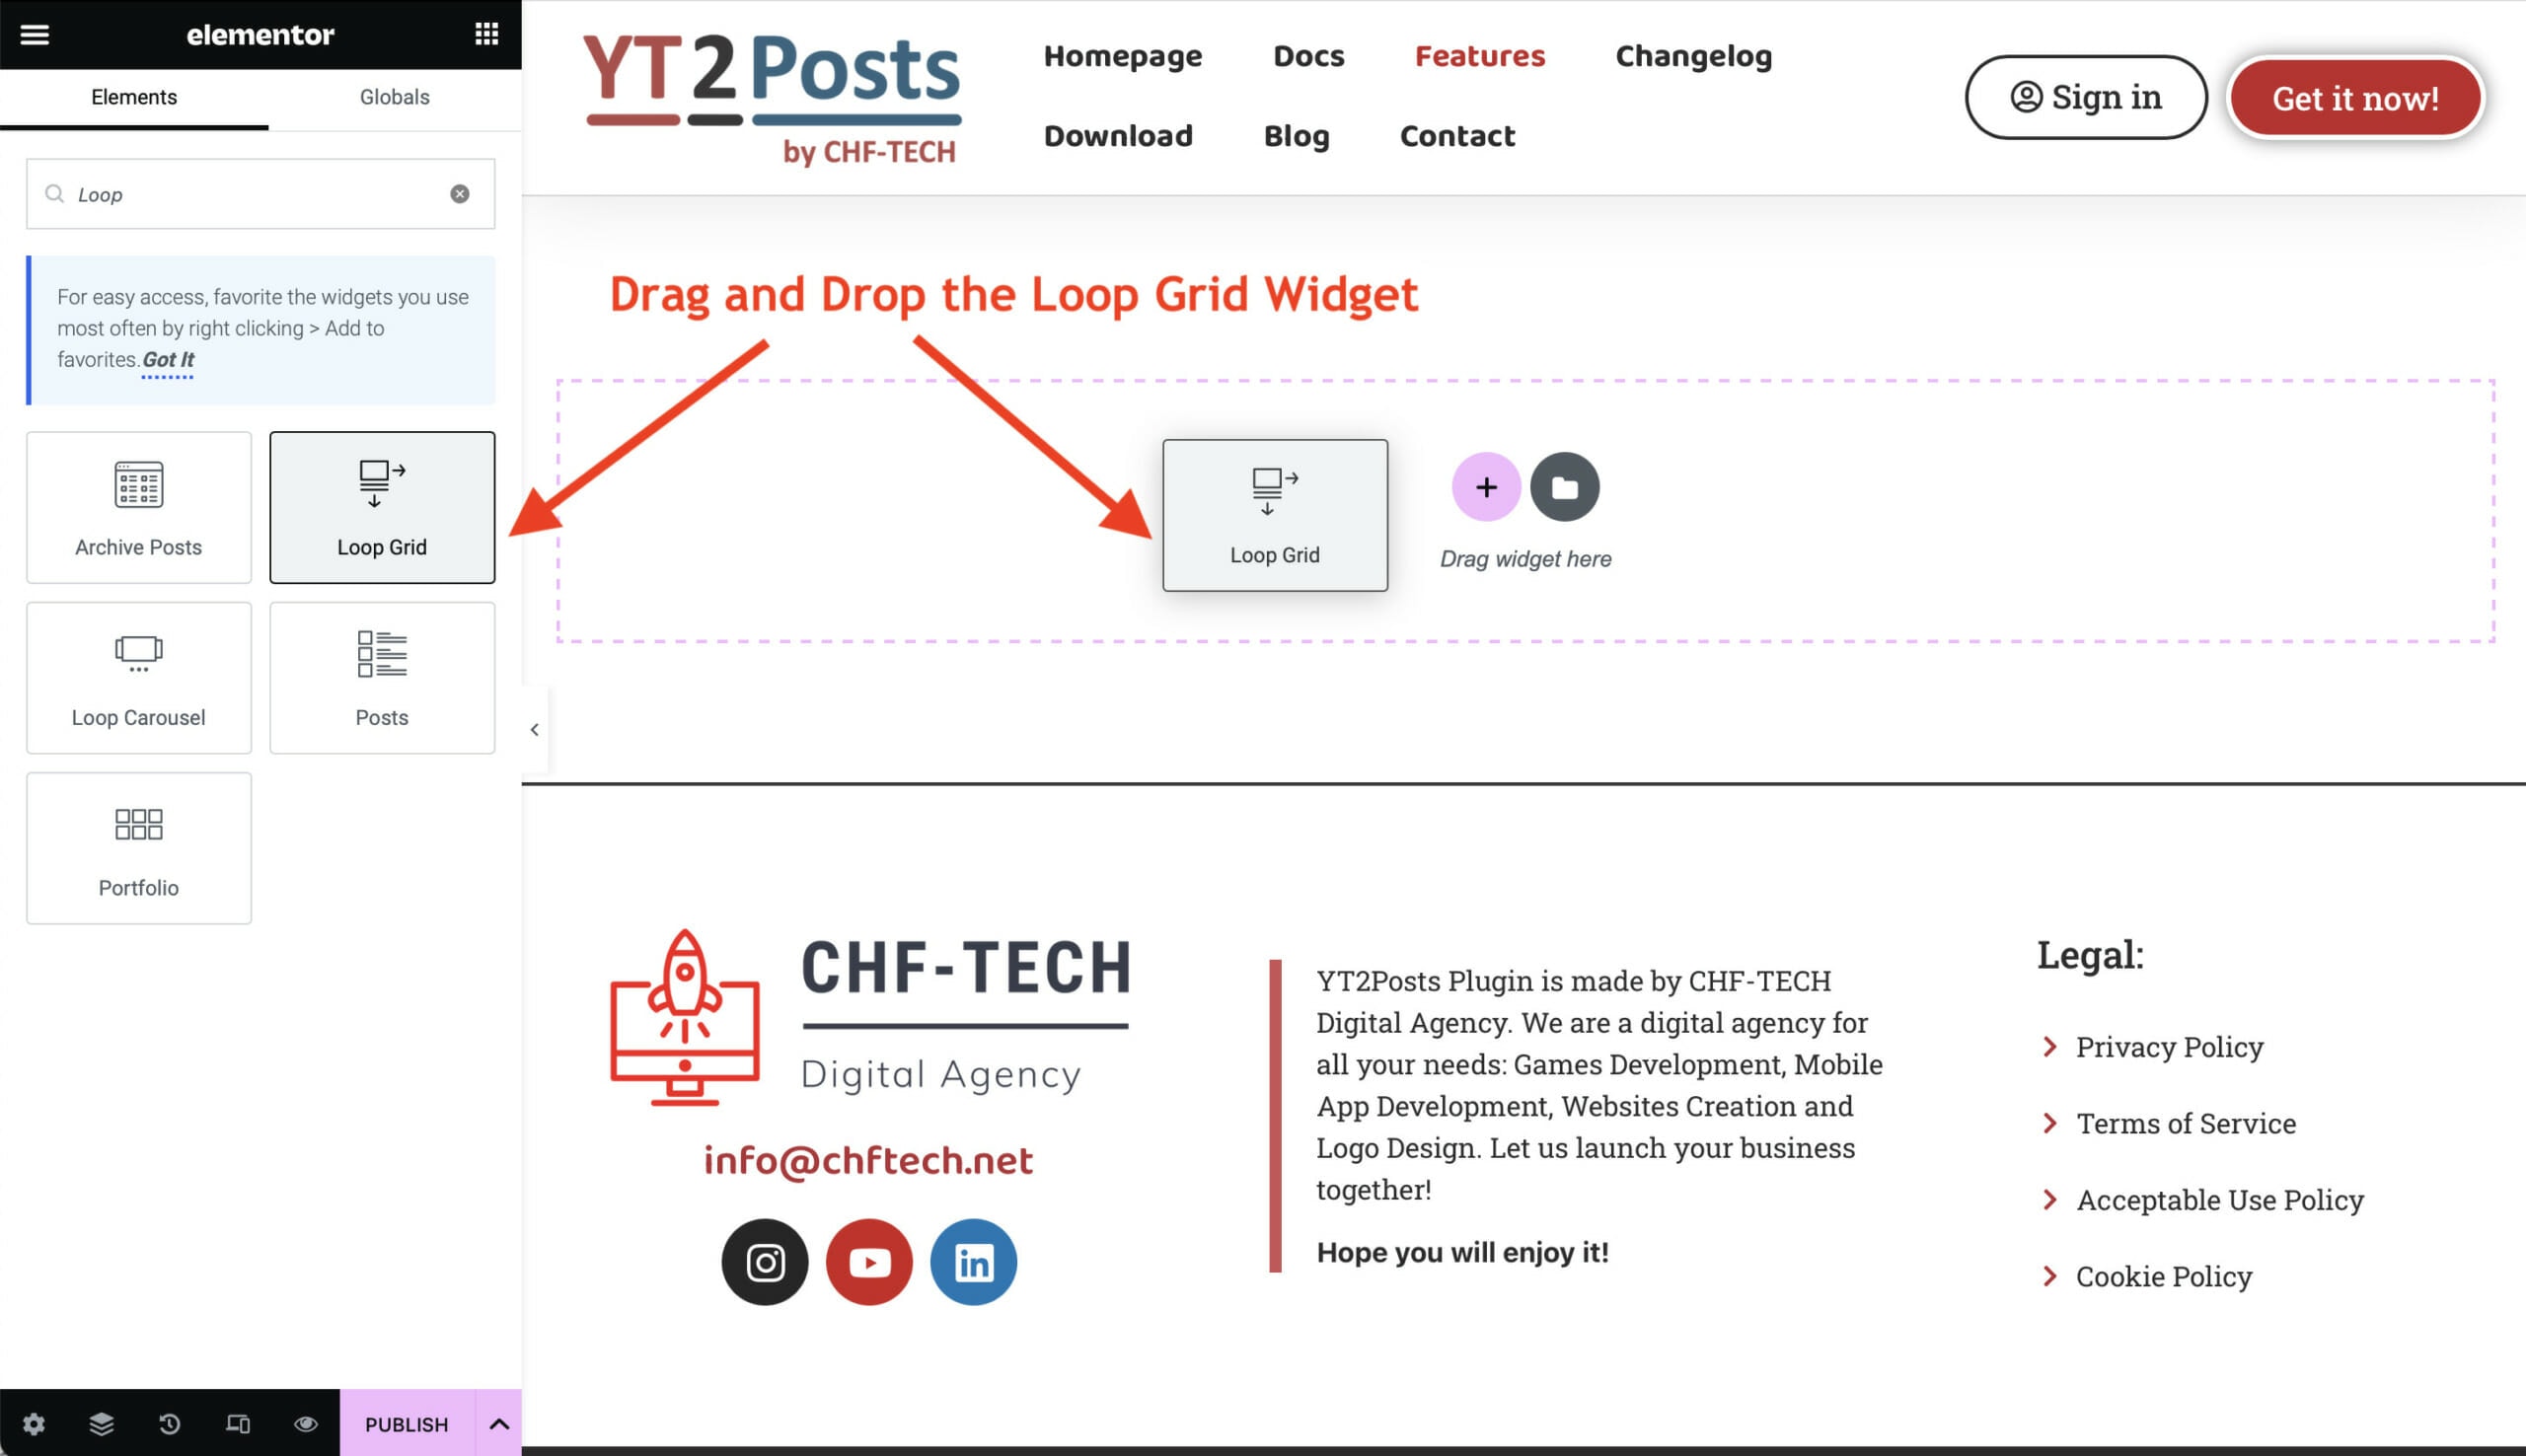
Once the Loop Template is created, it’s quite easy to create the grid. Simply open the page where you want to insert the grid and drag and drop the Loop Grid Widget, as shown in the image below.
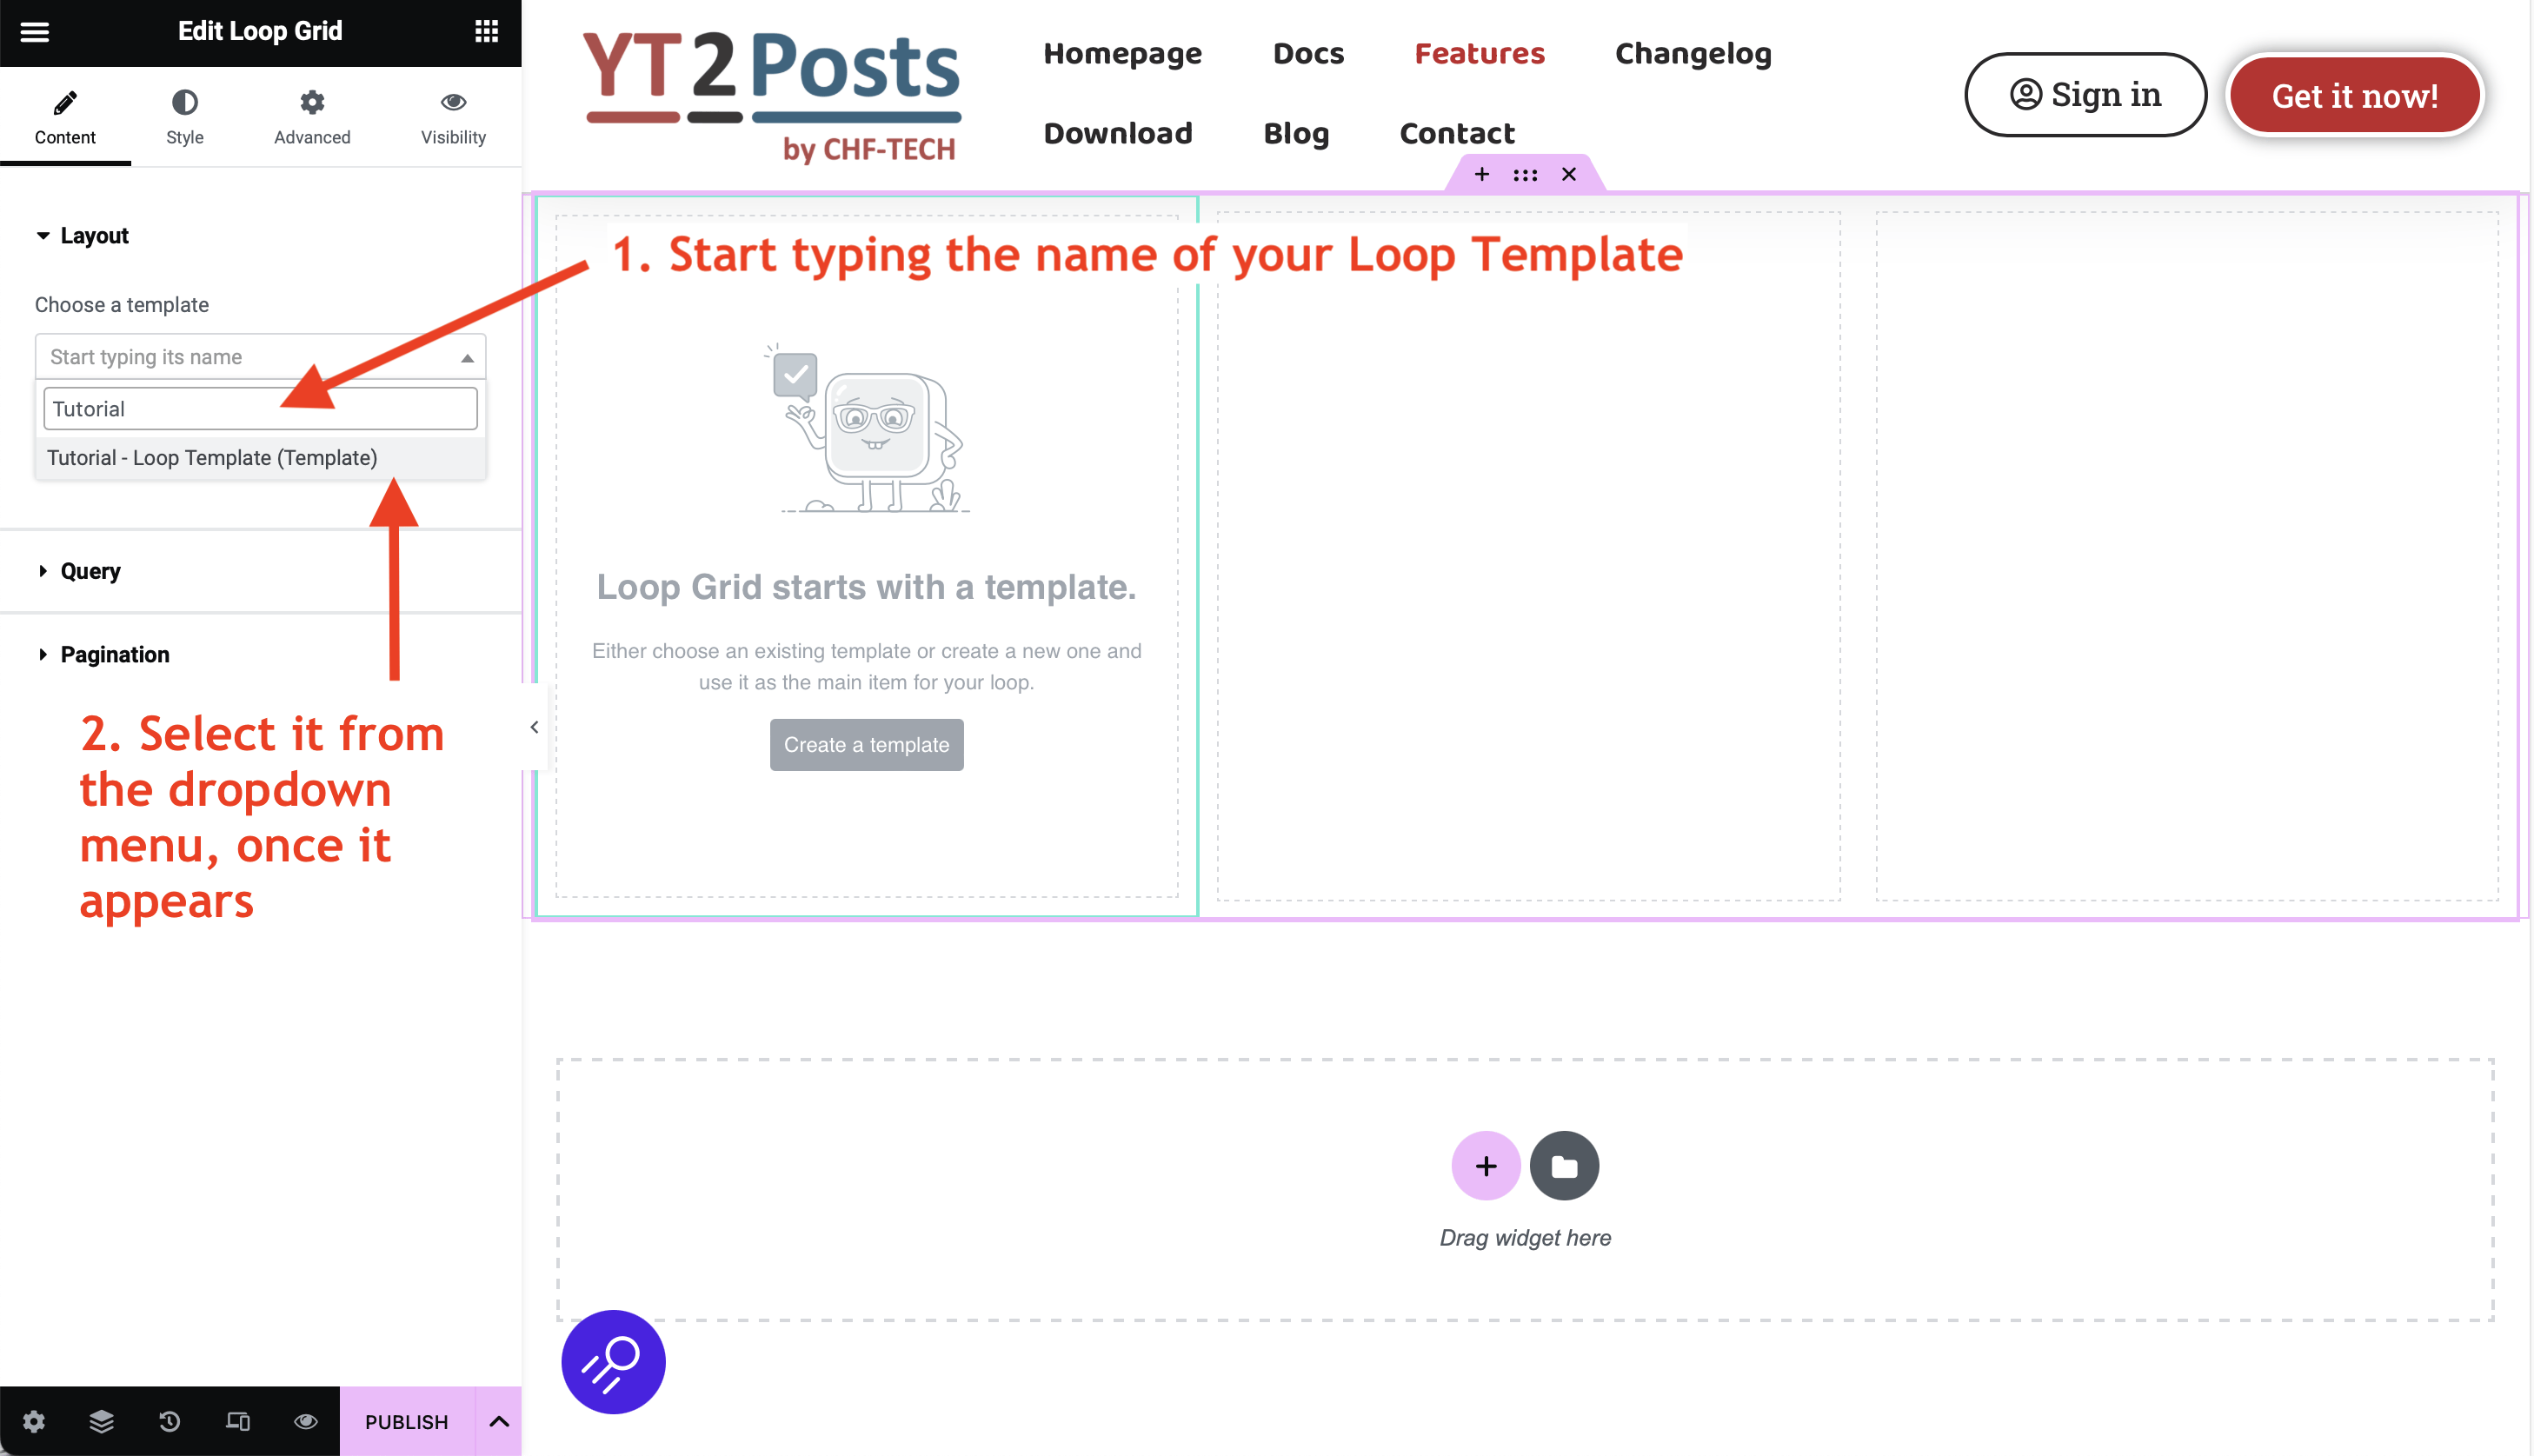
Now we need to specify that we want the grid to use our Loop Template that we have previously created. In the Layout Field, start typing the name of your Loop Template. After typing the first few letters, your template appear in the dropdown list. Our Loop Template was named “Tutorial – Loop Template”, so we selected it, as shown below.
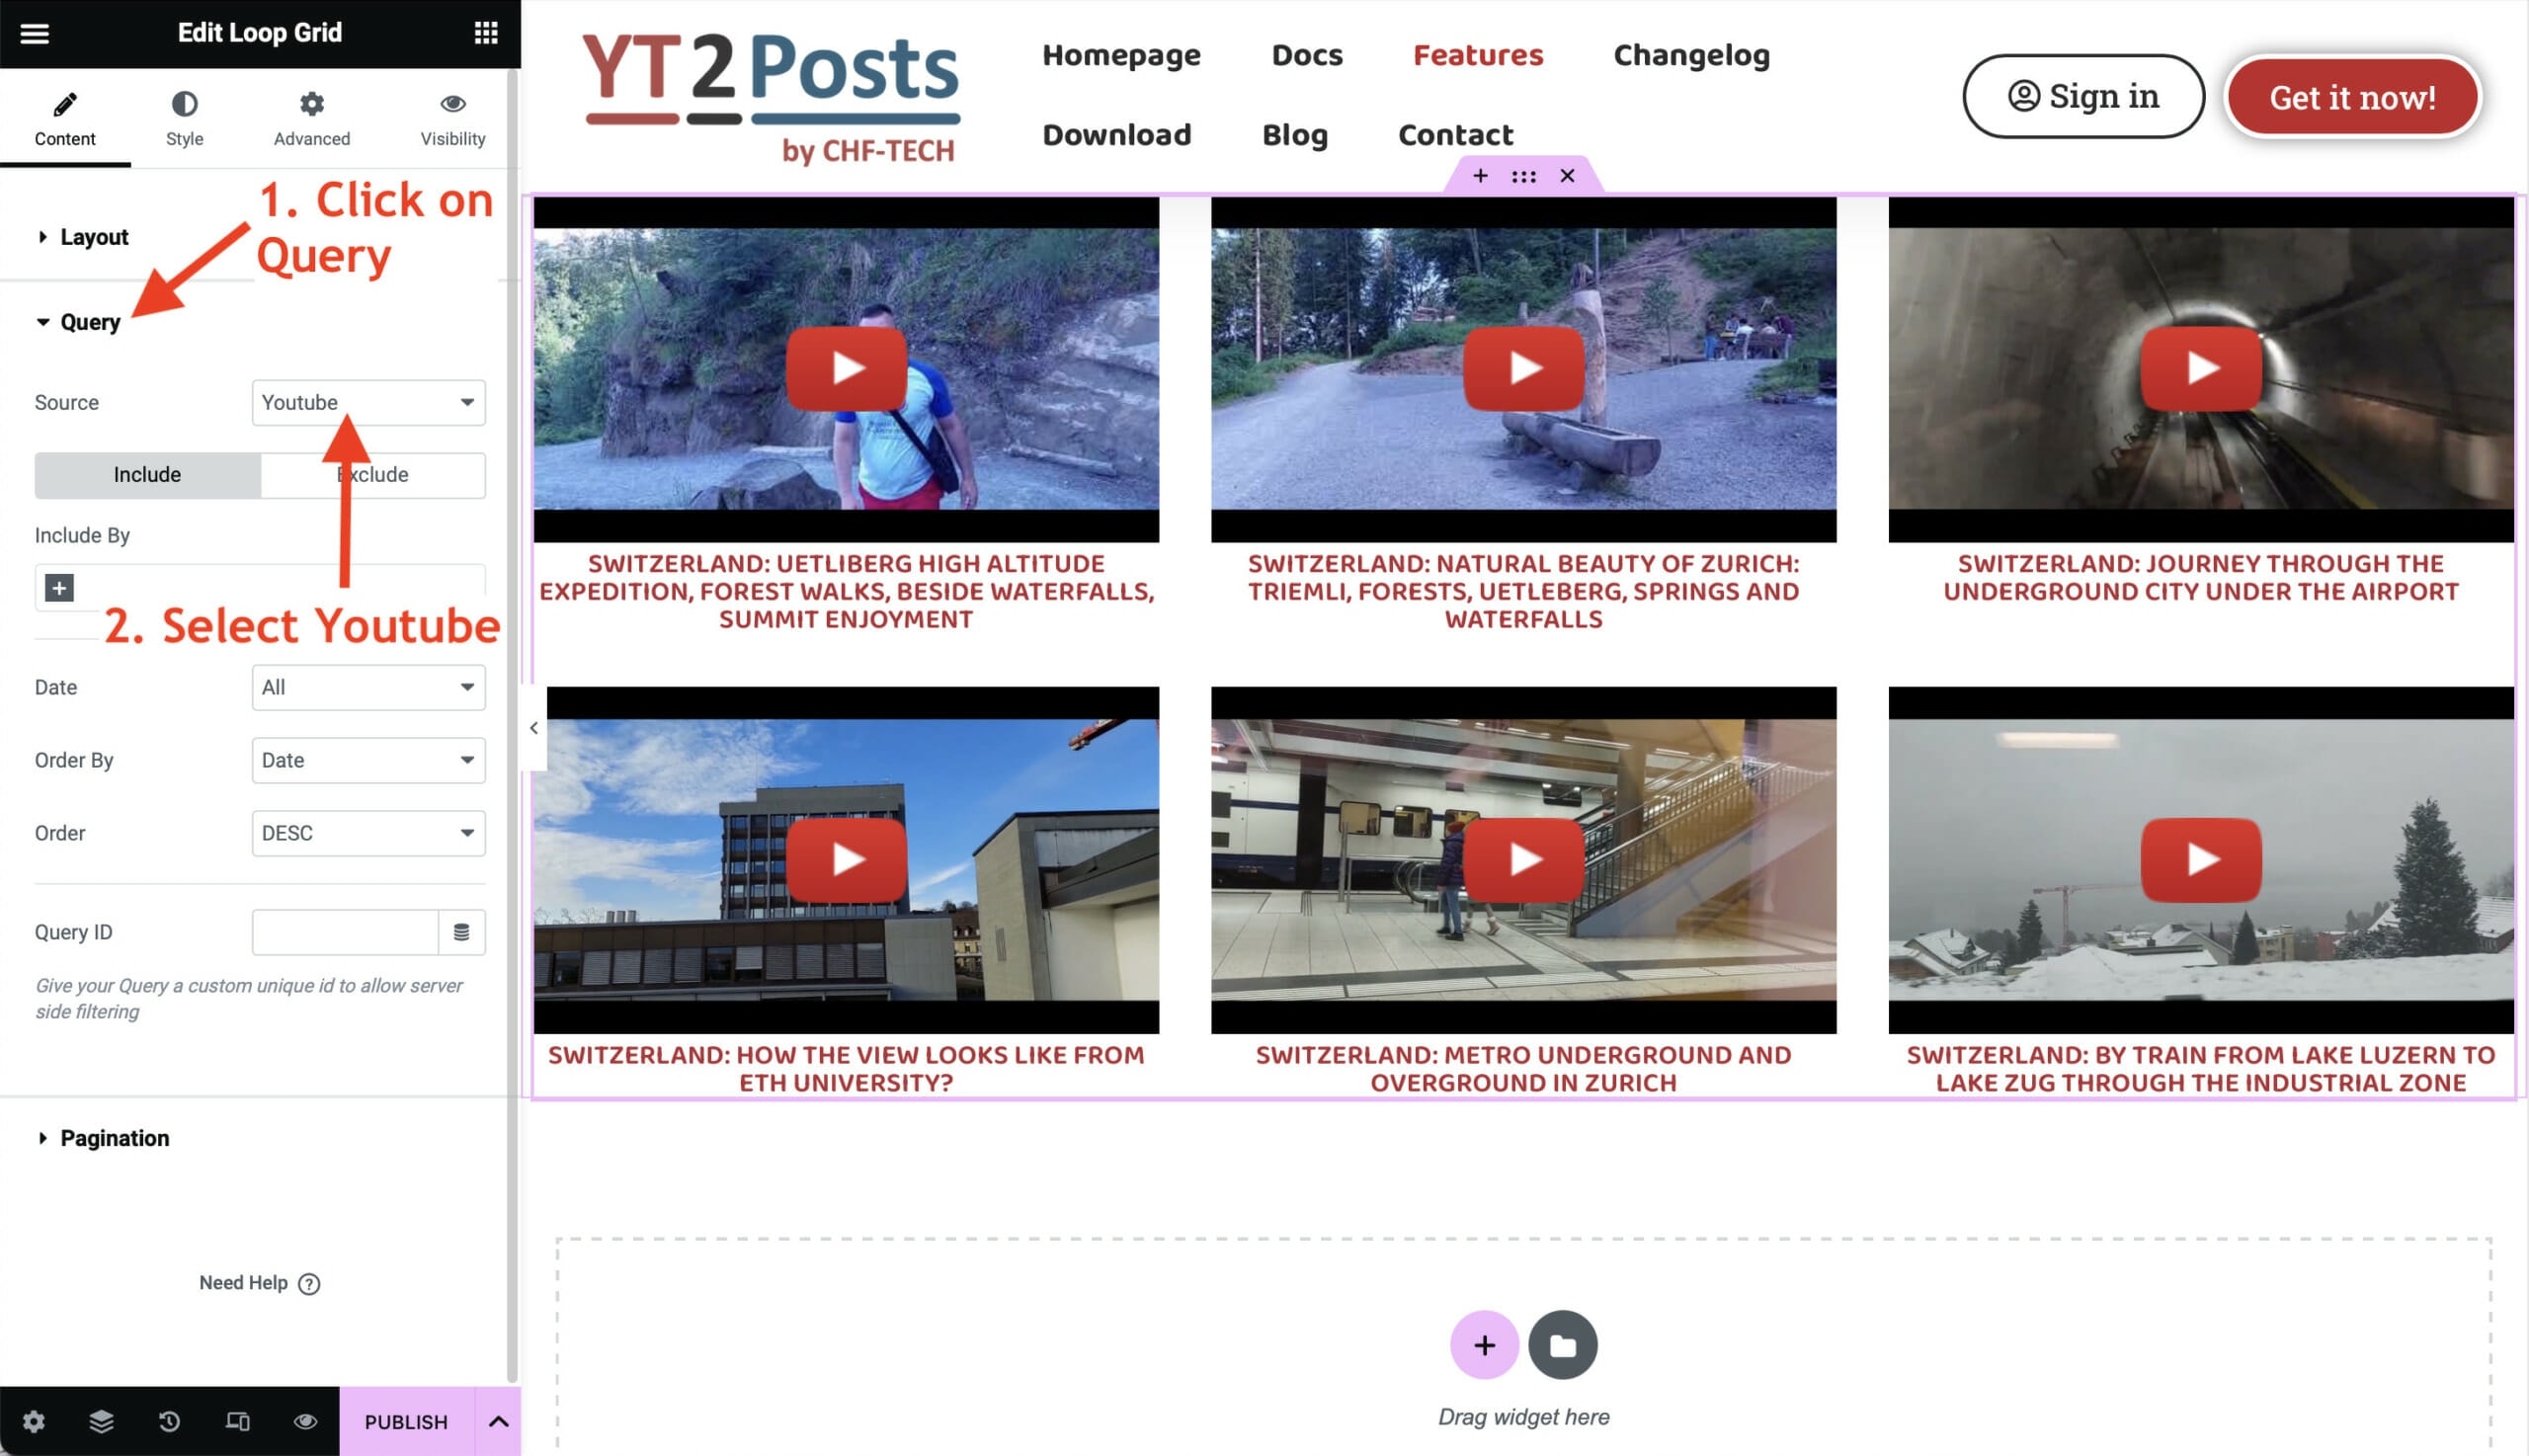
Now, click on the Query on the left and set the source to Youtube, as shown below.
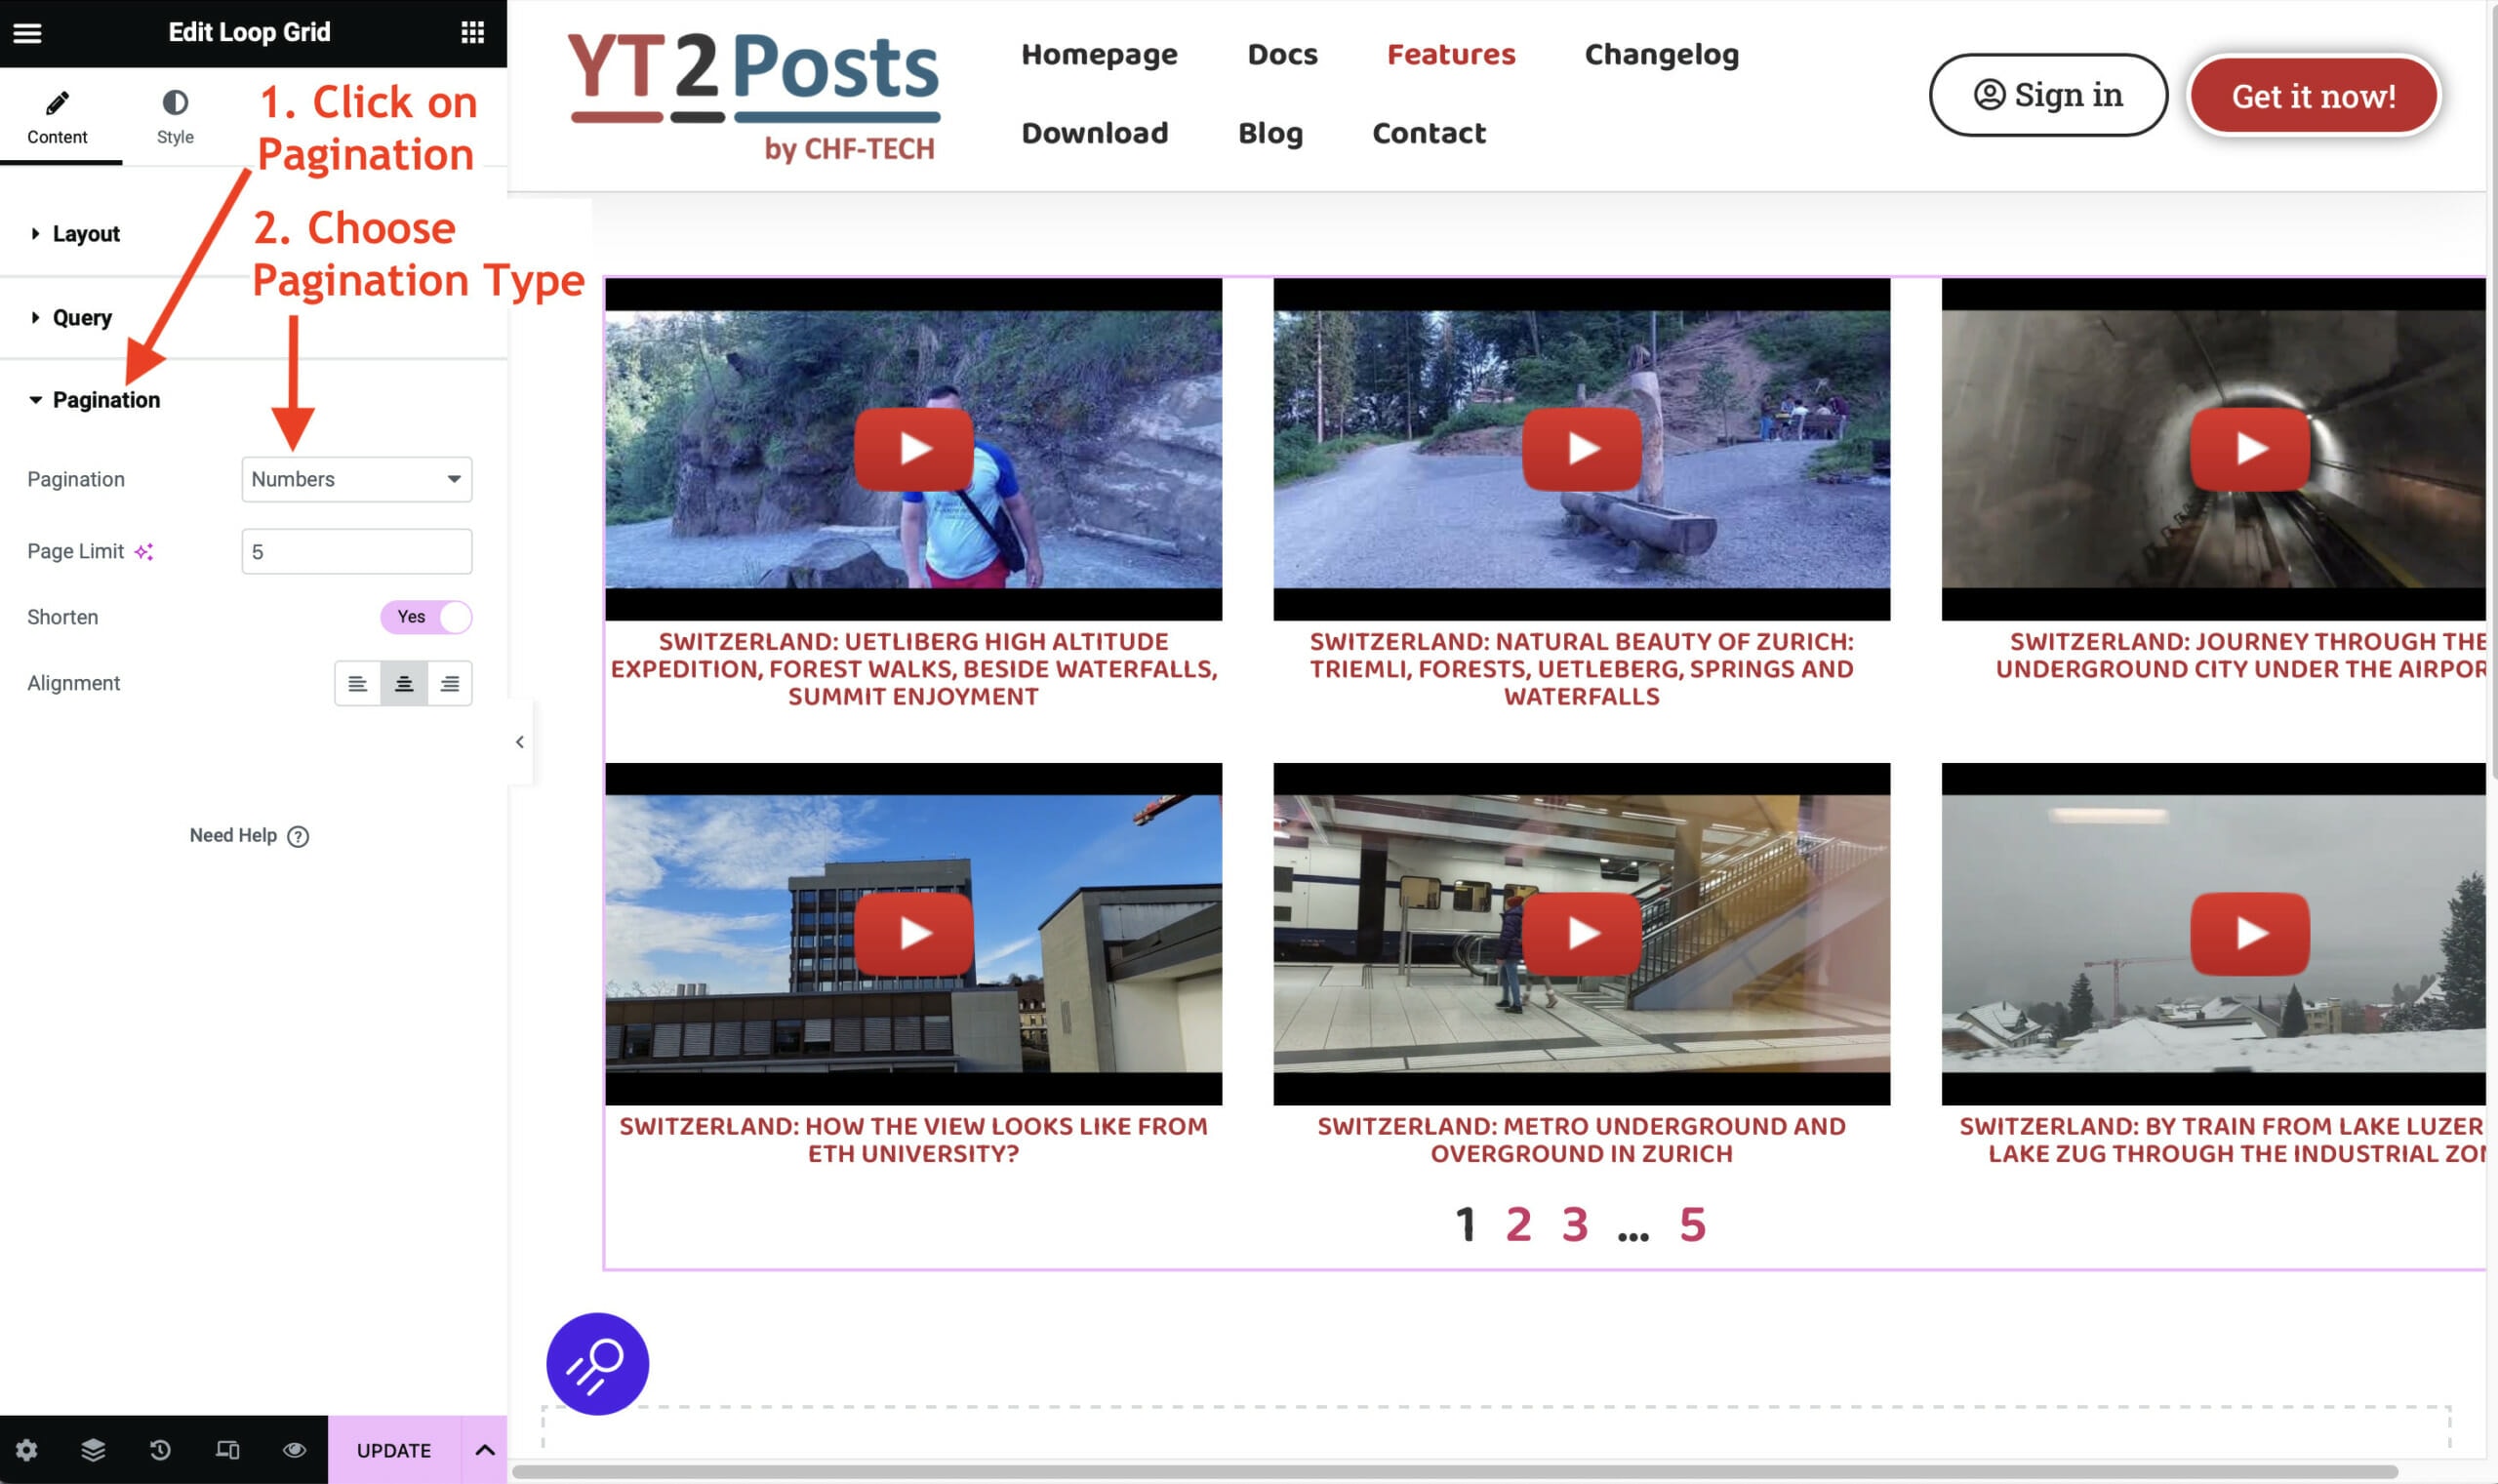
Optionally, you can also add the pagination. These are the page numbers that appear below the grid, so that the visitors can also see older videos. To add the pagination, simply click on the Pagination Settings beneath the Query and select the pagination type that you want, as shown below.
If you want, you can also additionally style the pagination or the grid by clicking on the Style tab.
That’s it, you can now click on Publish or Update in the lower left corner to publish (or update) your grid!
We have shown how a beautiful grid can be created using the Elementor’s Loop Grid Widget. The advantages of this approach are: